TL;DR:
- Regularly cleaning vents improves indoor air quality and reduces energy bills.
- DIY cleaning handles accessible parts but professional services are needed for deep ductwork cleaning.
- Ongoing maintenance, verification, and scheduling professional cleanings ensure long-term HVAC efficiency.
If your energy bills keep climbing and your family sneezes more than usual, your air vents may be the hidden cause. Dust, pet dander, and allergens build up inside vent covers and ductwork over time, forcing your HVAC system to work harder and pushing pollutants directly into your living space. Many homeowners in Avondale, Arizona try to tackle this problem themselves but skip critical steps or miss hard-to-reach areas entirely. This guide walks you through a structured air vent cleaning workflow, from gathering supplies to verifying results, so you get real improvements in comfort and indoor air quality.
Table of Contents
- Why a structured air vent cleaning workflow matters
- Gathering tools and preparing for cleaning
- Step-by-step air vent cleaning workflow
- Verifying results and maintaining clean vents
- A smarter approach: What most guides miss about air vent cleaning
- Ready for guaranteed results? Get professional air vent cleaning in Avondale
- Frequently asked questions
Key Takeaways
| Point | Details |
|---|---|
| Structured workflow essential | A step-by-step workflow ensures all vent areas are cleaned safely and thoroughly. |
| DIY has its limits | Homeowners can clean vent covers but need professionals for full duct cleaning. |
| Consistent maintenance pays off | Regular upkeep improves air quality and saves on energy costs. |
| Know when to call experts | Persistent dust or odors are signs you need professional air vent cleaning. |
Why a structured air vent cleaning workflow matters
Building on the importance of clean air vents, let's explore why the process itself makes all the difference.
Your HVAC system moves air through every room in your home, and that air carries whatever is sitting inside your ducts and vent covers. When vents are clogged with dust and debris, your system has to push harder to maintain temperature, which burns more energy and shortens the life of your equipment. A structured air vent cleaning overview approach ensures you address every part of the system rather than just the visible surfaces.
Here is what neglected vents actually cost you:
- Higher energy bills because restricted airflow forces your HVAC to run longer cycles
- Worsened allergy symptoms from circulating dust, mold spores, and pet dander
- Persistent odors that no amount of air freshener will fix
- Premature HVAC wear from motors and fans working under strain
- Uneven room temperatures caused by blocked or partially clogged vents
A well-structured workflow minimizes missed areas. When you follow a clear sequence, you are less likely to forget a vent in a back bedroom or skip the return air registers that pull stale air back into the system. Random, reactive cleaning leaves gaps. Systematic cleaning does not.
"DIY cleaning is generally limited to accessible vents and registers. Full duct cleaning requires professional equipment and expertise." This distinction matters because many homeowners assume a good vacuuming session covers everything, when in reality the deeper ductwork is untouched.
This is especially relevant if you have recently completed a home renovation. Construction dust and debris settle deep into ducts, and the benefits after renovation of a thorough cleaning go well beyond just better smells. You are removing fine particles that can irritate lungs for months if left in place.
According to a duct cleaning guide from Better Homes and Gardens, homeowners often underestimate how much debris accumulates inside the duct system between visible cleanings. The DIY cleaning limited to registers point from Martha Stewart reinforces this: surface cleaning and deep cleaning are two very different tasks.
For Avondale homeowners dealing with the desert climate, dust accumulation is faster than in many other regions. Fine particulate matter from the surrounding environment finds its way indoors constantly, making a structured approach to better air and airflow not just helpful but genuinely necessary for healthy living.
Gathering tools and preparing for cleaning
Once you understand the importance of a structured approach, preparation is your first step toward effective results.
Walking into a cleaning job without the right tools is how mistakes happen. You end up spreading dust around instead of capturing it, or you strip a screw because you grabbed the wrong screwdriver. Spending ten minutes gathering supplies before you start saves you an hour of frustration.
Here is what you need before touching a single vent cover:
- A flat-head and Phillips-head screwdriver
- A vacuum with a hose attachment and brush head
- Microfiber cloths (at least four to six)
- A bucket with warm water and mild dish soap
- A dust mask rated N95 or better
- Safety glasses
- A flashlight or headlamp
- A soft-bristle brush for loosening caked-on dust
- Painter's tape and a marker for labeling
The pre-cleaning tips from Martha Stewart recommend dusting vents annually and doing a deep clean every six months, or having a professional handle it once a year. Keeping that schedule in mind helps you decide whether today's task is a light maintenance pass or a full cleaning session.
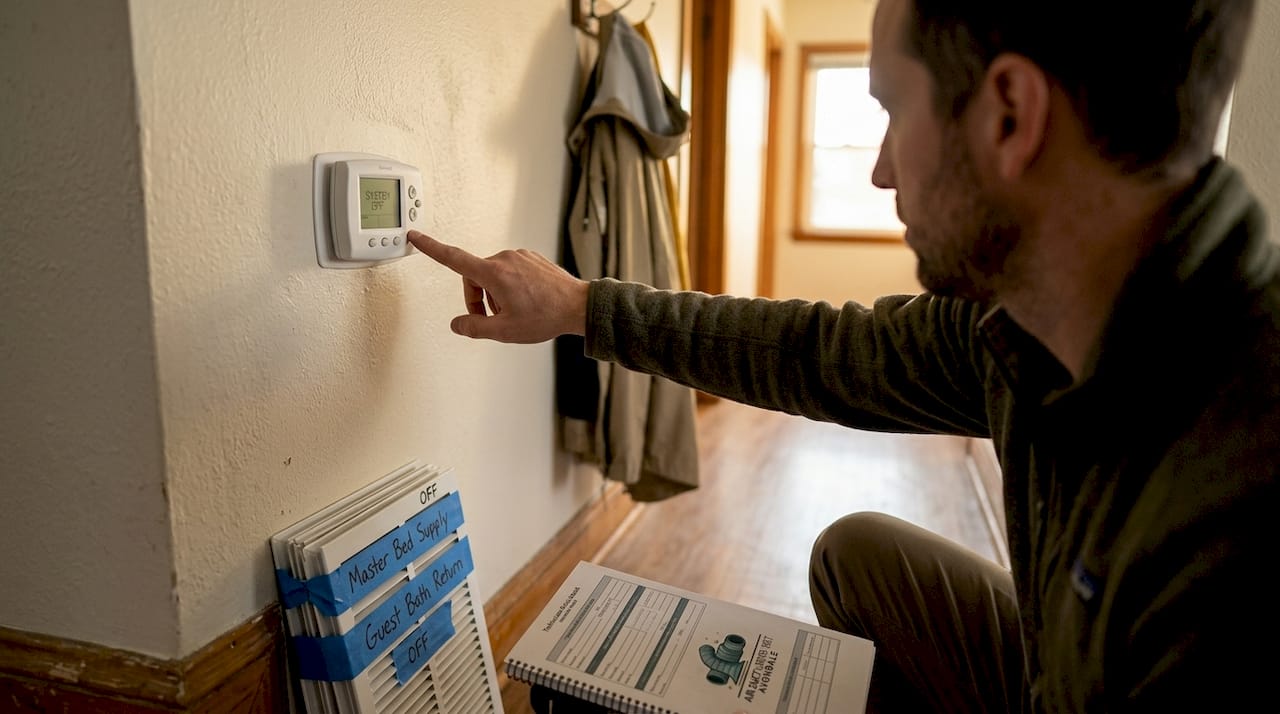
Safety first: Always shut off your HVAC system at the thermostat before you remove any vent covers. This stops the system from pulling loose dust and debris deeper into the ductwork while you work. It also protects you from accidental contact with moving parts.
Here is a quick preparation checklist to run through before you start:
| Preparation step | Done? |
|---|---|
| HVAC system powered off | ☐ |
| All tools and supplies gathered | ☐ |
| Dust mask and eye protection on | ☐ |
| Flashlight ready for inspection | ☐ |
| Bucket with soapy water prepared | ☐ |
| Painter's tape and marker available | ☐ |
If you are unsure whether your current vent covers are worth reinstalling or need replacing, check out vent replacement options before you begin. Bent or corroded covers reduce airflow even after cleaning.
Pro Tip: Use painter's tape and a marker to label each vent cover as you remove it, noting the room and location (for example, "living room, south wall"). Vent covers are not always interchangeable, and reinstalling the wrong size in the wrong spot can restrict airflow. This small step saves real confusion at the end of the job.
For a deeper look at how the full cleaning process works from start to finish, that resource breaks down what happens inside the ductwork beyond what you can reach yourself.
Step-by-step air vent cleaning workflow
With preparations in place, you're ready to move methodically through the cleaning steps.
Following a numbered sequence keeps you from backtracking or missing areas. Work from the top of your home down to the lowest floor, and from the farthest rooms toward your HVAC unit. This way, any dislodged dust falls into areas you have not cleaned yet rather than onto surfaces you just finished.
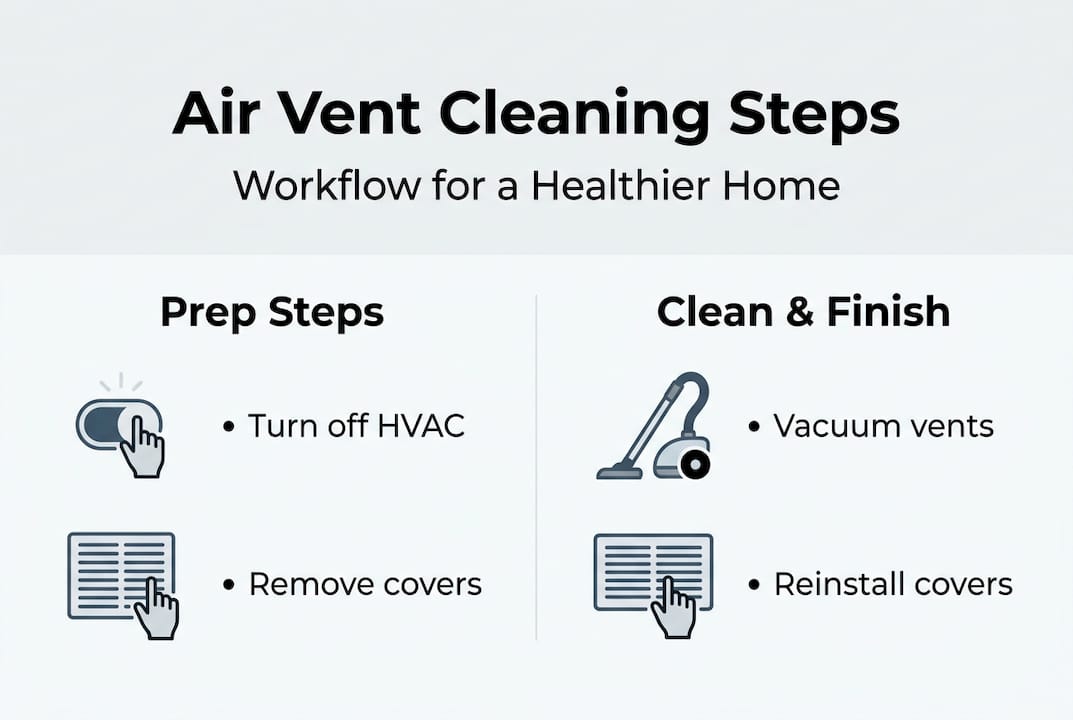
- Turn off the HVAC system at the thermostat. Confirm it is off before touching anything.
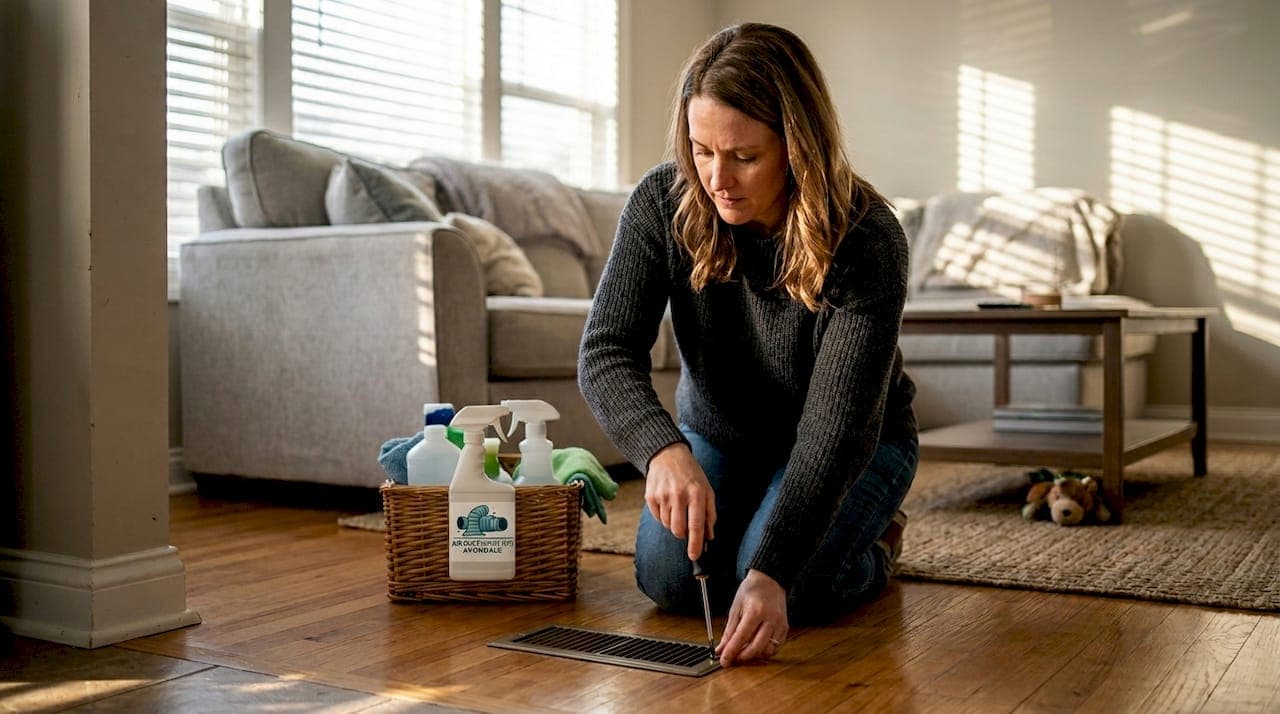
- Remove each vent cover using your screwdriver. Place screws in a small cup so you do not lose them.
- Vacuum inside the duct opening as far as your hose attachment reaches. Use the brush head to loosen debris from the duct walls.
- Wash vent covers in warm soapy water, scrubbing with a soft brush. Rinse and let them dry completely before reinstalling.
- Wipe down the duct opening edges with a damp microfiber cloth to catch any remaining dust.
- Inspect the opening with your flashlight for visible mold, standing moisture, or unusually heavy debris buildup.
- Reinstall dry vent covers and tighten screws snugly but not forcefully.
- Replace your air filter if it has not been changed recently, then restore power to the HVAC system.
The turn off HVAC, remove covers, dust, vacuum, wash, reinstall sequence from Martha Stewart confirms this order as best practice. Skipping the wash step is one of the most common DIY mistakes: a dusty cover reinstalled over a clean duct opening immediately reintroduces particles into the airflow.
Here is a clear breakdown of what you can handle yourself versus what needs professional equipment:
| Task | DIY | Professional only |
|---|---|---|
| Cleaning vent covers and registers | ✓ | |
| Vacuuming accessible duct openings | ✓ | |
| Replacing air filters | ✓ | |
| Full ductwork cleaning | ✓ | |
| Mold remediation inside ducts | ✓ | |
| Blower door and pressure testing | ✓ | |
| Sanitizing duct interiors | ✓ |
As DIY is not sufficient for full ducts confirms, surface-level cleaning does not reach the interior duct walls where allergens and mold actually accumulate. For those deeper jobs, professional cleaning benefits are significant and measurable.
Pro Tip: Never use a leaf blower or shop vac with a blowing function inside your ducts. It feels like a fast solution but it pushes debris further into the system and can dislodge insulation inside older ductwork. Stick to suction only.
For more DIY duct cleaning tips that go beyond basic vent covers, that resource covers what you can realistically accomplish on your own. And for anything beyond that, the detailed duct steps guide from Better Homes and Gardens explains when a professional inspection becomes necessary.
Verifying results and maintaining clean vents
Completing the workflow isn't the end, consistent maintenance ensures lasting results.
Once you have finished cleaning, do not just turn the system back on and call it done. A quick verification pass catches anything you missed and confirms the job actually improved conditions. Walk through every room and check each reinstalled vent cover.
Here is what to look for during your post-cleaning inspection:
- No visible dust on vent cover surfaces or around the edges
- Steady, unobstructed airflow when the system runs (hold your hand near the vent)
- No musty or burning smells when the HVAC first kicks on
- Even temperature distribution across rooms that previously felt inconsistent
- Clean air filter installed and seated correctly
"A deep clean every 6 months, or professional cleaning once a year, keeps vents clear and your HVAC running efficiently." Sticking to this schedule prevents the kind of buildup that turns a simple maintenance task into a major cleaning project.
The deep clean every 6 months recommendation from Martha Stewart is a practical benchmark. In Avondale, where dust storms and dry air accelerate buildup, leaning toward the more frequent end of that range makes sense.
Warning signs that mean it is time to call a professional rather than handle it yourself:
- You see or smell mold inside the duct opening
- Dust returns to surfaces within days of cleaning
- A family member's allergy symptoms do not improve after cleaning
- You notice dark staining around vent covers that was not there before
- Your energy bills stay high despite clean-looking vents
For a complete year-round maintenance plan, the residential air vent cleaning guide for Avondale homeowners in 2026 covers seasonal considerations specific to this region. Do not overlook your dryer vent cleaning schedule either, since clogged dryer vents are a leading cause of house fires and are often forgotten in routine maintenance.
Pro Tip: Set two calendar reminders right now, one for six months from today and one for twelve months. Label them "vent inspection" and "professional vent cleaning." You are far more likely to follow through when the reminder is already in your calendar than when you rely on memory.
A smarter approach: What most guides miss about air vent cleaning
Most step-by-step guides stop at the cleaning itself, as if finishing the last vent cover means the job is complete. In our experience working with homeowners across Avondale, the post-cleaning phase is where most people lose the gains they just worked for.
Verification and scheduled follow-up are not optional extras. They are the difference between a one-time improvement and lasting air quality. Homeowners who clean their vents once and then forget about them for two or three years often end up with worse buildup than if they had never cleaned at all, because disturbed debris resettles deeper in the system.
There is also a tendency to overestimate what DIY cleaning can accomplish. Surface cleaning gives you a sense of progress, and that feeling is real. But the professional cleaner perspective makes clear that the interior duct walls, bends, and plenums where allergens actually concentrate are beyond what a household vacuum can reach.
The most effective approach combines both: you handle the accessible, routine maintenance on a regular schedule, and you bring in professionals for the deeper work once a year. That combination costs less over time than reactive cleaning after symptoms appear, and it keeps your HVAC running efficiently year-round. Workflow discipline is not about doing more work. It is about doing the right work at the right time.
Ready for guaranteed results? Get professional air vent cleaning in Avondale
If your vents need a deeper clean or you want peace of mind, professional help is an easy next step.
Sometimes a DIY pass is not enough, especially for vents that have gone years without attention or homes with pets, recent construction, or allergy-sensitive occupants. That is where we come in.
At Air Duct and Dryer Vent Cleaning Avondale, our air vent cleaning service goes far beyond what a household vacuum can reach. We use professional-grade equipment to clean the full duct system, remove mold and allergens, and restore proper airflow throughout your home or business. We also offer dryer vent cleaning experts for fire prevention and energy savings, along with indoor air quality testing to give you a clear picture of what is actually in your air. Flexible scheduling, including after-hours options, makes it easy to fit service into your routine. Contact us today and breathe easier tomorrow.
Frequently asked questions
How often should air vents be cleaned in Avondale?
Vents should be dusted annually and deep cleaned every six months, with professional cleaning recommended once a year to maintain healthy indoor air quality, especially in dusty desert climates like Avondale.
What areas can homeowners clean themselves?
You can clean vent covers, registers, and accessible duct openings on your own, but full ductwork needs professional equipment to reach interior walls, bends, and deeper sections of the system.
What signs suggest you need professional vent cleaning?
Persistent dust on surfaces, mold smells, worsening allergy symptoms, or high energy bills that do not improve after cleaning all indicate that DIY is not sufficient and a professional service is needed.
Does vent cleaning really improve energy efficiency?
Yes, clean vents allow your HVAC system to move air freely, which means shorter run cycles, lower energy bills, and less strain on the motor and components over time.