
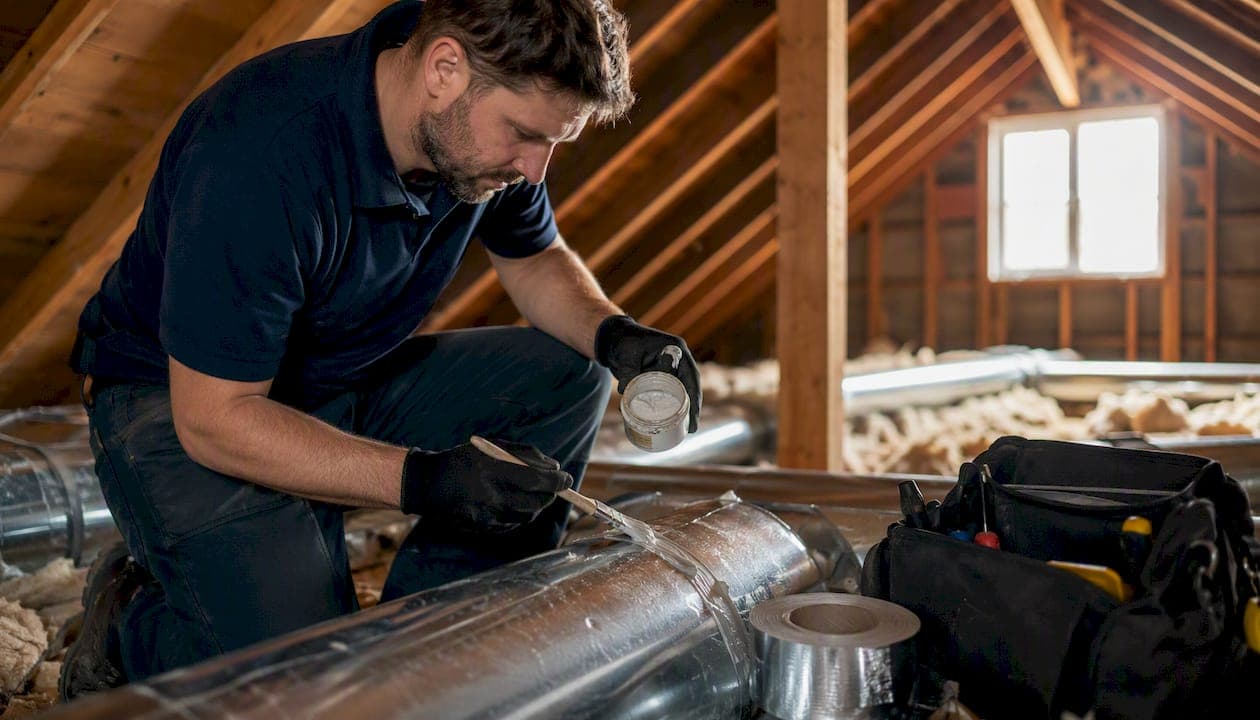
The most damaging common duct installation mistakes are leaky or unsealed joints, undersized supply trunks, missing or undersized return ducts, compressed or kinked flex duct, excessive tight-radius elbows, inadequate insulation on runs through unconditioned spaces, and wrong material choices for the application. Any one of these can cut your HVAC system's effective output by a meaningful margin. All of them together can make a properly sized unit behave like it's two sizes too small.
Right now, do this quick triage:
- Hold your hand over every supply register while the system runs. Weak or uneven airflow points to a sizing, sealing, or flex problem upstream.
- Look at every visible plenum collar and duct splice in your attic or crawlspace. Gaps, separated tape, or bare metal where tape used to be are active leaks.
- Check any visible flex duct for sharp bends, sags, or crushed sections. A kinked flex run can restrict airflow almost as badly as a closed damper.
- Feel for cold or warm spots room to room. Dramatic temperature differences between adjacent rooms often trace back to a return duct that's too small or missing entirely.
- Sniff near registers and plenum connections. A musty or moldy smell means moisture is getting in somewhere it shouldn't.
Call a pro immediately if you find visible mold, standing moisture near ductwork, or a sudden dramatic drop in system performance. Those situations go beyond DIY territory fast.
Key Takeaways
The most impactful duct installation mistakes share a common thread: they restrict airflow, leak conditioned air, or both, and they compound each other when left uncorrected.
| Point | Details |
|---|---|
| Seal joints with mastic or UL-181 tape | Cloth duct tape fails within years; proper sealing measurably reduces energy loss per ENERGY STAR guidance. |
| Check flex duct for kinks and sags | Any bend tighter than one duct diameter restricts airflow; re-support runs every 4–5 feet. |
| Undersized returns cause system-wide problems | Missing or undersized return ducts raise static pressure and stress the blower motor across the whole system. |
| Require Manual D before equipment replacement | Box-swapping without duct evaluation leaves new equipment underperforming and shortens its service life. |
| Airanddryerventcleaningavondale covers the full repair scope | Air Duct & Dryer Vent Cleaning Avondale handles duct cleaning, sealing, repair, replacement, and air quality testing for Avondale homes and commercial properties. |
Table of Contents
- 1. Leaky or Poorly Sealed Duct Joints
- 2. Undersized Supply Trunks
- 3. Missing or Undersized Return Ducts
- 4. Compressed or Kinked Flexible Duct
- 5. Excessive Elbows and Tight-Radius Bends
- 6. Inadequate Insulation on Ducts in Unconditioned Spaces
- 7. Wrong Material for the Application
- 8. Too Few or Blocked Supply and Return Registers
- 9. Poor Takeoffs and Bullhead Tee Geometry
- How to Inspect Your Ductwork Before Calling Anyone
- Repairs, Costs, and When to Stop DIYing
- Standards and Material Choices That Prevent These Problems
- The Box-Swapping Problem Most Homeowners Never See
- Why Airanddryerventcleaningavondale Is the Right Call for Avondale Homeowners
- An Honest Note from Shaun
- Sources
- FAQ
1. Leaky or Poorly Sealed Duct Joints
What causes it: Installers relying on standard gray cloth duct tape instead of mastic sealant or UL-181-rated foil tape. Cloth tape dries out and fails within a few years, leaving open gaps at every collar, splice, and branch takeoff.
Signs to look for: Dusty rings around supply registers, noticeably higher energy bills with no change in usage, and visible gaps or peeling tape at plenum connections.
DIY fix: Apply UL-181-rated foil-backed HVAC tape over any accessible joint as a temporary measure. It won't last as long as mastic, but it stops active leakage while you schedule a proper repair.
Pro repair: A technician cleans the joint surface, applies fiberglass mesh tape, and brushes on duct mastic. Mechanical fasteners (sheet metal screws) go in first on rigid connections. ENERGY STAR's duct sealing guidance confirms that properly sealed ducts measurably reduce energy loss and improve comfort, making this one of the highest-return repairs in residential HVAC.
Severity: High. Active leaks dump conditioned air directly into your attic or crawlspace.
2. Undersized Supply Trunks
What causes it: Contractors sizing trunks by habit or rule-of-thumb rather than running ACCA Manual D calculations. A trunk that's one size too small creates high static pressure throughout the entire system.
Signs to look for: Rooms far from the air handler that never reach setpoint, a system that runs constantly without satisfying the thermostat, and audible rushing or whistling from supply registers.
DIY fix: None that's safe or effective. You can confirm the problem by measuring airflow at registers with a simple anemometer, but the fix requires duct replacement.
Pro repair: A Manual D calculation determines the correct trunk size, and the undersized section gets replaced with properly sized sheet metal. According to BromingHVAC's analysis of installation performance loss, improper field sizing adjustments are among the most frequent causes of post-installation underperformance.
Severity: High.
3. Missing or Undersized Return Ducts
What causes it: Builders and contractors cutting corners by using a single central return for a multi-room layout, or sizing the return based on the supply side without accounting for actual airflow demand.
Signs to look for: Doors that slam shut when the system runs (a pressure imbalance sign), rooms that feel stuffy even when the supply is working, and a system that short-cycles.

DIY fix: Leaving interior doors open improves return airflow as a temporary workaround. Undercutting doors by 3/4 inch helps slightly.
Pro repair: Adding dedicated return drops to problem rooms or enlarging the existing return trunk. This is one of the most commonly skipped steps in residential new construction.
Severity: High. An undersized return starves the air handler of air, which raises static pressure and stresses the blower motor.
4. Compressed or Kinked Flexible Duct
What causes it: Installers routing flex duct through tight spaces without accounting for bend radius, or leaving excess duct length that bunches and sags between supports.
Signs to look for: Visible kinks or accordion-style compression in attic runs, registers with noticeably lower airflow than others on the same trunk, and flex duct that sags between joists.
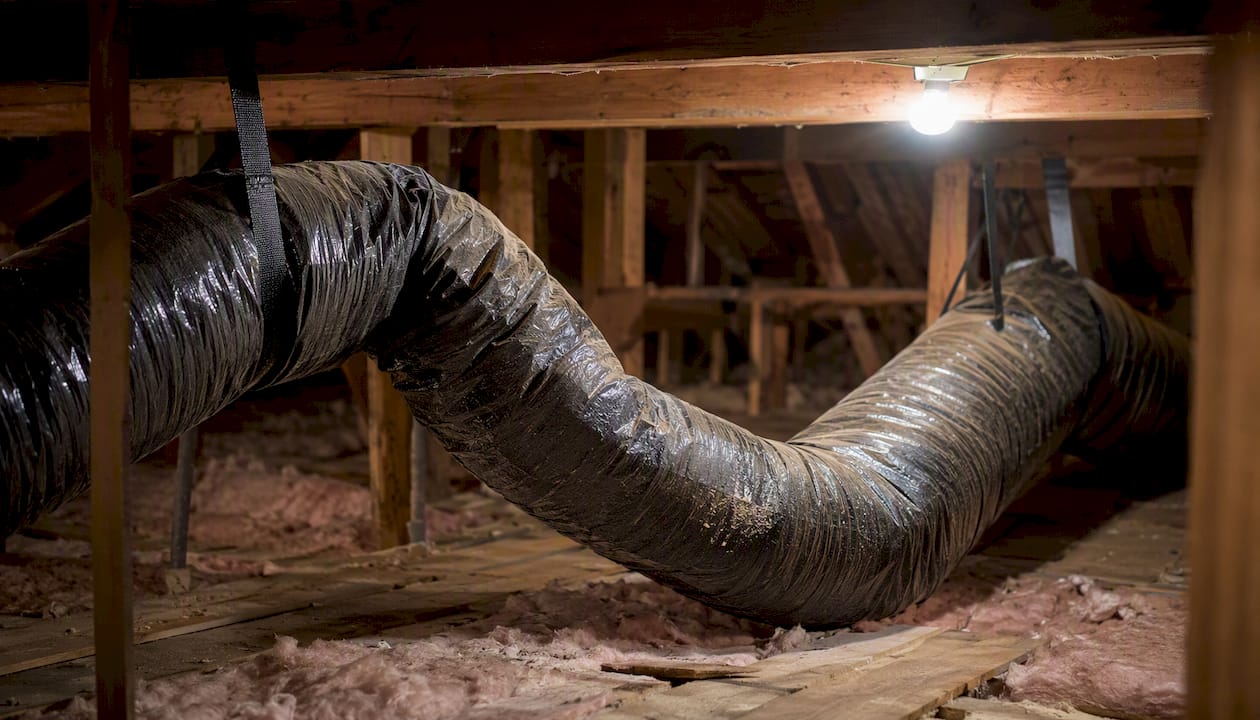
DIY fix: Where accessible, carefully re-route the flex to remove sharp bends and re-support it with proper strapping every 4–5 feet. Don't force a straightened run — if the space genuinely doesn't allow it, the duct needs to be re-routed or replaced with rigid.
Pro repair: Replace the kinked section with properly supported flex or rigid sheet metal. The American Society of Home Inspectors' flexible duct guide notes that bends with a centerline radius smaller than one duct diameter are a reportable installation defect because of the airflow restriction they cause.
Severity: Medium to High, depending on how severely the duct is compressed.
Pro Tip: The 2-foot rule is a useful field check: if a flex run has more than 2 feet of excess length bunched up anywhere, it almost certainly has compression somewhere in that slack. Pull it taut and re-support before assuming the airflow problem is elsewhere.
5. Excessive Elbows and Tight-Radius Bends
What causes it: Routing ductwork around structural obstacles using the tightest possible bends to save material and labor. Each elbow adds equivalent duct length (measured as friction loss), and a tight-radius elbow adds far more than a long-radius one.
Signs to look for: High static pressure readings, noise at registers (turbulence), and rooms at the end of long runs that never get adequate airflow.
DIY fix: None practical. You can confirm the problem with a manometer, but correcting it requires re-routing.
Pro repair: Re-routing the affected run with long-radius elbows or replacing multiple elbows with a single offset. ACHR News reports that tight-radius elbows and poor takeoff geometry create turbulence that downstream ductwork cannot recover from, permanently reducing capacity on that branch.
Severity: Medium to High.
6. Inadequate Insulation on Ducts in Unconditioned Spaces
What causes it: Using undersized insulation (R-4 when R-8 is appropriate for hot climates), or leaving sections of duct uninsulated entirely in attics, crawlspaces, or garages.
Signs to look for: Condensation on duct surfaces (especially in humid climates), supply air that feels warm by the time it reaches the register, and mold growth near duct connections.
DIY fix: Wrap accessible uninsulated sections with R-8 duct wrap and seal the seams with foil tape. This is one of the few legitimate DIY repairs that makes a real difference.
Pro repair: Full re-insulation of the run, including sealing any air gaps before the insulation goes on. In Arizona's climate, ducts in unconditioned attic spaces lose a significant portion of their cooling capacity to heat gain through under-insulated walls.
Severity: Medium to High depending on climate and how much duct runs through unconditioned space.
7. Wrong Material for the Application
What causes it: Using flexible duct for long main trunk runs where sheet metal is the right choice, or using ductboard in high-humidity environments where it absorbs moisture and degrades.
Signs to look for: Ductboard that feels soft or shows surface discoloration (moisture damage), flex duct used as a main trunk that sags and compresses under its own weight, and persistent musty odors from the supply side.
DIY fix: None. Material replacement requires a contractor.
Pro repair: Replace flex trunk runs with galvanized sheet metal and replace moisture-damaged ductboard with sheet metal or properly sealed rigid fiberglass board. The Durmahvac installation guide lists wrong material selection alongside poor sealing and sharp bends as recurring causes of airflow problems and uneven temperatures.
Severity: Medium.
8. Too Few or Blocked Supply and Return Registers
What causes it: Builders placing registers based on floor plan aesthetics rather than ACCA Manual D airflow calculations, or furniture and rugs blocking registers after move-in.
Signs to look for: Rooms that feel consistently warmer or cooler than the rest of the house, registers that are partially or fully blocked by furniture, and a system that runs longer than expected to reach setpoint.
DIY fix: Clear any physical obstructions from registers. If the register count is genuinely insufficient, that requires adding new boots and duct branches.
Pro repair: Adding supply or return registers with new duct branches, or relocating existing registers to better positions based on room heat load.
Severity: Low to Medium.
9. Poor Takeoffs and Bullhead Tee Geometry
What causes it: Installers using bullhead tees (where two branches split directly off the end of a trunk) instead of properly designed Y-fittings or square-to-round transitions. This creates a high-pressure collision point right at the split.
Signs to look for: Loud rushing noise near the plenum, dramatically uneven airflow between branches that share a tee, and high static pressure readings at the air handler.
DIY fix: None. This is a fabrication and geometry problem.
Pro repair: Replace bullhead tees with properly designed Y-fittings or re-route branches off the trunk at proper angles with conical takeoffs. Per ACHR News, correcting plenum geometry often requires measuring static pressure before and after to confirm the fix actually worked.
Severity: High.
How to Inspect Your Ductwork Before Calling Anyone
A systematic walkthrough takes about 30 minutes and gives you enough information to describe the problem accurately to a contractor, or to decide you can handle it yourself.
Step 1: Register-by-register airflow check. Run the system in fan-only mode and hold your hand 6 inches from each supply register. Note which ones feel weak. A smoke pencil or a lit incense stick works even better — the smoke stream shows both direction and volume clearly.
Step 2: Temperature delta check. Use an infrared thermometer to measure supply air temperature at each register. Significant variation between registers on the same trunk (more than a few degrees) points to leakage or compression somewhere upstream.
Step 3: Visual inspection of accessible ductwork. In your attic or crawlspace, look for:
- Separated collars or joints with visible gaps
- Flex duct that sags, kinks, or has obvious compression
- Missing or damaged insulation
- Condensation or water stains on duct surfaces
- Mold growth near connections
Step 4: Sniff test. Musty or earthy smells at registers or near the air handler suggest moisture intrusion or mold growth inside the duct system. This escalates to a pro call.
Step 5: Static pressure check (optional but useful). A basic digital manometer costs under $50 and lets you measure static pressure at the air handler. Residential systems typically run between 0.5 and 0.8 inches of water column. Readings consistently above 0.8 suggest restriction somewhere in the system.
Documenting for a contractor: Take photos of every visible defect before calling. A photo of a separated collar or a kinked flex run saves a technician 20 minutes of diagnosis time and helps you get an accurate quote faster.
For a deeper walkthrough on safe DIY inspection steps, the benefits of regular plumbing inspections for homeowners highlight how scheduled checks can prevent costly issues, complementing what homeowners can safely do themselves before a professional visit.
Repairs, Costs, and When to Stop DIYing
Not every duct problem needs a contractor. The decision comes down to whether the fix requires opening walls, replacing structural runs, or working near combustion equipment.
What you can reasonably do yourself
Sealing small accessible leaks with UL-181 foil tape, re-supporting sagging flex duct with proper strapping, clearing blocked registers, and wrapping exposed uninsulated runs with R-8 duct wrap are all within reach for a careful homeowner. Budget $50–$150 in materials for a basic sealing and insulation job on accessible runs. Time: a few hours on a weekend.
Skipping small repairs is one of the most common homeowner mistakes that compounds into expensive fixes later. A $30 roll of foil tape applied to a leaking collar today is cheaper than a blower motor replacement next summer.
What requires a professional
Cost ranges are estimates for the U.S. market and vary by region, access difficulty, and job scope.
For duct repair and replacement work that goes beyond sealing, a professional inspection first helps you avoid paying for repairs that won't actually solve the underlying problem.
Questions to ask any contractor before hiring
- Do you perform a Manual D calculation or measured airflow testing before and after the work?
- Will you measure static pressure at the air handler before you start?
- What sealing method do you use — mastic, UL-181 tape, or both?
- Do you provide a written scope of work with materials specified?
Red flags that mean stop and call a pro now
- Visible mold on duct surfaces or inside registers
- Standing water or moisture near the air handler or ductwork
- Work that involves fire dampers, combustion appliances, or structural penetrations
- Static pressure readings consistently above 0.8 inches of water column
- Any situation involving a gas furnace and suspected duct leakage near the heat exchanger
For guidance on how often to schedule professional service, the duct cleaning frequency guide covers recommended intervals for different home types and climates.
Standards and Material Choices That Prevent These Problems
Knowing which standards your contractor should follow gives you a real way to evaluate their work before it's done.
ACCA Manual D is the industry standard for residential duct system design. It calculates the correct trunk size, branch sizes, and register locations based on the actual heat load of each room. Any contractor who sizes ductwork by eye or habit rather than Manual D is guessing.
SMACNA (Sheet Metal and Air Conditioning Contractors' National Association) publishes fabrication and installation standards for duct construction, including joint sealing requirements, hanger spacing, and fitting geometry. These standards are what separate a properly built system from one that looks fine until it fails.
ENERGY STAR provides homeowner-facing guidance on duct sealing benefits and recommends mastic sealant or UL-181-rated tape as the only acceptable long-term sealing methods. Standard gray cloth duct tape is not on that list.
Material guidance at a glance
Sheet metal (galvanized steel):
- Best for main trunk runs and any run longer than 10 feet
- Durable, low friction loss, easy to seal with mastic
- Higher upfront cost, requires skilled fabrication
Flexible duct:
- Appropriate for short branch runs (under 8 feet) from a rigid trunk to a register
- Must be fully extended, supported every 4–5 feet, and never compressed or kinked
- The one-duct-diameter bend radius rule is the practical minimum: any tighter and airflow restriction becomes significant
Ductboard (rigid fiberglass):
- Acceptable for plenums and some branch runs in dry climates
- Absorbs moisture in humid environments, leading to mold and structural failure
- Requires careful sealing at all joints; cut edges must be sealed to prevent fiber release
Pro Tip: When reviewing a contractor's proposal, ask specifically whether flex duct will be used for any trunk runs. If the answer is yes, that's a flag worth pushing back on. Flex trunks sag, compress, and underperform sheet metal in every long-run application.
For homeowners interested in the sustainability angle of material choices, the eco-friendly duct cleaning workflow covers material and maintenance considerations worth reviewing.
The Box-Swapping Problem Most Homeowners Never See
There's a category of duct installation error that doesn't happen during the original installation. It happens when a contractor replaces your HVAC unit without evaluating whether the existing ductwork can handle the new equipment.
Industry consultant Joey Henderson calls this "box-swapping" — and according to ACHR News, it's one of the most common mistakes that shortens equipment life and leaves homeowners wondering why their new system performs no better than the old one.
Box-swapping interacts badly with every other mistake on this list. An undersized return that was merely annoying with the old unit can push a new variable-speed system into fault mode.
What to request when replacing HVAC equipment:
- A system static pressure measurement before the new unit goes in
- Measured CFM per register (not estimated) to confirm the distribution system can handle the new equipment's airflow
- A Manual D verification or at minimum a duct leakage test
- Written documentation of any duct deficiencies found and whether they're being corrected as part of the job
If a contractor quotes equipment replacement without mentioning any of these steps, ask directly. A contractor who can't explain why static pressure matters before a new install is one worth reconsidering.
Why Airanddryerventcleaningavondale Is the Right Call for Avondale Homeowners
Duct problems in Avondale homes have a specific character: attic temperatures that push well past 140°F in summer mean that any duct leak, compressed flex run, or missing insulation costs you far more here than it would in a milder climate. The gap between a properly sealed, well-supported duct system and a neglected one shows up directly on your APS bill.
Air Duct & Dryer Vent Cleaning Avondale handles the full range of duct-related services: air duct cleaning, duct repair and sealing, register and boot repair, duct replacement, air quality testing, and dryer vent cleaning. A typical service visit starts with a visual inspection and photographic documentation of every accessible duct section, followed by a prioritized repair list so you know exactly what's urgent and what can wait. Pre- and post-service airflow checks confirm the work actually made a difference.
For commercial properties and rental units in Avondale, the commercial air duct cleaning service covers multi-unit and business applications with flexible scheduling, including after-hours options.
Schedule an inspection or get a quote at Airanddryerventcleaningavondale.
An Honest Note from Shaun
One pattern I see repeatedly in Avondale homes: a homeowner calls because one room never cools down, and when we get into the attic, we find a flex run that's been kinked at a 90-degree angle for years, sitting right off the plenum collar. The previous installer left about 3 feet of extra duct length that bunched up and compressed against a truss. The register in that room was getting maybe a third of the airflow it should have. Straightening and re-supporting the run, then sealing the collar with mastic, made a noticeable difference the same day.
The thing is, that kind of problem doesn't show up on a thermostat. You need eyes on the duct and a hand at the register to find it. Real diagnosis almost always requires measurements, not just a visual pass.
Sources
- 6 of the most common HVAC installation mistakes killing system performance | ACHR News
- ENERGY STAR — Duct sealing benefits
- A Home Inspectors' Guide to Flexible HVAC Duct Installation — American Society of Home Inspectors
- Common Air Duct Installation Issues & How to Avoid Performance Loss | BromingHvac
- Common HVAC mistakes that could cost you money | CBS News
- HVAC Duct Installation Guide: Steps, Standards & Best Practices - Durmahvac
FAQ
What is the 2-foot rule for ductwork?
The 2-foot rule is a field guideline for flexible duct: any flex run should have no more than 2 feet of excess length, since slack bunches into compression that restricts airflow. The related one-duct-diameter rule states that any bend in flex duct must have a centerline radius of at least one duct diameter to avoid significant airflow restriction.
What are the most common problems with HVAC ductwork?
The most frequent issues are leaky or unsealed joints, undersized supply or return ducts, compressed or kinked flex duct, excessive tight-radius elbows, and inadequate insulation on runs through unconditioned spaces. Any of these raises static pressure, reduces airflow, and forces the system to work harder to reach setpoint.
What percentage of HVAC installations are done incorrectly?
A precise industry-wide figure is not publicly established, but contractor and home inspector reports consistently identify duct leakage, improper sizing, and poor sealing as near-universal findings during post-installation inspections, suggesting installation defects are far more common than most homeowners realize.
Should I replace 20-year-old ductwork?
Ductwork that's 20 years old isn't automatically due for replacement, but it warrants a professional inspection. Flex duct degrades faster than sheet metal, and older systems often predate current Manual D sizing standards. If inspection reveals significant leakage, compression, or moisture damage, replacement is usually more cost-effective than repeated patching. For guidance on scheduling, the duct cleaning frequency guide covers when professional assessment makes sense.
When should I call a pro instead of fixing duct problems myself?
Call a professional when you find visible mold, standing moisture near ductwork, static pressure readings above 0.8 inches of water column, or any situation involving combustion appliances or structural penetrations. Airanddryerventcleaningavondale provides inspection, repair, and air quality testing for Avondale homeowners and property managers when the problem goes beyond what a DIY fix can address.