TL;DR:
- Performing a quick visual and airflow inspection of your home's vents can identify dust, mold, and airflow issues early, preventing costly repairs. Using basic tools like a flashlight, screwdriver, tissue paper, and a camera, homeowners can assess duct conditions and detect leaks or blockages effectively. While DIY methods address surface problems, professional cleaning is recommended for mold, pests, or significant debris buildup that DIY tools cannot fully resolve.
DIY air vent inspection is the practice of visually and functionally checking your home's supply and return vents, grilles, and accessible ductwork to catch dust buildup, airflow problems, and early signs of mold or damage before they become costly repairs. Done right, a home air vent inspection takes less than an hour, requires only basic tools like a flashlight, screwdriver, and a sheet of tissue paper, and gives you a clear picture of whether your HVAC system is running the way it should. The techniques covered here range from visual checks and airflow testing to vent cover cleaning and knowing when to call in professionals. Think of this as your practical air duct inspection guide, written for homeowners who want real answers, not vague advice.
1. DIY air vent inspection tips: start with the right tools
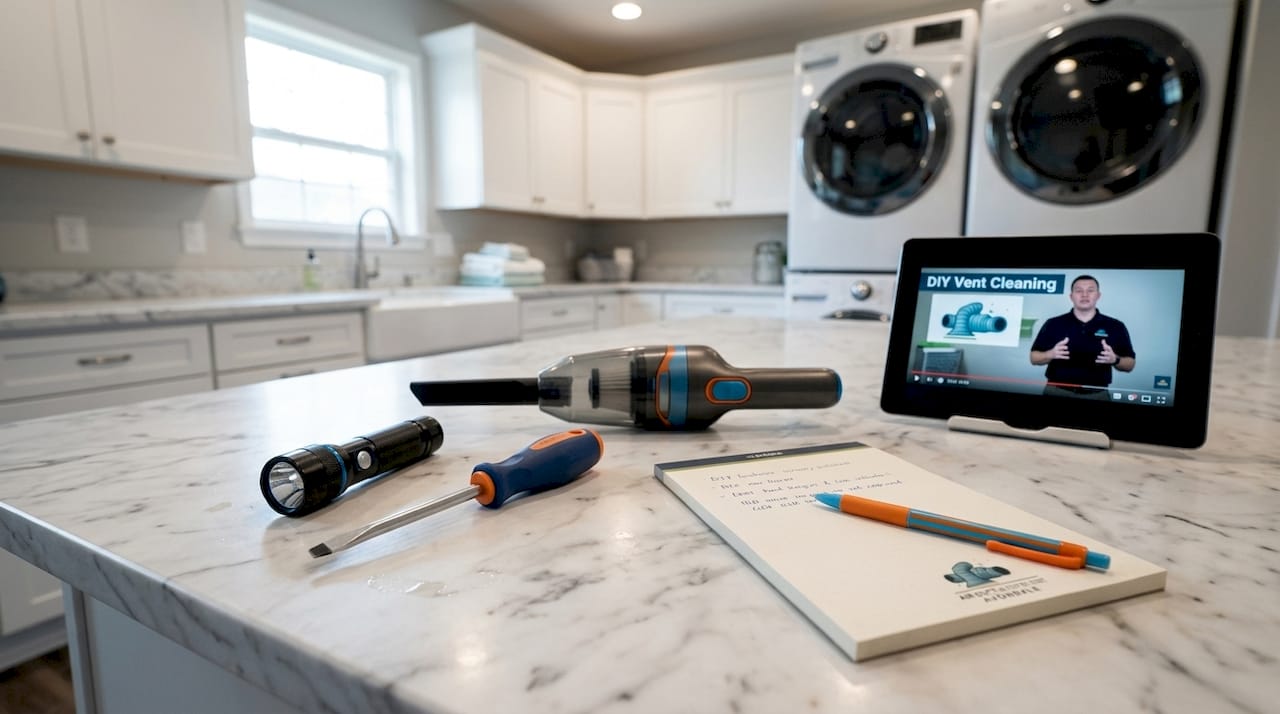
Every effective inspection starts with the right gear in your hands before you touch a single vent cover. You do not need expensive equipment. A bright flashlight, a standard Phillips-head screwdriver, a vacuum with a brush attachment, and a few sheets of tissue paper cover 90% of what a thorough home air vent inspection requires. If you want to go further, a basic anemometer (available at hardware stores for under $30) measures airflow in cubic feet per minute, and a smoke pencil helps you spot air leaks at duct seams.
Keep a notepad or use your phone to photograph each vent before and after inspection. This creates a cleaning history that tells you exactly how fast dust accumulates in each zone of your home, which is far more useful than guessing when you last checked. Labeling vents by room also helps you track which areas consistently show more buildup, pointing toward filter seal problems or duct leaks upstream.
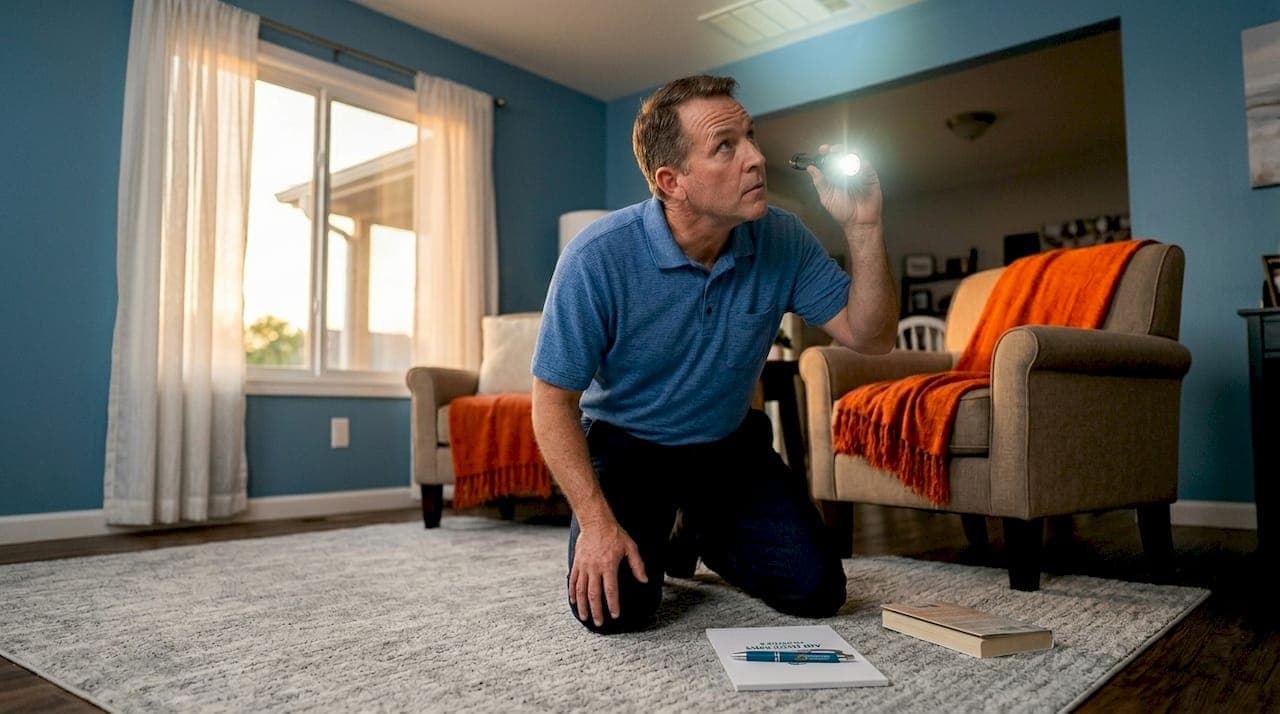
2. How to visually inspect air vents for dust, mold, and damage
Turn your HVAC system off before you remove any vent cover. Turning off the HVAC before vent removal prevents the blower from pushing loosened dust directly into your living space. This single step is the most skipped and most consequential part of the entire process.
With the system off, remove the vent cover screws and set the cover aside. Shine your flashlight directly into the duct opening and look for:
- Thick gray or brown dust layers coating the duct walls within the first 12 inches
- Dark, fuzzy patches that may indicate mold growth on metal or insulated duct surfaces
- Rodent droppings, insect casings, or nesting material that signal a pest problem
- Visible holes, tears, or disconnected duct sections within reach of the opening
- Rust or moisture staining on metal ducts, which points to condensation or a leak
Recurring dust on supply grilles often signals particle infiltration from within the duct system or a bypass path around the filter, not just a dirty grille. If you clean a grille and it looks dirty again within two weeks, the problem is inside the duct, not on the surface.
Pro Tip: Use your phone camera on video mode and slowly pan it into the duct opening. The screen gives you a wider, brighter view than your eye alone, and you get a recorded reference to compare at your next inspection.
Check every accessible vent in the home, including floor registers, wall vents, and ceiling diffusers. Return air vents (the larger grilles that pull air back to the system) tend to collect the most debris and are often overlooked. Physical damage like holes or loose connections are signs you need duct cleaning or professional repairs sooner rather than later.
3. Techniques for checking airflow strength and blocked vents
Steady, consistent airflow from every register is the clearest sign your HVAC system is balanced and your ducts are clear. Here is a step-by-step method for checking airflow across your home:
- Turn the HVAC system on and set it to fan-only mode so the blower runs without heating or cooling.
- Hold your hand 6 inches from each supply register. You should feel a firm, steady push of air. Weak or intermittent flow in one room compared to others signals a blockage or leak in that branch of ductwork.
- Use the tissue paper test. Hold a single sheet of tissue paper in front of a supply vent. It should flutter and hold position. If it barely moves or falls, airflow is restricted.
- Compare room to room. Walk through every room and note which registers feel noticeably weaker. Rooms at the far end of duct runs are most vulnerable to pressure loss.
- Feel along accessible duct joints and seams in your attic, basement, or crawl space while the system runs. Feeling duct connections for air leakage while the HVAC is running is one of the most reliable low-tech methods for finding leaks.
- Check that all registers are fully open. Blocked vents and obstructed openings directly reduce system efficiency and can cause pressure imbalances that stress the blower motor.
Combining visual and functional airflow testing improves accuracy in detecting duct issues far beyond relying on appearances alone. A duct can look clean from the grille and still leak 20% of conditioned air into an unconditioned attic space.
Pro Tip: If you find a suspected leak at an accessible duct joint, mark it with painter's tape before you leave the attic or crawl space. You can then patch it with UL-181 rated mastic sealant or metal foil tape on a follow-up visit, rather than hunting for the spot again.
Proper sealing with UL-181 mastic or metal foil tape is the correct method for patching accessible duct leaks. Standard gray duct tape fails within months under temperature cycling and should never be used on HVAC ductwork.
4. Safe DIY vent cover cleaning to improve airflow
Cleaning vent covers is one of the most straightforward parts of DIY vent cleaning, but the order of steps matters. Skipping any one of them can spread dust through the home or leave covers prone to rust.
Follow this sequence every time:
- Shut off the HVAC system completely at the thermostat before removing any cover.
- Unscrew the vent cover and place it in a utility sink or bathtub. For floor registers, lift straight up after removing screws.
- Vacuum the inside of the duct opening using a brush attachment. Work only as far as the hose reaches without forcing it. Do not use a leaf blower or compressed air, which pushes debris deeper into the system.
- Wash the vent cover with warm water and a few drops of dish soap. A soft brush removes stubborn dust from the grille slats. For heavy buildup, soak for 10 minutes before scrubbing.
- Rinse thoroughly and dry completely before reinstalling. Careful drying prevents rust or mildew from forming on metal covers, which can then flake into the airstream.
- Reinstall the cover snugly so it sits flush against the wall or floor. A loose cover creates a gap that bypasses the filter seal and pulls unfiltered air into the return system.
A few additional points worth keeping in mind:
- Clean supply and return vents on the same day so you get a complete picture of the system's condition.
- Replace any vent cover that shows significant rust, bent slats, or cracked frames. Damaged covers restrict airflow even when the duct behind them is clean.
- For painted metal covers, avoid abrasive scrubbers that strip the finish and accelerate rust.
For a full walkthrough of safe grille removal and reinstallation, the step-by-step HVAC cleaning guide from Airanddryerventcleaningavondale covers the process in detail.
5. When to schedule professional duct cleaning based on your findings
Not every inspection finding requires a professional. Knowing which findings cross the line from DIY territory into professional work saves you time and protects your health.
The EPA takes a condition-based approach to duct cleaning, recommending cleaning only when specific triggers are present rather than on a fixed calendar schedule. Those triggers are mold growth inside ducts or on system components, vermin infestation with evidence of droppings or nesting, and ducts so clogged with debris that visible particles are released into the room at startup. Routine cleaning without these conditions present is not supported by EPA guidance.
NADCA guidelines recommend professional duct cleaning every 3 to 5 years, with a shorter interval if your household includes pets that shed heavily, occupants with allergies or asthma, or recent construction that introduced drywall dust into the system. In Avondale, Arizona, where dust and desert particulates are a year-round factor, many homeowners find the shorter end of that range more practical.
Here is a direct comparison to help you decide:
| Finding from your inspection | Recommended action |
|---|---|
| Light dust on grilles, no odor | DIY cleaning of covers and accessible duct area |
| Weak airflow in one or two rooms | Check for blockages, seal accessible leaks with UL-181 tape |
| Visible mold patches inside ducts | Professional remediation required |
| Rodent droppings or nesting material | Professional cleaning and pest control before HVAC use |
| Heavy debris visible at duct opening | Professional cleaning with negative-pressure equipment |
| Persistent musty odor after DIY cleaning | Professional inspection and possible mold testing |
Professional duct cleaning systems use negative-pressure vacuuming combined with mechanical agitation to remove debris from the full length of duct runs without releasing contaminants into living spaces. A household vacuum and brush attachment cannot replicate this, regardless of how carefully you work. For mold or pest contamination, attempting DIY cleaning without containment equipment risks spreading spores or allergens to rooms that were previously unaffected. The HVAC mold risk guidance from TX Mold Remediation reinforces that condition-based inspection, rather than routine cleaning, is the right framework for deciding when professional intervention is warranted.
6. How to detect and document duct leaks during inspection
Duct leaks are the most underdiagnosed problem in residential HVAC systems, and most homeowners walk right past them during a basic visual check. A leak does not have to be large to matter. A gap at a duct joint the width of a pencil can bleed enough conditioned air into an attic to raise your monthly energy bill noticeably.
The most accessible leaks are at duct connections near the air handler, at branch takeoffs where smaller ducts split from the main trunk, and at elbows where ducts change direction. These joints are under the most mechanical stress from vibration and temperature cycling, so they loosen over time. When you run your hand along these joints with the system on, you will feel a distinct puff of air at any gap. A smoke pencil makes the leak visible as a wisp of smoke pulled toward or pushed away from the joint.
Document every leak you find with a photo and a note of its location (for example, "attic, second branch left of air handler"). This record is useful whether you patch the leak yourself or hand the job to a professional. For accessible leaks on rigid metal ductwork, duct leak detection and patching with UL-181 rated materials is a reasonable DIY repair. Flexible duct connections and leaks near the air handler are better left to a technician who can verify the repair does not affect system pressure balance.
7. Checking air filters as part of your vent inspection routine
Your air filter is the first line of defense for your duct system, and its condition directly affects what you find during a vent inspection. A clogged or improperly seated filter allows unfiltered air to bypass the media and deposit particles directly onto duct walls and supply grilles. Dust buildup on vent grilles often originates from air carrying particles within ducts or from leaks around filter seals, not just from ambient household dust.
Every time you inspect your vents, pull the filter and check two things. First, look at how loaded it is. A filter that is uniformly gray and dense is doing its job. A filter that is clean on one side and dirty on the edges suggests air is bypassing the media through gaps in the filter frame. Second, check that the filter fits snugly in its slot with no visible gaps around the perimeter. Even a quarter-inch gap is enough to allow significant particle bypass over weeks of operation.
MERV 8 to MERV 11 rated filters strike the right balance for most residential systems between particle capture and airflow restriction. Going higher than MERV 13 without confirming your system's blower can handle the added resistance can actually reduce airflow and accelerate duct contamination by starving the system of air volume.
Key takeaways
A thorough DIY air vent inspection combines visual checks, airflow testing, and filter assessment to catch problems early and avoid unnecessary professional cleaning costs.
| Point | Details |
|---|---|
| Always shut off HVAC first | Turning off the system before removing covers prevents blowing loosened dust into living spaces. |
| Combine visual and airflow tests | Checking both appearance and airflow catches leaks and blockages that visual inspection alone misses. |
| Use condition-based cleaning decisions | EPA guidance supports cleaning only when mold, pests, or heavy debris are confirmed, not on a fixed schedule. |
| Patch accessible leaks with UL-181 materials | Standard duct tape fails under temperature cycling; use mastic sealant or metal foil tape rated UL-181. |
| Know when to call a professional | Mold, pest infestation, and heavy debris require negative-pressure equipment that DIY tools cannot replicate. |
What I've learned from years of watching homeowners inspect their own vents
Most homeowners either do too little or too much when they start paying attention to their vents. The "too little" group glances at the grille, decides it looks fine, and moves on. The "too much" group reads one article about mold and starts pulling apart their entire duct system on a Saturday afternoon. Neither approach serves them well.
The single most valuable habit I have seen is the combination of a quick visual check with a simple airflow test done at the same time. Neither takes more than a few minutes per vent, but together they catch the two most common problems: visible contamination and hidden pressure loss. Doing one without the other leaves a real gap in what you actually know about your system.
I have also seen homeowners damage flexible duct connections by pushing vacuum hoses too aggressively into duct openings during DIY cleaning. The inner liner of flex duct tears easily, and a torn liner creates turbulence that reduces airflow and can trap debris. If your duct openings connect to flexible duct rather than rigid metal, limit your vacuum work to the first few inches inside the opening.
The other mistake worth flagging is assuming that a clean-looking vent means a clean duct system. Supply grilles can look spotless while the main trunk line 10 feet back is coated in a layer of fine dust. Your visual inspection at the grille is a starting point, not a conclusion. If your home has not had a professional inspection in more than five years, or if you moved into the home without knowing its maintenance history, a professional assessment gives you a reliable baseline that DIY inspection alone cannot provide.
— Shaun
Ready for a deeper clean? Airanddryerventcleaningavondale can help
DIY inspection tells you what is happening at the surface. Professional cleaning addresses what is happening throughout the entire duct system.
If your inspection turned up mold, pest evidence, heavy debris, or airflow problems that persist after cleaning the grilles and sealing visible leaks, the team at Airanddryerventcleaningavondale is equipped to handle it. Their air vent and duct cleaning service in Avondale, AZ uses negative-pressure equipment to remove contaminants from the full length of your duct system without spreading dust through your home. They also offer air quality testing and duct repairs for homeowners who need more than a surface-level fix. Flexible scheduling, including after-hours options, makes it easy to book around your routine.
FAQ
How often should I inspect my home's air vents?
A visual inspection of all accessible vents every three to six months is a practical schedule for most homeowners. Increase frequency if you have pets, recent construction, or occupants with respiratory conditions.
What are the clearest signs my ducts need professional cleaning?
Visible mold inside duct openings, rodent droppings or nesting material, and heavy debris that releases particles into the room when the system starts are the three triggers the EPA identifies for professional cleaning.
Can I clean air vents myself without professional help?
Yes. Removing, washing, and reinstalling vent covers and vacuuming the first few inches of accessible duct openings are safe DIY tasks. Deep duct cleaning that reaches the full system requires professional negative-pressure equipment.
What tools do I need for a basic DIY vent inspection?
A bright flashlight, a Phillips-head screwdriver, a vacuum with a brush attachment, and tissue paper for airflow testing cover the core inspection. A smoke pencil or basic anemometer adds precision for leak and airflow checks.
Does a dirty vent grille always mean the ducts are dirty?
Not necessarily. Dust on supply grilles can come from particle infiltration inside the duct system or from filter bypass, meaning the ducts may need attention even if the grille itself is the only visible sign.