
TL;DR:
- Emergency vent cleaning removes lint buildup to prevent fires and improve indoor air quality. Proper tools, safety precautions, and following a step-by-step process are essential for effective cleaning. Regular maintenance and professional inspections help avoid costly repairs and reduce fire risks.
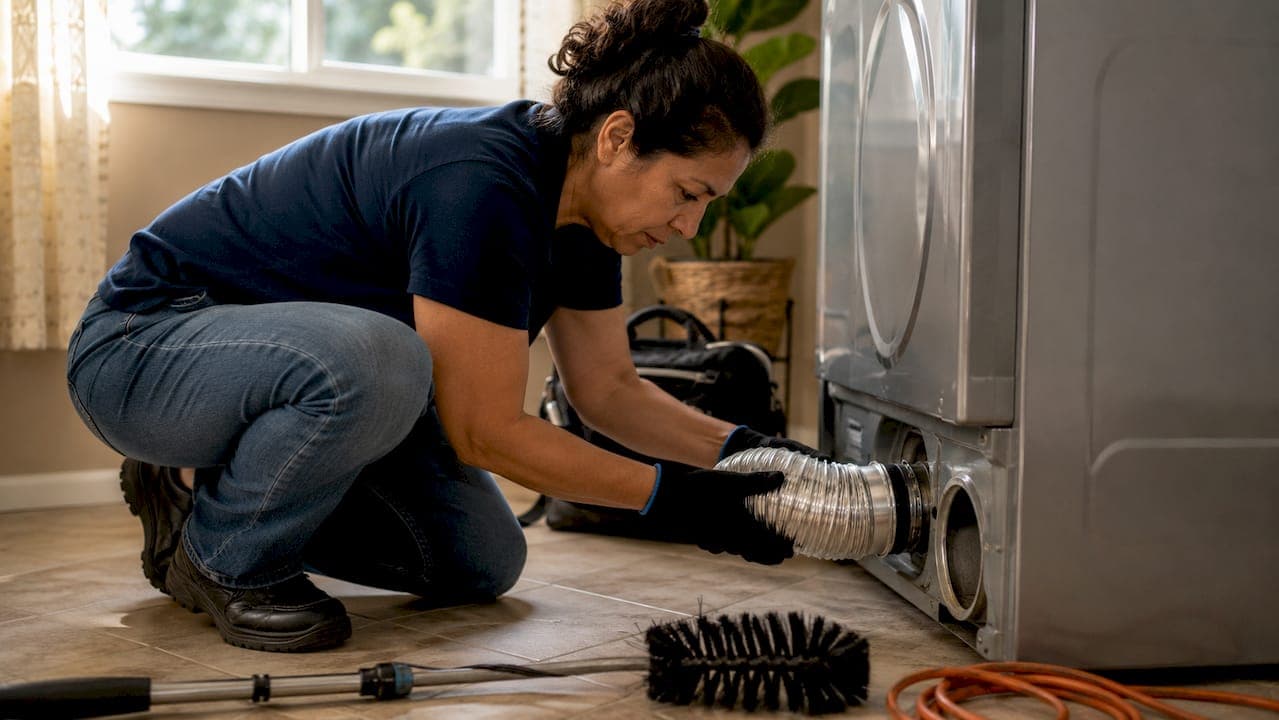
Emergency vent cleaning is the process of removing dangerous lint buildup and debris from dryer vents and air ducts to prevent fires and protect indoor air quality. This guide to emergency vent cleaning covers exactly what you need: the right tools, a step-by-step cleaning method, and clear guidance on when to call a professional. The NFPA advises annual dryer vent cleaning as a minimum, with more frequent service for high-volume households. The EPA reinforces this by recommending preventive maintenance to stop mold, pests, and blockages before they become health hazards. Acting fast when warning signs appear can prevent a small clog from becoming a house fire.
What tools and safety precautions do you need for emergency vent cleaning?
The right tools make the difference between a thorough clean and a dangerous half-job. Gather everything before you start. Stopping mid-process to find a missing tool increases the risk of leaving the duct disconnected or the dryer improperly reassembled.
Essential tools
- Flexible dryer vent brush kit (at least 12 feet of rod sections)
- Shop vacuum with a hose long enough to reach the duct interior
- Flashlight or headlamp to inspect the duct and exterior vent cap
- Flathead and Phillips screwdrivers for removing vent covers and clamps
- Foil tape (not duct tape) to reseal connections after cleaning
- Work gloves and a dust mask rated N95 or better
- Drop cloth to catch lint debris around the dryer
Safety precautions before you touch anything
Electrical safety is non-negotiable. Unplug electric dryers from the wall outlet completely. For gas dryers, turn off the gas supply valve at the wall before moving the unit. Never assume the dryer is safe to move just because it is off. Gas lines can flex and crack if the dryer is pulled too sharply.
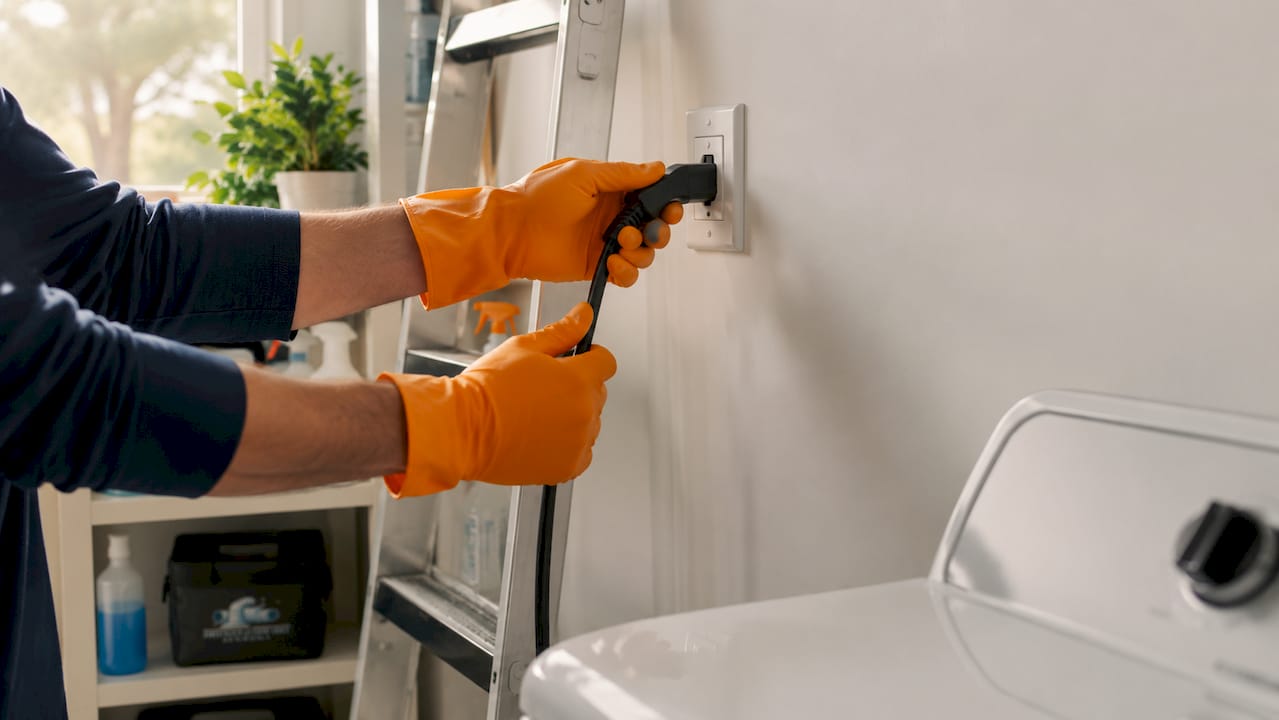
Ventilation systems are safety-critical infrastructure requiring careful handling. Treat every duct connection as a potential hazard until you have confirmed the power and gas are fully isolated. Keep children and pets out of the work area.
Pro Tip: Photograph the duct connections before you disconnect anything. A quick photo on your phone preserves the exact orientation and clamp positions, which saves real time during reassembly in tight laundry spaces.
How to perform emergency vent cleaning: a step-by-step process
Follow these steps in order. Skipping steps, especially the power isolation and inspection phases, is the most common cause of injury and incomplete cleaning.
-
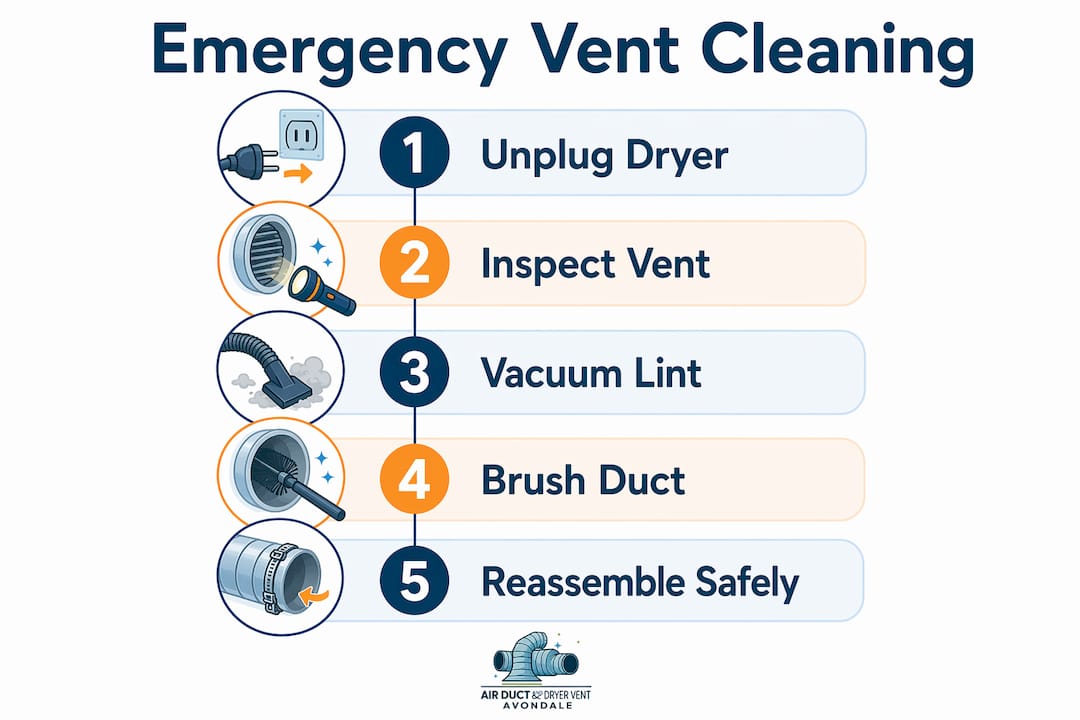
Unplug the dryer and isolate power or gas. Pull the dryer away from the wall carefully. For gas units, confirm the supply valve is closed before moving the appliance more than a few inches.
-
Disconnect the duct from the dryer. Loosen the clamp or foil tape connecting the flexible duct to the dryer's exhaust port. Set the duct aside without bending or kinking it.
-
Vacuum the duct opening first. Insert the shop vacuum hose into the duct opening at the dryer end. Remove as much loose lint as possible before introducing a brush. This step is critical.
-
Brush in short, controlled sections. Attach one rod section of the brush kit at a time. Push the brush in gently, rotate it, and pull it back before adding the next rod section. Vacuuming before brushing prevents the brush from compacting lint deeper into the duct.
-
Clean the exterior vent cap. Go outside and remove the vent cap cover. Clear any lint, bird nesting material, or debris from the flap and the opening. A blocked exterior cap is one of the most overlooked causes of poor dryer performance.
-
Inspect the duct for damage. Run your flashlight along the duct interior and check the exterior connection for cracks, gaps, or crushed sections. Damaged duct sections allow lint to escape into wall cavities, creating a hidden fire risk.
-
Reconnect and reseal. Reattach the duct using foil tape at every joint. Do not use standard duct tape. It dries out and fails within months, leaving gaps that leak hot, lint-laden air.
-
Run a test cycle. Plug the dryer back in, run it on air-only for five minutes, and check the exterior vent for strong, steady airflow. Weak airflow means the duct is still partially blocked.
"Vacuum first, then brush in short increments. Pushing a brush through in one long pass compacts lint into a dense plug that is far harder to remove than the original loose buildup."
Pro Tip: If you find a crushed or kinked flexible duct section during inspection, replace it with rigid metal duct. Flexible foil duct is more prone to sagging and lint accumulation, and rigid duct is the preferred material under most current building codes.
When should you hire a professional instead of doing it yourself?
DIY emergency cleaning works well for straightforward situations. A short, accessible duct with a standard wall exit is a reasonable candidate for a homeowner to handle. The situation changes quickly when the duct system becomes complex.
Signs you need professional service
- The duct run is longer than 30 feet or has more than two 90-degree turns
- The vent exits through the roof rather than a side wall
- You find visible mold or pest activity inside the duct or near the vent cap
- The dryer still runs hot or takes multiple cycles after you have cleaned the duct
- The duct has damaged, disconnected, or inaccessible sections inside the wall
Ducts longer than 30 feet or with unknown obstructions require professional equipment and expertise to clear safely. That is not a limitation of skill. It is a physical constraint of brush kit reach and vacuum suction.
Professional cleaning also goes beyond lint removal. Professional servicing can improve heat exchanger efficiency by restoring proper airflow, which reduces energy costs and mechanical stress on the dryer motor. A trained technician can also spot duct damage that a homeowner would miss in a tight crawl space or wall cavity.
| Situation | Recommended approach |
|---|---|
| Short duct, wall exit, no damage | DIY emergency cleaning |
| Duct over 30 feet or roof exit | Professional service required |
| Visible mold or pest evidence | Professional service required |
| Dryer still overheats after DIY clean | Professional inspection needed |
| Annual routine maintenance | Professional service preferred |
For air duct systems in commercial buildings, the threshold for professional service is lower. Business owners should treat any duct blockage as a professional job given the scale of the systems and the liability involved. Airanddryerventcleaningavondale serves both residential and commercial clients in Avondale, AZ, with air vent safety precautions guidance built into every service visit.
How do you maintain vents after an emergency clean?
An emergency clean buys you time. Consistent maintenance is what prevents the next emergency. The importance of vent maintenance comes down to one fact: lint and debris accumulate every single time you run the dryer or run your HVAC system.
Recommended maintenance schedule
- After every dryer load: Clean the lint trap screen completely. A clogged lint trap forces more lint into the duct.
- Every 3 months: Visually inspect the exterior vent cap for blockages or damage.
- Every 6 months: Run a full DIY vent cleaning if your household does more than five loads of laundry per week.
- Annually: Schedule a professional inspection and cleaning. The NFPA recommends annual dryer vent service as the baseline for all households.
The EPA emphasizes routine filter replacement and duct inspection as the most effective steps homeowners can take to prevent mold growth and maintain air quality. Replacing your HVAC air filter every 60–90 days is the single cheapest action with the highest return on air quality.
Preventive maintenance detects early mechanical issues before they become costly breakdowns. A small crack in a duct joint found during a routine inspection costs far less to fix than a full duct replacement after a blockage-related failure.
| Maintenance task | Frequency |
|---|---|
| Clean lint trap | After every load |
| Inspect exterior vent cap | Every 3 months |
| DIY duct cleaning (high use) | Every 6 months |
| Professional inspection and clean | Annually |
| HVAC air filter replacement | Every 60–90 days |
Log every maintenance activity with the date and any observations. A simple note in your phone or a paper log on the laundry room wall gives you a clear record to share with a technician during an annual visit. It also helps you spot patterns, like a duct that clogs faster than expected, which can signal a hidden restriction or damage.
Poorly maintained kitchen and home ventilation systems compound the problem. Grease and moisture from cooking can migrate into connected duct systems, accelerating buildup and creating conditions for mold. Treating all ventilation in your home as one connected system, not separate appliances, is the mindset that prevents emergencies.
Key Takeaways
Emergency vent cleaning prevents fires and protects air quality, but only when done with the right technique, the right tools, and a consistent maintenance plan afterward.
| Point | Details |
|---|---|
| Vacuum before brushing | Remove loose lint with a shop vacuum before using a brush to avoid compacting blockages deeper. |
| Photograph before disassembly | A phone photo of duct connections prevents reassembly mistakes in tight spaces. |
| Know the DIY limits | Ducts over 30 feet, roof exits, or visible mold require professional service, not a DIY clean. |
| Annual professional service | NFPA recommends at least one professional dryer vent cleaning per year for every household. |
| Log every maintenance task | A written maintenance record helps identify recurring problems and supports professional inspections. |
What I have learned from years of watching homeowners handle vent emergencies
The biggest mistake I see is not the cleaning itself. It is the timing. Homeowners wait until the dryer takes 90 minutes to dry a single load, or until they smell something burning, before they act. At that point, the duct is not just dirty. It is a fire risk that has been building for months.
The second mistake is rushing the reassembly. People spend 45 minutes cleaning the duct carefully, then slap the connection back together with whatever tape is nearby. Standard duct tape fails in heat. Foil tape is the only correct choice, and it costs about the same at any hardware store.
What actually works is treating vent maintenance the same way you treat a smoke detector battery. You do not wait for it to fail. You set a calendar reminder, you do the task, and you log it. The 20 minutes you spend on a quarterly inspection is worth far more than the emergency call at 10 PM when the dryer stops working before a family trip.
I also want to address a common myth: that professional cleaning is only for people with old homes or dirty habits. That is wrong. A brand-new home with a long duct run and a family that does daily laundry needs professional service just as much as an older property. The duct length and usage frequency matter more than the age of the home.
Combine your own regular checks with a professional annual visit from a qualified service like Airanddryerventcleaningavondale, and you will almost never face a true vent emergency again.
— Shaun
Airanddryerventcleaningavondale: professional vent cleaning for Avondale homeowners and businesses
Airanddryerventcleaningavondale provides professional dryer vent and air duct cleaning for residential and commercial clients across Avondale, AZ. The team handles everything from routine annual service to urgent blockage calls, with flexible scheduling that includes after-hours appointments.
Whether you need a professional dryer vent cleaning after an emergency or want to set up a maintenance plan that keeps your vents clear year-round, Airanddryerventcleaningavondale delivers thorough, warranted service. Commercial property owners can also request commercial air duct cleaning to meet safety standards and protect building occupants. Contact Airanddryerventcleaningavondale to schedule an inspection and get your vents back to full, safe operation.
FAQ
What are the warning signs of a blocked dryer vent?
Clothes taking more than one cycle to dry, a burning smell during operation, and a dryer that feels hot to the touch are the clearest signs of a blocked vent. The exterior vent cap not opening during a cycle is another reliable indicator.
How often should dryer vents be cleaned?
The NFPA recommends at least once per year for every household, with semi-annual cleaning for homes that do five or more loads of laundry per week.
Can I clean my dryer vent myself in an emergency?
Yes, if the duct is short, accessible, and exits through a side wall. Vacuum first, then brush in short sections. Call a professional if the duct is over 30 feet, exits through the roof, or shows signs of damage or mold.
Does the EPA recommend routine air duct cleaning?
The EPA does not recommend routine air duct cleaning without a specific reason such as visible mold, pest infestation, or confirmed blockage. Preventive steps like regular filter replacement and moisture control are the EPA's primary recommendations.
How long does an emergency vent cleaning take?
A straightforward DIY dryer vent cleaning on a short, accessible duct typically takes 30–60 minutes. Professional service on a longer or more complex system may take 1–2 hours depending on duct length and condition.