TL;DR:
- Duct leaks in Avondale homes cause significant energy waste, uneven temperatures, and poor indoor air quality. DIY detection methods include visual, hand-feel, and smoke tests, but professional testing and sealing ensure optimal results. SRP offers rebates up to $400 for certified duct repair and testing, improving efficiency and comfort.
If your Avondale home feels stuffy in one room and freezing in another, or your SRP bill keeps climbing despite running your AC constantly, duct leaks are likely the cause. Knowing how to detect duct leaks can save you hundreds of dollars a year and protect the air your family breathes. Leaky ducts in unconditioned spaces like attics cause serious energy waste and indoor air quality problems, and in Avondale's brutal summer heat, that adds up fast. This guide walks you through every step.
Table of Contents
- Understand why duct leaks matter in Avondale homes
- Prepare your home and tools before checking for duct leaks
- Step-by-step guide to detecting duct leaks yourself
- Verifying and documenting duct leaks for professional repair and rebates
- Why most DIY duct leak attempts miss hidden problems (and what experts do differently)
- Professional duct leak detection and repair services in Avondale, AZ
- Frequently asked questions
Key Takeaways
| Point | Details |
|---|---|
| Duct leaks waste energy | Leaky ducts in Avondale homes can waste up to 30% of conditioned air, raising energy bills significantly. |
| Visual and hand tests help | You can identify many duct leaks by visually inspecting and feeling for escaping air at duct joints. |
| Professional tests are more precise | Duct blaster testing measures leakage accurately and is required for rebates and thorough repairs. |
| Use proper sealants | UL-181 mastic and metal-backed foil tape last longer in hot attics than standard duct tape. |
| Certified local services assist | Hiring BPI-certified professionals ensures comprehensive leak detection and quality repairs in Avondale. |
Understand why duct leaks matter in Avondale homes
Duct leaks are not just a minor inefficiency. They are a direct tax on your comfort and your wallet. When conditioned air escapes through gaps in your ductwork before it reaches your living spaces, your HVAC system has to work harder and longer to compensate. In a climate like Avondale's, where temperatures regularly push past 110°F in summer, that extra strain is expensive.
Duct leaks waste up to 30% of conditioned air in the average home, which translates to 20 to 40% higher utility bills and uneven room temperatures throughout the house. That bedroom that never cools down? It is probably getting shorted by a leaking duct joint somewhere between the air handler and the register.
Beyond your energy bill, leaks pull in whatever air surrounds your ductwork. In most Avondale homes, ducts run through attics full of insulation fibers, dust, and potentially mold spores. That air gets sucked into your living spaces every time the system runs. Understanding how air ducts impact energy savings shows just how connected duct health is to your home's overall performance.
Here is what duct leaks actually do to your home:
- Higher energy bills from conditioned air escaping into attics, walls, or crawl spaces before reaching rooms
- Uneven temperatures where some rooms stay 5 to 10°F warmer or cooler than the thermostat setting
- Excessive dust accumulating around vents as leaky ducts pull attic air and debris into your living spaces
- Reduced air quality from airborne contaminants bypassing your filter and entering the supply stream
- HVAC system strain causing premature wear on your blower motor and compressor
Stat to know: Duct leaks waste up to 30% of conditioned air in Avondale homes, inflating cooling and heating costs by 20 to 40% annually.
Now that you know why leaks are costly in Avondale, let's prepare to detect them.
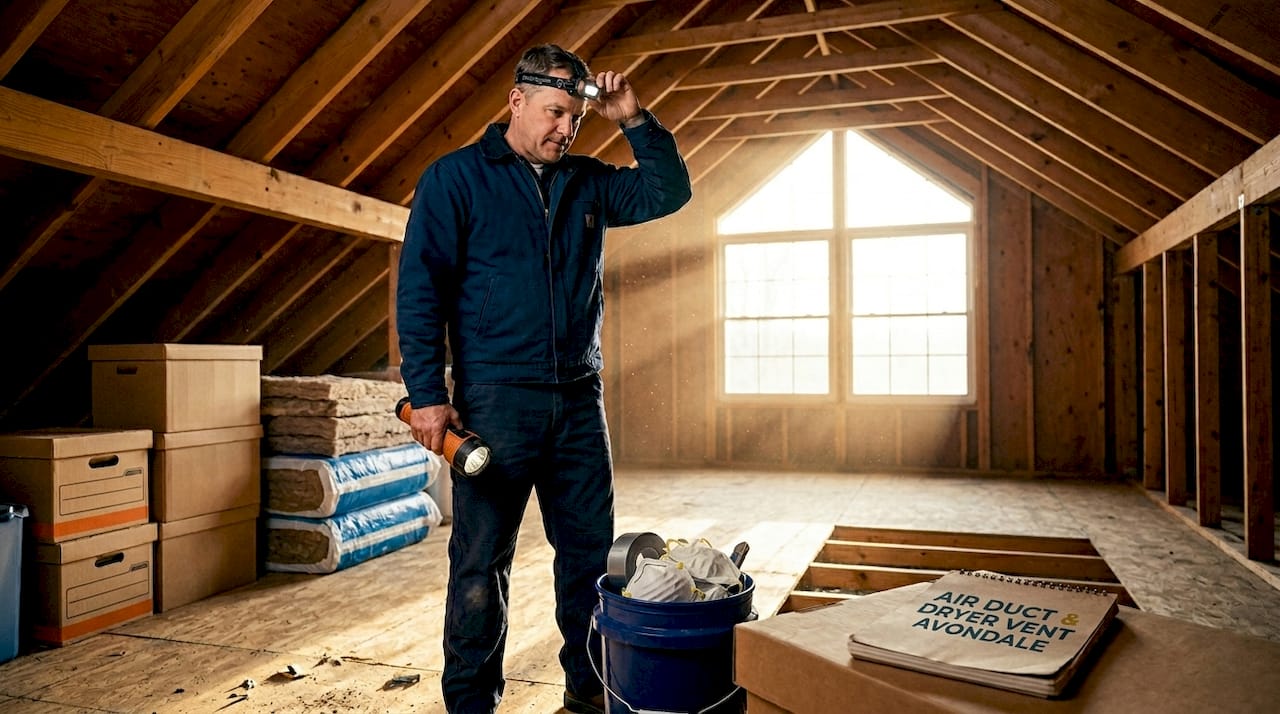
Prepare your home and tools before checking for duct leaks
Good preparation separates a productive inspection from a frustrating one. Rushing into your attic without the right gear is how people miss obvious leaks or end up with fiberglass insulation in their lungs. Take 20 minutes to set up before you start.
Tools and materials you need:
| Item | Purpose | Where to get it |
|---|---|---|
| Flashlight or headlamp | Illuminate dark attic and crawl space ducts | Hardware store |
| Smoke pen or incense stick | Visualize air movement at joints and seams | HVAC supply store |
| UL-181 mastic sealant | Permanent sealing of gaps and holes | Hardware store |
| Metal-backed foil tape | Reinforcing joints and seam repairs | HVAC supply store |
| Respirator mask (N95 minimum) | Protection from attic dust, insulation, and mold | Hardware store |
| Knee pads and gloves | Comfort and safety in tight attic spaces | Hardware store |
| Notepad or phone | Document locations of leaks found | Already have it |
A critical material note: use UL-181 mastic and metal-backed foil tape for any repairs you make. Standard duct tape from the hardware store fails within a year or two, especially in Avondale attics where summer temperatures regularly hit 150 to 160°F. Mastic holds up far longer under those conditions.
Before starting any inspection, take these preparation steps:
- Close all supply and return registers temporarily with tape or cardboard to create a more pressurized test environment
- Turn the HVAC fan to "on" (not "auto") so air circulates continuously during inspection
- Check that your air filter is not clogged, which can cause false pressure readings
- Inspect your duct insulation condition first, since torn or wet insulation often signals a leak underneath. Learn more about why you should inspect duct insulation to save on costs and protect air quality.
Pro Tip: Do your attic inspection in the early morning before 8 AM during summer. Attic temperatures climb to dangerous levels by mid-morning in Avondale, making a focused inspection both safer and more productive.
With preparations complete, let's dive into the actual duct leak detection steps.
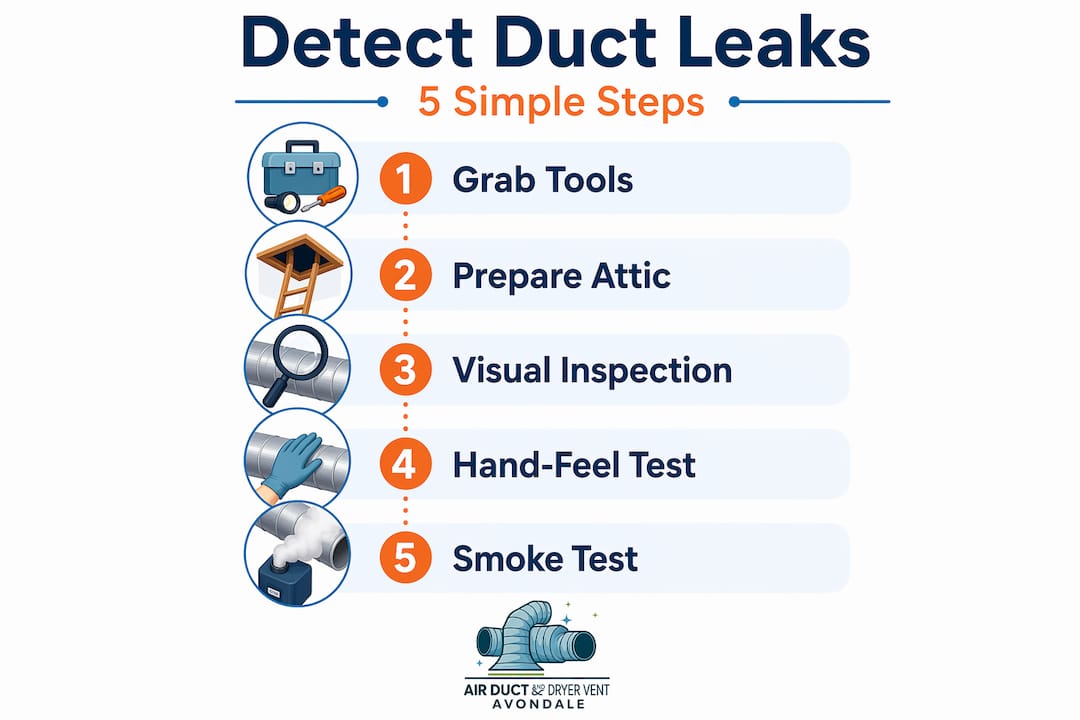
Step-by-step guide to detecting duct leaks yourself
DIY duct leak detection, done right, can identify a large portion of leaks in an accessible system. These methods work best on exposed ductwork in attics, garages, utility closets, and basements. Follow each step in order for the best results.
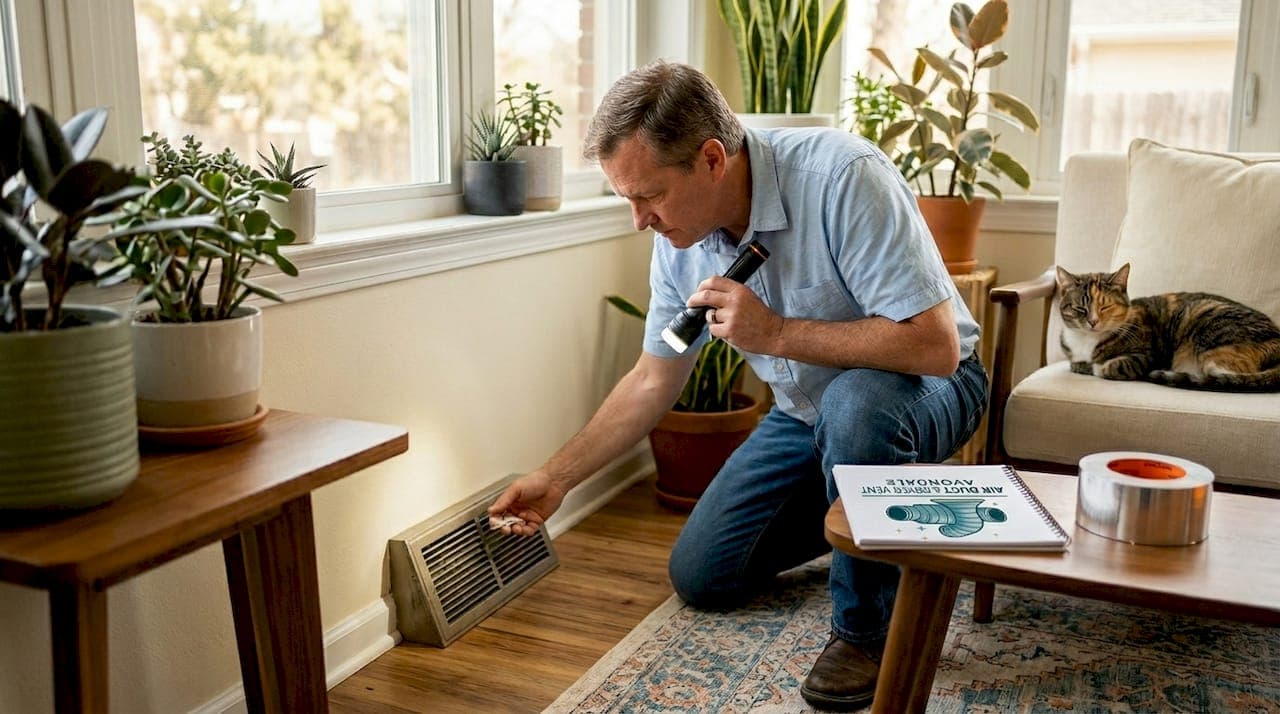
Visual inspection first
- Start at the air handler. Look at every connection point where ducts attach to the unit itself. This is where separation and gaps are most common.
- Follow each duct run. Move along the length of each duct, looking for torn insulation, missing tape, disconnected joints, or visible daylight through seams.
- Check all duct boots. These are the rectangular or round connectors where ducts meet registers in your floor, ceiling, or wall. Gaps here are extremely common and easy to miss.
- Look for discoloration. Dirty streaks or gray staining on insulation around joints signals air leakage pulling dust through gaps over months or years.
- Note any condensation. Wet spots or rust on metal ducts indicate air leaks where warm attic air is meeting cool duct surfaces.
The hand-feel test
With the HVAC fan running on "on" mode, slowly run your hand along every accessible duct joint, seam, and connection point. You are feeling for a slight pressure of air pushing against your palm. Even small leaks produce a noticeable puff of air. Visual inspections reveal gaps and tears, while hand tests detect air movement at 25 Pa pressure, which is roughly what your system generates during normal operation.
Pay close attention to:
- Elbow joints and T-connections, where duct sections change direction
- Where flex duct connects to metal collars, a common failure point
- Around dampers and zone control equipment
- At every register boot, pressing your hand around the perimeter of the boot where it meets drywall or flooring
The smoke test
This is the most revealing DIY method for detecting duct leaks visually. Light an incense stick or use a purpose-made smoke pen and hold it within an inch of a suspect joint or seam while the fan runs. Smoke disturbance tells the whole story. Smoke tests at joints and pressure pans show 1 to 25 Pa differentials indicating leaks, making even small gaps visible.
Watch for two patterns:
- Smoke pulled toward the duct surface means that point is under negative pressure, drawing air in (return duct leak)
- Smoke blown away from the duct means pressurized supply air is pushing out through a gap
| Detection method | Best for | Limitation |
|---|---|---|
| Visual inspection | Obvious tears, disconnected joints, damaged insulation | Misses leaks behind insulation |
| Hand-feel test | Supply duct pressure leaks at joints | Hard to feel small leaks |
| Smoke test | Mapping exact leak locations visually | Only works on accessible ducts |
| Flashlight only | Finding large gaps in dark spaces | Cannot detect airflow |
Pro Tip: After you complete a DIY duct cleaning, re-run your smoke test. Cleaning removes debris that sometimes masks small gaps, making them easier to find and seal properly.
After detecting leaks, here is how to confirm your findings and proceed.
Verifying and documenting duct leaks for professional repair and rebates
Once you have located suspected leaks, you need to go beyond guessing. Precise measurement tells you how serious the problem is, which repairs to prioritize, and whether you qualify for financial incentives available right here in the Phoenix metro area.
Duct blaster testing: The professional standard
A duct blaster is a calibrated fan and pressure gauge system that a certified technician connects to your duct system to pressurize it and measure how much air escapes. Duct blaster tests pressurize at 25 Pa, and scores under 4% leakage to outside are considered excellent. Any leakage above 10% increases fan power demand by 30%, meaning your blower motor works far harder than it should.
What duct blaster results tell you:
- Total leakage to outside, the number that matters most for energy loss
- Total system leakage, which includes leakage between conditioned and unconditioned spaces
- Pre- and post-repair comparison, so you can measure the actual improvement after sealing
- Baseline for rebate documentation, which SRP requires for approval
SRP rebates for Avondale homeowners
This is the part most homeowners do not know about. SRP offers rebates covering 75% of duct testing and repair costs with BPI-certified professionals using duct blaster tests, targeting under 5% leakage to outside. For a single-family home, that can cover up to $400 of the cost.
To qualify and document your project properly:
- Hire a BPI-certified contractor for both testing and repair work
- Get a pre-repair duct blaster reading and keep the printed report
- Photograph all repair locations before and after sealing
- Collect all invoices showing materials and labor costs
- Submit through SRP's portal within 90 days of completed work
| Leakage level | Performance rating | Energy impact |
|---|---|---|
| Under 4% to outside | Excellent | Minimal energy loss |
| 4 to 10% to outside | Acceptable | Moderate inefficiency |
| 10 to 20% to outside | Poor | 30%+ higher fan energy use |
| Over 20% to outside | Critical | Major comfort and cost problems |
Pro Tip: Even if you complete DIY repairs first, hiring a BPI-certified contractor for the post-repair test gives you official documentation proving the leakage level is now within code. That paperwork is valuable for rebates, home sales, and warranty claims.
Finally, consider expert perspectives to avoid common pitfalls and get the best results.
Why most DIY duct leak attempts miss hidden problems (and what experts do differently)
Here is something the average "how to detect duct leaks" article will not tell you: the leaks you can see and feel with your hands are rarely the worst ones. They are just the ones that happen to be accessible. In our experience working with Avondale homes, the leaks that drive the biggest energy losses are the ones nobody looks for.
70% of duct leaks are hidden in walls requiring camera inspection to locate. Poor sealing around furnace backs causes roughly 30% of total system failures. No smoke pen or hand test finds those. You would need a camera-equipped inspection system and proper pressure diagnostics to even know they exist.
The second problem is sealant choice. Homeowners who take initiative and seal the joints they find often grab whatever tape is in the garage. Standard duct tape fails within 1 to 2 years in attics reaching 200°F. You seal the joint, feel good about it, and two Arizona summers later it has peeled off completely. UL-181 rated mastic, applied after cleaning the duct surface of dust and debris, is what actually holds.
The third thing professionals do differently is pressure correction. When a technician performs a duct blaster test, they account for the difference in pressure between your house and the outside air. That correction changes the leakage calculation significantly. Without it, you might think your system is tighter than it really is, or miss that a large percentage of your supply air is escaping into your attic.
There is also the matter of sequence. Cleaning your ducts before sealing them is not optional if you want lasting results. Mastic does not adhere well to dusty metal. We always clean first, then seal. It is the same reason a painter primes a surface before coating it. The benefits of professional duct repairs go well beyond just plugging holes. They include restoring airflow balance, reducing contamination, and extending the life of your HVAC equipment.
DIY inspection is genuinely worth doing. It finds accessible leaks, saves you money, and teaches you your own system. But treat it as the first phase of a two-phase process, not the whole answer.
Professional duct leak detection and repair services in Avondale, AZ
If your inspection turns up leaks, or you just want certainty before your system runs hard all summer, our team at Air Duct and Dryer Vent Cleaning Avondale is ready to help. We work specifically with Avondale homeowners to find, document, and fix duct leaks using industry-grade materials and certified testing methods.
We handle everything from air vent cleaning services to full air duct repair and replacement, using UL-181 mastic and metal-backed tape that holds up through Avondale's extreme summer heat. We also provide indoor air quality testing to confirm your home's air is clean after repairs are complete. For homeowners looking to take advantage of SRP rebates, we can help with the documentation and paperwork too. Call us to schedule a duct inspection and start saving on your energy bills this season.
Frequently asked questions
What are the easiest signs that my ducts are leaking?
Look for uneven room temperatures, higher-than-normal energy bills, and excessive dust buildup around vents as common signs of duct leaks. High utility bills increasing 20 to 40%, rooms differing by 5 to 10°F from the thermostat, and dusty registers all point to a leaking duct system.
Can I detect all duct leaks myself without professional tools?
No. While you can identify obvious leaks visually or by hand-feel, many leaks inside walls require professional testing to find accurately. 70% of leaks are hidden in walls and require camera inspection and BPI-certified duct blaster tests to locate and measure.
How do duct blaster tests help in detecting leaks?
Duct blaster tests pressurize the duct system to measure exactly how much air escapes at a set pressure, giving you a precise leakage rate. Duct blaster tests measure CFM leakage at 25 Pa pressure, and scores under 4% leakage to outside indicate a tight, efficient system.
Are there rebates available in Avondale for duct leak testing and repair?
Yes. SRP rebates cover 75% of duct testing and repair costs up to $400 for single-family homes, provided you use a BPI-certified contractor and meet the post-repair leakage targets.