
TL;DR:
- Most air vent issues, like noise, weak airflow, and blockages, are fixable without professional help through systematic inspection and cleaning. Addressing loose hardware, cleaning dust buildup, matching filter ratings, and ensuring return grilles are open typically resolve common problems, but persistent issues may require expert assessment. Regular maintenance, including filter replacement and duct inspections, prevents future vent problems and keeps HVAC systems running efficiently.
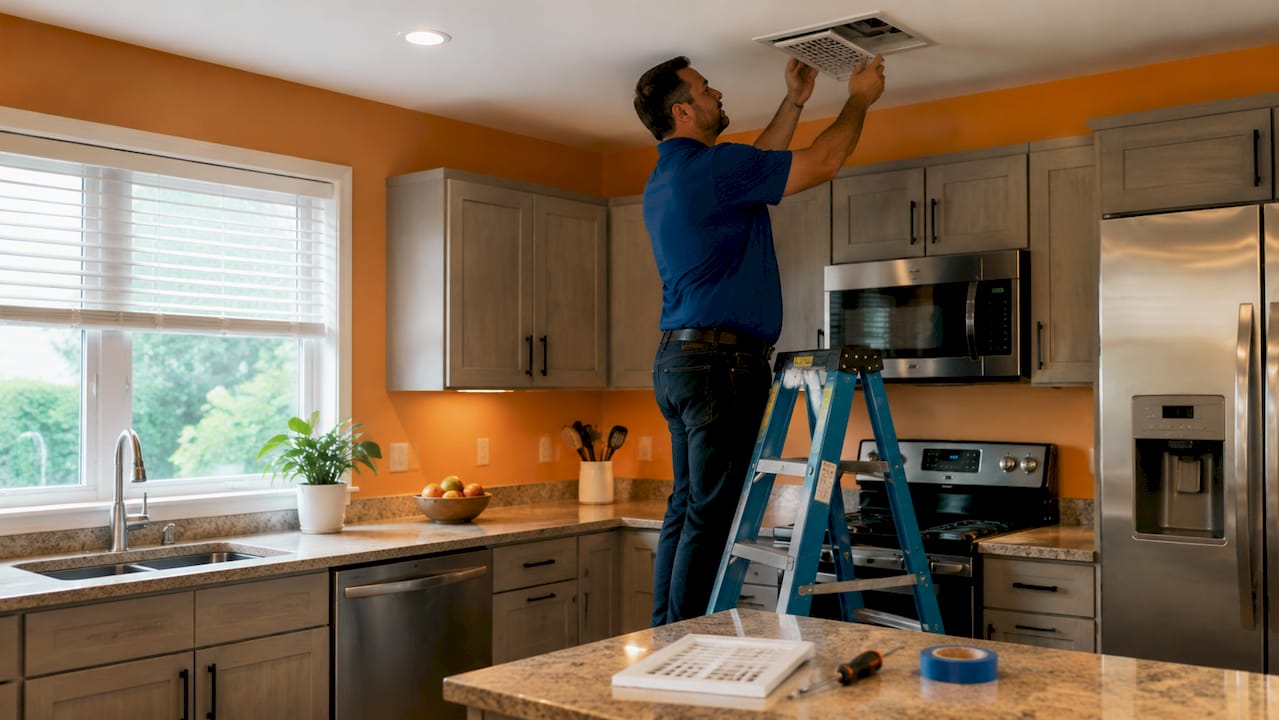
Most air vent problems, including noisy registers, weak airflow, and blocked ducts, are fixable without calling a technician. Knowing how to fix air vent issues starts with a systematic inspection of your HVAC system's supply vents, return grilles, filters, and accessible ductwork. The tools you need are basic: a Phillips screwdriver, a vacuum with a hose attachment, HVAC foil tape, and a stiff-bristle brush. Before touching any vent or duct component, always turn off your HVAC system at the thermostat. This protects both you and the equipment. The sections below walk through every common problem, from rattling covers to frozen coils, with clear steps you can act on today.
How to fix air vent issues: diagnosing and stopping noisy vents
Noisy vents are one of the most reported HVAC complaints, and the cause is almost always one of two things: loose hardware or high static pressure inside the duct system. High duct static pressure creates whistling sounds when air is forced through a restricted opening. Rattling, on the other hand, usually means a screw is loose or the vent cover is vibrating against the wall or floor.
Step-by-step fix for rattling and whistling registers
- Turn off your HVAC system at the thermostat before doing anything else.
- Remove the vent cover using a Phillips screwdriver. Most residential registers use two screws at opposite corners.
- Inspect the mounting screws and the bracket that holds the cover to the duct collar. Tighten any loose screws firmly but without overtightening, which can crack plastic covers.
- Check the duct collar itself. If it wobbles or feels loose inside the wall or floor opening, wrap HVAC foil tape around the collar edge to secure it.
- Look inside the duct opening with a flashlight. Dust buildup on the duct walls near the register creates turbulence that amplifies noise.
- Vacuum the duct opening using a hose extension, then wash the vent cover in warm soapy water. Dry it completely before reinstalling.
- Reinstall the cover, turn the system back on, and listen for changes.
Pro Tip: Never spray cleaning chemicals directly into an open duct. Residue coats the duct interior and attracts more dust, making the problem worse over time.
If whistling persists after tightening and cleaning, the issue is likely blocked return grilles creating excess pressure throughout the system. Walk the space and confirm every return air grille is fully open and has at least 6 inches of clearance from furniture, curtains, or storage boxes. Closing off supply vents in unused rooms also raises static pressure and is a common mistake homeowners make thinking it saves energy. It does the opposite.
When noise continues despite all of the above, the duct itself may be undersized or kinked. That requires a professional assessment.

Why are your vents producing weak or no airflow?
Weak airflow is the most common air duct problem, and simple DIY checks fix the majority of cases without any professional intervention. The cause is almost always one of four things: a clogged filter, a closed or blocked vent, a kinked flexible duct, or a frozen evaporator coil.
Systematic troubleshooting steps for low airflow
- Check every supply vent in the space. Confirm the damper lever on each register is fully open. A partially closed damper cuts airflow dramatically even when the system runs normally.
- Inspect every return air grille. Blocked return grilles reduce blower efficiency and create pressure imbalances that starve certain rooms of conditioned air.
- Pull out the air filter and hold it up to a light source. If you cannot see light through it, replace it immediately. A clogged filter is the single most common cause of weak airflow across the entire system.
- Check accessible flexible ductwork in the attic, crawlspace, or mechanical room. Kinked flex ducts at sharp 90-degree bends can reduce airflow volume by up to 40%. Straighten any kinks and support sagging sections with duct straps.
- Seal minor duct leaks with HVAC foil tape. Press the tape firmly over any visible gaps at duct joints. Do not use standard household duct tape, which dries out and fails within months.
- If airflow is weak only from the cooling system, check the indoor air handler for ice buildup on the evaporator coil. A frozen coil blocks airflow completely.
Pro Tip: To safely thaw a frozen evaporator coil, turn off cooling mode and run the fan only for about an hour. Once thawed, switch back to cooling and monitor. If the coil freezes again within 24 hours, you likely have a refrigerant or metering device issue that requires a licensed technician.
Filter ratings and airflow balance
Choosing the right filter matters as much as replacing it on schedule. The table below shows how MERV ratings affect both air quality and airflow performance.
| MERV rating | What it captures | Airflow impact | Best for |
|---|---|---|---|
| MERV 8 | Dust, pollen, mold spores | Minimal restriction | Most standard residential systems |
| MERV 11 | Pet dander, fine dust | Moderate restriction | Homes with pets or mild allergies |
| MERV 13 | Bacteria, smoke, fine particles | Higher restriction | Systems with compatible high-static blowers |
| MERV 16+ | Virus-sized particles | Significant restriction | Commercial HVAC with engineered airflow |
MERV 13 filters require a blower motor capable of overcoming the added resistance. Installing a MERV 13 in a system designed for MERV 8 will reduce airflow and can trigger the exact weak-vent symptoms you are trying to fix. Check your system's documentation or consult an HVAC professional before upgrading filter ratings. For guidance on matching filters to your specific system, the HVAC filter selection guide from Xtreme Air Services breaks down the options clearly.
If the blower motor does not start at all despite the thermostat calling for operation, the problem may be electrical. Blower motor failures and faulty circuit boards require professional diagnosis. Do not attempt to bypass electrical components yourself.
How to repair or replace damaged vent covers and registers
Bent louvers, cracked plastic frames, and broken damper levers are cosmetic problems that also affect airflow direction and volume. Replacing a damaged register is a straightforward repair that costs between $5 and $30 per unit at most hardware stores.
Before purchasing a replacement, measure the duct opening, not the old cover. Duct openings are the standard sizing dimension. A 4x10-inch duct opening takes a 4x10 register regardless of how large the old cover's faceplate was. Getting this measurement wrong is the most common mistake when replacing floor or wall registers.
Here is what the full replacement process looks like:
- Turn off the HVAC system and remove the old cover with a screwdriver.
- Vacuum debris from inside the duct opening before installing the new cover. Loose debris pulled into the system during operation creates noise and reduces air quality.
- Inspect the duct collar. If it moves or feels loose, wrap HVAC foil tape around the collar-to-duct connection to stabilize it.
- Set the new register in place and confirm the damper lever moves freely between open and closed positions.
- Secure the cover with screws and turn the system back on.
- Hold a tissue or thin piece of paper near the vent. It should flutter steadily when the damper is open. Weak or no movement after replacing the cover points to an upstream duct or blower issue, not the register itself.
If airflow remains weak after a clean register replacement, the problem lives deeper in the duct system. At that point, a professional duct inspection is the right next step rather than more DIY guesswork.
Preventative maintenance to avoid future vent problems
The most cost-effective way to avoid air vent repairs is a consistent maintenance schedule. Most vent and duct problems develop gradually over months, which means early inspection catches them before they affect comfort or air quality.
Follow these maintenance practices to keep your system running cleanly:
- Replace filters on schedule. In a standard home without pets, replace filters every 90 days. Homes with pets, smokers, or allergy sufferers should replace every 30 to 45 days. A clogged filter is the root cause of more vent problems than any other single factor.
- Clean vent covers twice a year. Remove covers, wash them in warm soapy water, and vacuum the duct opening before reinstalling. This routine vent cleaning prevents dust buildup from restricting airflow or creating noise.
- Inspect outdoor vent exteriors seasonally. Leaves, bird nests, and debris block exhaust and intake vents on the building exterior. Use a brush and a shop vacuum with a hose extension to clear any obstruction. Check these vents every spring and fall.
- Keep return grilles clear year-round. Furniture rearrangements often accidentally block return air grilles. Walk your space every few months and confirm all returns have open clearance.
- Check flexible duct runs annually. In attics and crawlspaces, flex duct can sag, kink, or separate at joints over time. A visual inspection once a year catches these issues before they cause noticeable airflow loss.
Pro Tip: When selecting a replacement filter, check your air handler's manual for the maximum MERV rating the system supports. Installing a higher-rated filter than your blower can handle creates the same weak-airflow symptoms as a clogged filter.
When to schedule professional duct cleaning
The EPA recommends professional duct cleaning specifically when there is visible mold growth, confirmed pest infestation inside ducts, or heavy debris release into living spaces. Routine annual cleaning is not universally necessary for every home. However, after major renovations, after purchasing an older property, or when occupants experience persistent allergy symptoms despite filter changes, professional cleaning delivers measurable results. Qualified technicians use vacuum systems with HEPA filtration or outdoor exhaust to prevent contaminated air from recirculating during the cleaning process.
The comparison below helps you decide between DIY maintenance and professional service.
| Situation | DIY sufficient? | Professional recommended? |
|---|---|---|
| Dusty vent covers | Yes | No |
| Weak airflow after filter change | Yes, check ducts first | If duct issue found |
| Visible mold inside ducts | No | Yes, immediately |
| Post-renovation debris in system | No | Yes |
| Persistent allergy symptoms | Partial, change filter | Yes, full cleaning |
| Noisy vents after tightening | Partial, check returns | If noise persists |
For a deeper look at what you can handle yourself versus when to bring in a pro, the DIY duct cleaning guide from Airanddryerventcleaningavondale covers the decision clearly.
Key takeaways
Fixing air vent issues requires working through a clear sequence: open all vents, replace the filter, clean registers, inspect flex ducts, and address frozen coils before assuming a mechanical failure.
| Point | Details |
|---|---|
| Start with the filter | A clogged filter causes more vent problems than any other single factor. |
| Check returns, not just supply vents | Blocked return grilles raise static pressure and cause both noise and weak airflow. |
| Use HVAC foil tape for minor leaks | Standard duct tape fails within months. Foil tape is the correct material for sealing duct joints. |
| Match filter MERV rating to your system | A filter rated higher than your blower supports will restrict airflow just like a clogged filter. |
| Call a pro for mold, refrigerant, or electrical issues | These three categories require licensed technicians. DIY attempts create safety and liability risks. |
What I've learned after years of watching homeowners troubleshoot vents
Most homeowners I talk to make the same mistake: they go straight to the supply vents and ignore the return side of the system entirely. The return grilles are where the air comes back to the blower to be reconditioned. When those are blocked, the whole system starves. I have seen cases where simply moving a couch six inches away from a return grille solved a noise problem that had been blamed on the ductwork for two years.
The second pattern I see constantly is people installing MERV 13 filters because they read that higher is better for air quality. That is true in isolation. But if your air handler was designed for a MERV 8 environment, you have just created an artificial blockage. The blower works harder, the coil runs colder, and within a few weeks you are back to weak airflow and wondering what went wrong.
My honest advice: work through the simple fixes first and in order. Open every vent. Replace the filter with the correct rating. Clean the covers. Check the flex duct runs. Only after all of that should you consider calling anyone. In my experience, that sequence resolves the problem the majority of the time without spending a dollar on service calls.
That said, there are three situations where I tell people to stop and call a professional immediately: visible mold inside a duct, a coil that keeps freezing after thawing, and any situation involving the blower motor or electrical components. Refrigerant handling is federally regulated and requires certification. Electrical work inside an air handler carries real shock risk. Those are not DIY territory, and no article should tell you otherwise.
— Shaun
Professional air vent and duct services in Avondale, AZ
When DIY fixes do not resolve the problem, or when you find mold, heavy debris, or persistent airflow loss, Airanddryerventcleaningavondale provides professional air vent and duct cleaning for residential and commercial properties throughout Avondale, Arizona. Services include full duct cleaning with HEPA-grade equipment, duct sealing and repair, dryer vent cleaning, air quality testing, and HVAC filter replacement. For business owners managing larger HVAC systems, the commercial duct cleaning service covers multi-zone systems with flexible scheduling including after-hours appointments. Every job comes with a quality guarantee and transparent pricing. Contact Airanddryerventcleaningavondale to schedule an inspection and get your system performing at full capacity.
FAQ
What causes whistling sounds from air vents?
Whistling from air vents is caused by high static pressure inside the duct system, usually from blocked return grilles, closed supply vents, or undersized ducts. Opening all vents and clearing obstructions from return grilles resolves the noise in most cases.
How often should I replace my HVAC air filter?
Replace your filter every 90 days in a standard home, or every 30 to 45 days if you have pets, smokers, or allergy sufferers in the household. A clogged filter is the leading cause of weak airflow and increased vent noise.
Can I fix a frozen evaporator coil myself?
You can thaw a frozen coil by switching the system to fan-only mode for about an hour with cooling turned off. If the coil freezes again after thawing, the cause is likely a refrigerant leak or metering device failure, both of which require a licensed HVAC technician.
When does duct cleaning require a professional?
The EPA recommends professional duct cleaning when there is visible mold growth inside ducts, confirmed pest infestation, or heavy debris actively releasing particles into living spaces. Routine dusty vents do not require professional cleaning and can be maintained with regular filter changes and cover washing.
Why is airflow weak in one room but fine in others?
Uneven airflow between rooms usually points to a kinked or disconnected flex duct serving that specific zone, a closed damper on the register, or a duct that is undersized for the room's load. Inspect the flex duct run to that room first, then confirm the register damper is fully open.