
TL;DR:
- HVAC air balance testing measures and adjusts airflow to match design specifications, improving energy efficiency and air quality. Proper testing involves calibrated instruments, following a specific sequence, and verifying building pressurization for accurate results. Regular rebalancing and duct cleaning help maintain system performance and occupant comfort over time.
HVAC air balance testing is the process of measuring and adjusting airflow in heating, ventilation, and air conditioning systems to match design specifications. The industry term for this work is Testing, Adjusting, and Balancing, or TAB. Standards like ASHRAE 111 and NEBB govern how TAB procedures are performed and documented. When your system is properly balanced, every room gets the right amount of conditioned air, your energy bills drop, and your indoor air quality improves. This guide walks you through what air balancing requires, how it is done, and how to keep your system performing well after testing.
What does an HVAC air balance testing guide cover?
Air balancing is not about sending equal air to every vent. The goal is to match each room's specific heating and cooling load. A bedroom with a south-facing window needs more cooling capacity than a north-facing hallway. Balancing meets room-specific load demands, not just equal distribution. That distinction matters because homeowners who assume equal airflow is the goal often miss the real problem.
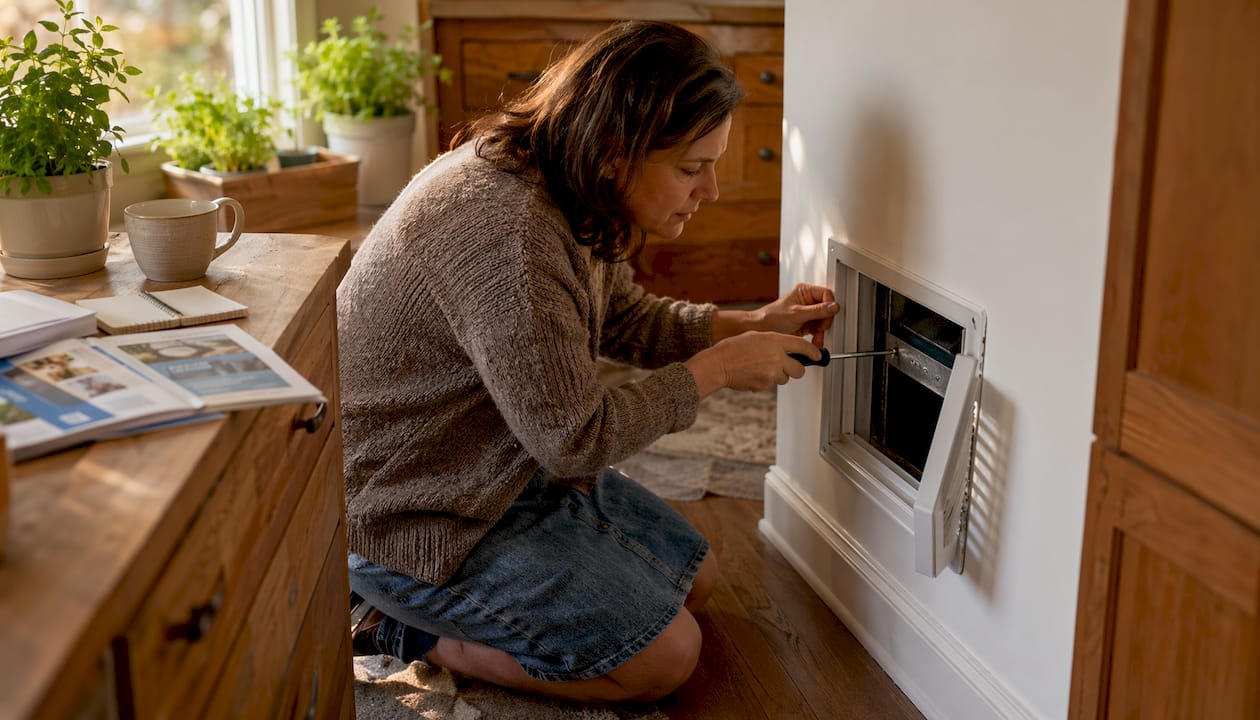
TAB also confirms that your equipment runs at the conditions it was designed for. When static pressure is off, fans work harder than they should, components wear out faster, and energy costs climb. TAB validates design conditions to prevent premature equipment failure and excessive energy use. Think of it as a performance verification for your entire air distribution system.
The accepted tolerance for a balanced system is tight. Measured airflow at each terminal device must fall within ±10% of the design airflow. Total fan airflow must also stay within ±10% of the design supply airflow. That standard applies to both residential and commercial systems.
What do you need before starting HVAC airflow testing?
Preparation separates a reliable test from a wasted afternoon. Gather these items before any measurements begin.
Required documents:
- Original HVAC design drawings and equipment schedules
- Manufacturer specifications for fans, coils, and terminal units
- Any previous TAB reports if the system has been tested before
- Building permits or commissioning records for new construction
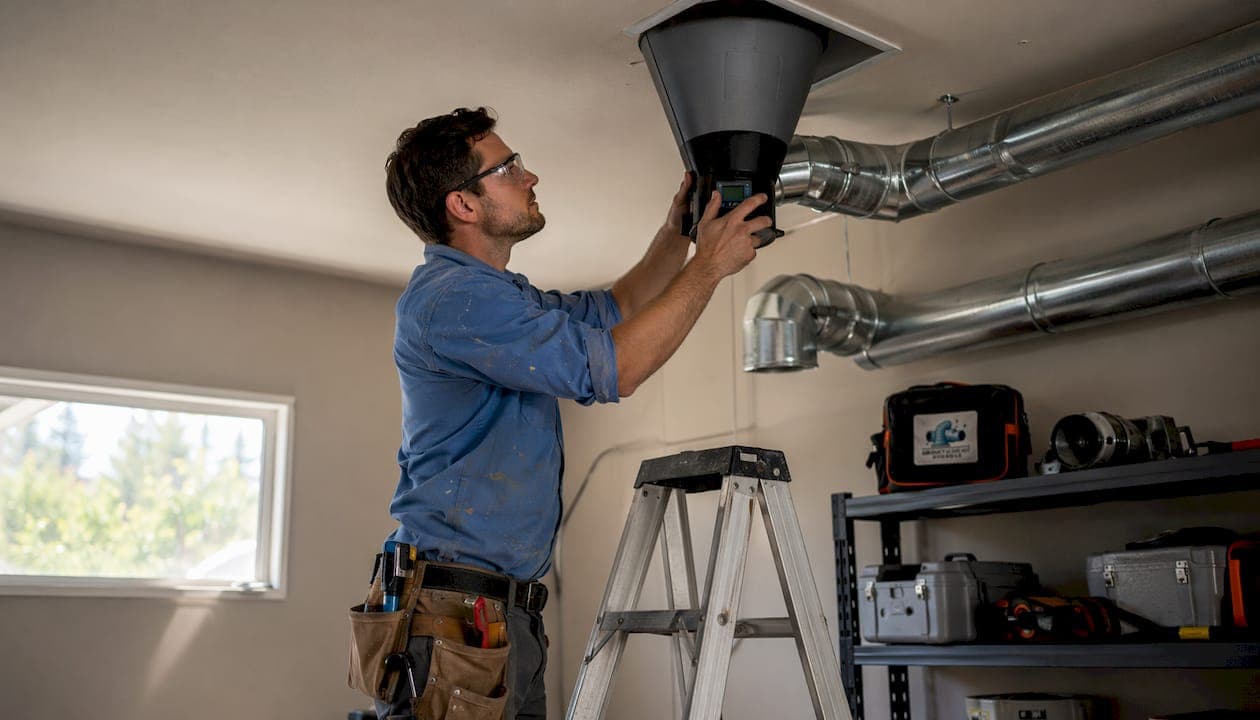
Tools for air flow measurement:
| Tool | Purpose | Accuracy standard |
|---|---|---|
| Flow hood (capture hood) | Measures airflow at supply and return grilles | ±3% with calibration certificate |
| Pitot tube with manometer | Measures velocity pressure in ductwork | Traceable to national standards |
| Tachometer | Measures fan RPM | Calibrated before each use |
| Digital manometer | Reads static pressure differentials | Calibrated before each use |
Flow hood accuracy is ±3%, and every hood must carry a current calibration certificate to produce a valid certified report. Using an uncertified instrument means your results cannot be trusted or submitted for commissioning.
Pre-test checklist:
- All ductwork connections are secure and visible leaks are sealed
- Filters are clean and properly seated
- Dampers move freely and are set to the fully open position
- The building is in its normal occupied state with doors and windows closed
- The HVAC system has been running for at least 30 minutes to reach steady state
Pro Tip: Before touching any damper, photograph its current position. If you need to troubleshoot later, you will know exactly where you started.
Instrument calibration certificates must be current and traceable to national standards for certified TAB reports to be valid. A technician who skips this step produces data that no engineer or building owner can rely on.
How do you perform HVAC air balance testing step by step?
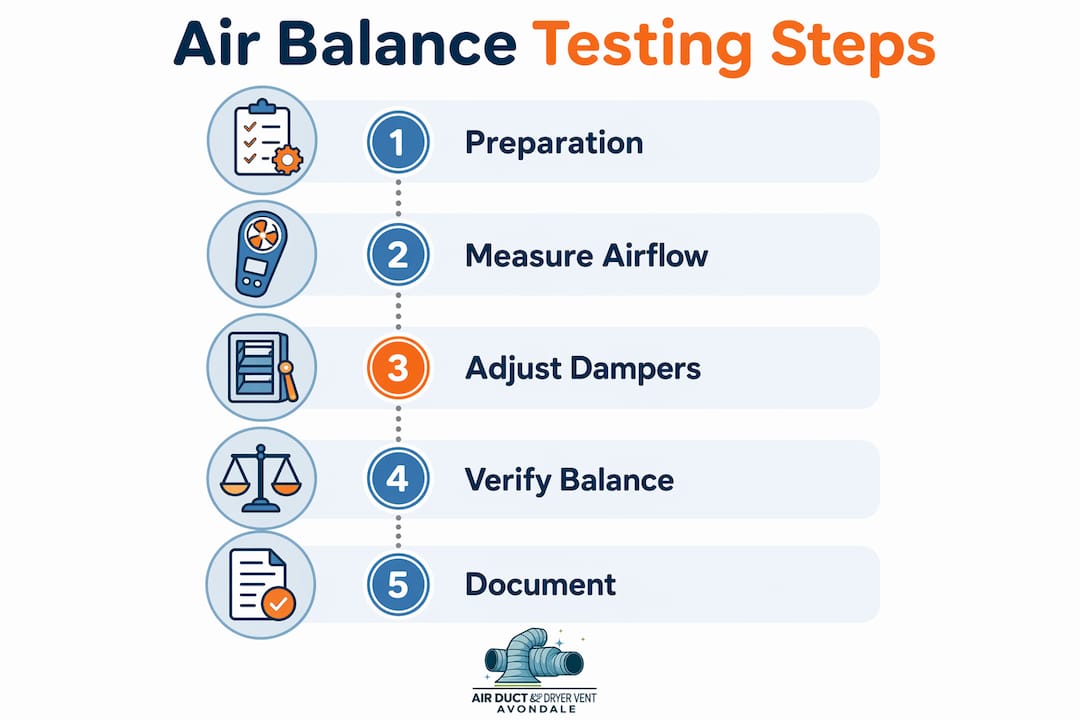
The TAB procedure follows a specific sequence. Skipping steps or working out of order produces unreliable results.
-
Measure total system airflow. Insert a pitot tube into the main supply duct and traverse the cross-section to calculate average velocity pressure. Convert that reading to cubic feet per minute (CFM) using the duct area. Compare the result to the design total supply airflow.
-
Adjust fan speed to match design airflow. If total airflow is low or high, adjust the fan drive or variable frequency drive (VFD) settings until the measured total falls within ±10% of the design value. Do not adjust individual dampers until total airflow is correct.
-
Identify the index circuit. The index circuit is the branch with the highest resistance to airflow, typically the longest or most restrictive run. Proportional balancing leaves this circuit's damper fully open as the reference point. All other dampers are throttled relative to it.
-
Take initial readings at all terminal devices. Use a calibrated flow hood at every supply and return grille. Record each reading alongside the design value. Calculate the ratio of measured to design airflow for every outlet.
-
Perform proportional damper adjustments. Starting with the terminal device showing the highest ratio, throttle its damper until its ratio matches the index circuit's ratio. Work through all devices systematically. This method preserves the proportional relationship between outlets as you adjust.
-
Re-measure after adjustments. Once all dampers are set, take a second round of measurements at every terminal device. Confirm that each reading falls within ±10% of design airflow.
-
Verify outdoor air intake. Measure airflow at the outdoor air damper and confirm it meets the design minimum for ventilation. Insufficient outdoor air causes indoor air quality problems regardless of how well the rest of the system is balanced.
-
Confirm building pressurization. Use a digital manometer to measure differential pressure between zones and between the building interior and exterior. Differential pressure testing confirms pressurization and controls air leakage, cross-contamination, and energy loss. A positive pressure in the main occupied zone prevents unconditioned air from infiltrating through gaps in the building envelope.
-
Document all "as-left" measurements. Record every final reading in a formatted TAB report. Include instrument serial numbers, calibration dates, design values, measured values, and percent deviation. This report becomes the baseline for all future HVAC performance evaluation.
Pro Tip: If a terminal device consistently reads low after multiple adjustments, check for a disconnected flex duct or a collapsed liner before blaming the damper. Physical obstructions cause more low-flow problems than damper settings.
| Step | Action | Acceptance criterion |
|---|---|---|
| Total airflow | Pitot tube traverse in main duct | Within ±10% of design CFM |
| Fan speed | Adjust VFD or drive | Total airflow at design value |
| Terminal devices | Flow hood at each grille | Each outlet within ±10% of design |
| Outdoor air | Flow hood at OA damper | Meets design minimum CFM |
| Pressurization | Differential manometer | Positive pressure in occupied zones |
What are the most common mistakes in air balance testing?
The biggest misconception in HVAC airflow testing is that all vents should deliver the same volume of air. They should not. Each outlet is sized for the specific load of the space it serves. Throttling a large bedroom's supply down to match a small bathroom creates comfort problems and wastes the system's capacity.
Duct debris is a silent saboteur. Duct contamination alters system resistance and invalidates prior balancing without cleaning. Dust buildup inside ducts changes friction losses, which shifts airflow away from design conditions even if dampers have not moved. A system balanced two years ago with dirty ducts is no longer balanced today. Reviewing a home air quality mold testing checklist before testing can reveal contamination issues that would otherwise skew your results.
Instrument drift is another underappreciated problem. BMS flow transducer calibration drifts over years, meaning readings from building automation systems cannot substitute for physical measurements with calibrated instruments. Property managers who rely on BAS screen values instead of field measurements often discover their system is further out of balance than the controls suggest.
Airflow numbers alone don't guarantee system performance. Building pressurization must also be confirmed. A system that passes airflow testing but fails pressurization verification still allows unconditioned air infiltration, cross-contamination between zones, and energy losses that no amount of damper adjustment will fix.
Pressure imbalances between zones are easy to overlook because they are invisible. A room that is slightly negative relative to adjacent spaces will pull air through wall gaps, door frames, and ceiling penetrations. That infiltration carries dust, allergens, and humidity, all of which degrade indoor air quality and make the system work harder.
How do you maintain HVAC air balance after testing?
A balanced system does not stay balanced forever. Dampers loosen, ducts develop leaks, filters get dirty, and building use patterns change. Maintenance is what preserves the investment you made in testing.
Maintenance schedule:
- Schedule a full rebalancing every 3–5 years. Periodic rebalancing every 3 to 5 years is recommended because duct leakage and damper looseness accumulate over time.
- Replace filters on the manufacturer's schedule, typically every 1–3 months for residential systems. A clogged filter raises static pressure and shifts airflow away from design conditions.
- Inspect damper positions annually. A damper that has slipped from its set position throws off the proportional balance you established during testing.
- Clean ducts when contamination is visible or when airflow readings drift more than 15% from the last certified report. Duct debris causes friction changes that affect balance accuracy over time.
- Monitor comfort complaints by zone. A room that suddenly feels stuffy or drafty is often the first sign that balance has shifted.
When to call a professional versus doing it yourself:
DIY maintenance covers filter changes, visual duct inspections, and basic comfort monitoring. Anything involving damper adjustments, fan speed changes, or certified documentation requires a credentialed TAB technician. Property managers should keep the original TAB report on file and provide it to any technician performing future work. That baseline document cuts diagnostic time significantly.
Pro Tip: After any renovation that adds, removes, or relocates a supply or return grille, schedule a rebalancing. Even a single new outlet changes the system's resistance profile and can pull airflow away from other zones.
Proper documentation also protects you. A certified TAB report with deficiency notes creates a paper trail that supports warranty claims, lease negotiations, and building sale disclosures. Treat it like a service record for your HVAC system.
For homeowners who want to understand the broader picture, learning about HVAC airflow and energy savings shows how balance connects directly to monthly utility costs.
Key Takeaways
Proper HVAC air balance testing requires meeting the ±10% tolerance standard at every terminal device, using calibrated instruments, and verifying building pressurization alongside airflow measurements.
| Point | Details |
|---|---|
| Tolerance standard | Every terminal device must measure within ±10% of its design airflow value. |
| Instrument calibration | Flow hoods and manometers need current certificates traceable to national standards. |
| Proportional balancing | Leave the index circuit fully open and throttle all other dampers relative to it. |
| Pressurization check | Confirm positive differential pressure in occupied zones, not just airflow numbers. |
| Rebalancing schedule | Plan a full TAB rebalancing every 3–5 years to account for duct leakage and damper drift. |
What I've learned from years of watching HVAC systems fall out of balance
Most homeowners call for help when a room is uncomfortable. By that point, the system has usually been out of balance for months or years. The discomfort is the last symptom, not the first. What I have seen consistently is that the systems causing the most complaints are the ones that were never properly commissioned in the first place, or were balanced once and then forgotten.
The property managers who get the best long-term results treat TAB as a scheduled maintenance item, not a one-time event. They keep their original report, schedule rebalancing after any renovation, and clean their ducts before testing rather than after. That sequence matters. Testing a dirty system produces numbers that reflect the contamination, not the system's true capability.
The other thing I would tell any homeowner is this: do not let a contractor tell you that equal airflow at every vent is the goal. That advice is wrong and it leads to systems that are technically "adjusted" but still uncomfortable. The right goal is design airflow at every terminal device, which means some rooms get more and some get less, exactly as the engineer intended.
Investing in a proper TAB procedure pays back in lower energy bills, longer equipment life, and better air quality. It is preventive maintenance, not a luxury. The role of air balancing in home HVAC systems is one of the most underappreciated factors in residential comfort, and getting it right from the start saves real money over the life of the system.
— Shaun
How Airanddryerventcleaningavondale supports your HVAC balance goals
Clean ducts are the foundation of accurate air balance testing. Debris inside your ductwork changes airflow resistance and throws off any measurements taken before cleaning.
Airanddryerventcleaningavondale provides professional air duct and vent cleaning for residential and commercial properties in Avondale, Arizona. Cleaning before a TAB procedure gives your technician a clean baseline and produces results that actually reflect your system's design performance. The team also offers indoor air quality testing to identify contaminants that affect both comfort and health. Flexible scheduling, including after-hours appointments, makes it straightforward to fit service into your calendar without disrupting your day.
FAQ
What is air balancing in an HVAC system?
Air balancing is the process of adjusting airflow at each supply and return outlet to match the design specifications for every room. The goal is room-specific load matching, not equal airflow at every vent.
How often should HVAC air balance testing be done?
A full rebalancing is recommended every 3–5 years, or sooner after any renovation that changes the duct layout or adds new outlets.
What tools are used in HVAC airflow testing?
The core tools are a calibrated flow hood for grille measurements, a pitot tube with manometer for duct traverses, a tachometer for fan RPM, and a digital manometer for pressure differentials. All instruments must carry current calibration certificates.
Can dirty ducts affect air balance test results?
Yes. Duct contamination increases friction resistance and shifts airflow away from design conditions. Testing a dirty system produces inaccurate results that do not reflect the system's true performance.
What is the accepted tolerance for a balanced HVAC system?
Each terminal device must measure within ±10% of its design airflow, and total fan airflow must also fall within ±10% of the design supply airflow.