
TL;DR:
- Turning off your HVAC and vacuuming vents quickly reduces visible dust and improves air quality. If the white-paper test shows debris or you notice musty smells, professional cleaning is recommended to resolve deeper system issues.
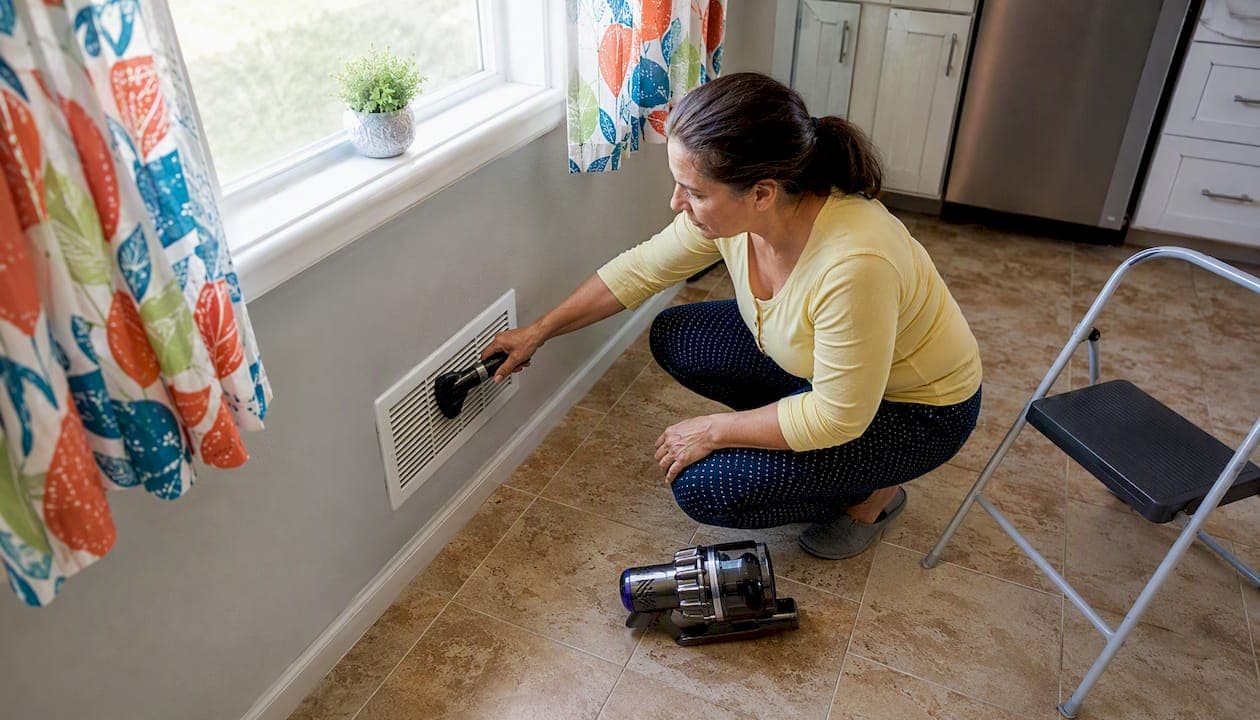
The fastest way to cut visible dust at your vents right now: turn off your HVAC, vacuum the vent face for 10 seconds, wipe the register with a dry microfiber cloth, and swap in a fresh filter if yours looks gray. Then run the white-paper test: hold a white paper towel over a running vent for 10 seconds. Clean air leaves it white. Gray or dark specks mean the system is recirculating dust and you may need more than a surface wipe.
DIY is usually enough when the test comes back clean and the vents just look dusty. Call a professional when the paper shows heavy debris, you smell something musty, or you spot visible mold, rodent droppings, or standing water near any duct component. Airanddryerventcleaningavondale handles exactly those situations for homeowners in Avondale, AZ.
The five highest-impact quick actions:
- Turn off the HVAC at the thermostat before touching anything
- Vacuum the vent face with a soft brush attachment (10 seconds per vent)
- Wipe the register with a dry microfiber cloth
- Replace the air filter if it looks gray or clogged
- Run the white-paper test to confirm the system is clean
Table of Contents
- What are the fastest quick fixes for dusty vents you can do right now?
- How do you safely clean a vent register from start to finish?
- Which tools and filters actually make a difference?
- How do you know when DIY isn't enough?
- What daily and seasonal habits keep vents from getting dusty again?
- What safety mistakes do most homeowners make when cleaning vents?
- Key Takeaways
- The part most homeowners underestimate about dusty vents
- Professional vent cleaning in Avondale, AZ: what to do next
- Useful sources
- FAQ
What are the fastest quick fixes for dusty vents you can do right now?
You need a vacuum with a soft brush attachment, a microfiber cloth, a replacement filter (have one on hand), and a screwdriver if your registers are screwed in. That is the whole kit. Most homeowners finish this run in under 10 minutes.
Work through this in order:
- Set your thermostat to Off, not just "fan auto." You want zero airflow while you work.
- Vacuum the face of the first vent for about 10 seconds using the brush attachment. This alone removes the visible gray halo that forms on ceilings and walls.
- Follow with a dry microfiber cloth across the slats. Dry only at this stage.
- Walk to your filter and pull it out. If you can barely see the filter media through the dust, replace it now. A clogged filter is the most common root cause of dusty vents.
- Reinstall the new filter, noting the airflow arrow on the frame.
- Turn the system back on and run the white-paper test at one supply vent and one return vent.
Pro Tip: Check the return vent first. Return vents pull air in, so they collect far more dust than supply vents. If the return looks significantly worse, that is where your filter bypass or leak is most likely hiding.
How do you safely clean a vent register from start to finish?
This is the deeper clean you do twice a year, not the 10-minute monthly pass. Done correctly, it takes about 20 minutes per register.
- Turn off the HVAC at the thermostat. Cleaning with the system running pulls dislodged dust straight into the air handler.
- Lay a drop cloth or old towel under the vent to catch falling debris.
- Vacuum the vent face before removing it, so loose dust does not fall into the duct opening.
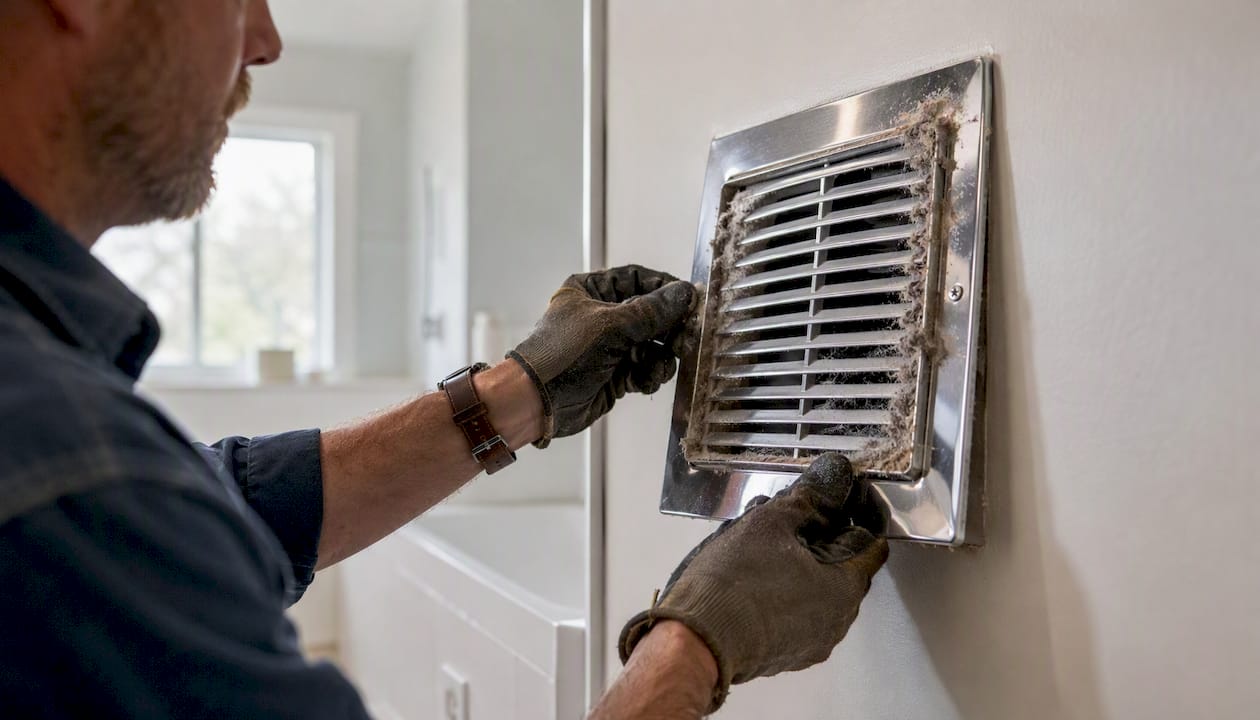
- Unscrew the register and carry it to a sink or bathtub.
- Soak it in warm water with a few drops of mild dish soap for 10–15 minutes. Use a toothbrush to scrub between the slats where dust bonds to grease film.
- Rinse thoroughly and set it on a dry towel. Let it air dry completely, or use a hair dryer on the low/cool setting to reach narrow crevices. A damp cover reinstalled over a duct opening is a mold invitation.
- While the cover dries, vacuum the duct opening shallowly — just the first inch or two you can see. Stop there.
- Once the register is bone dry, reinstall it and tighten the screws snugly.
Do not push a vacuum hose deep into the duct. Household vacuums can puncture flexible ductwork, tear insulation, and stir up far more debris than they remove. Shallow vacuuming at the opening is safe; anything deeper belongs to a professional with the right equipment.
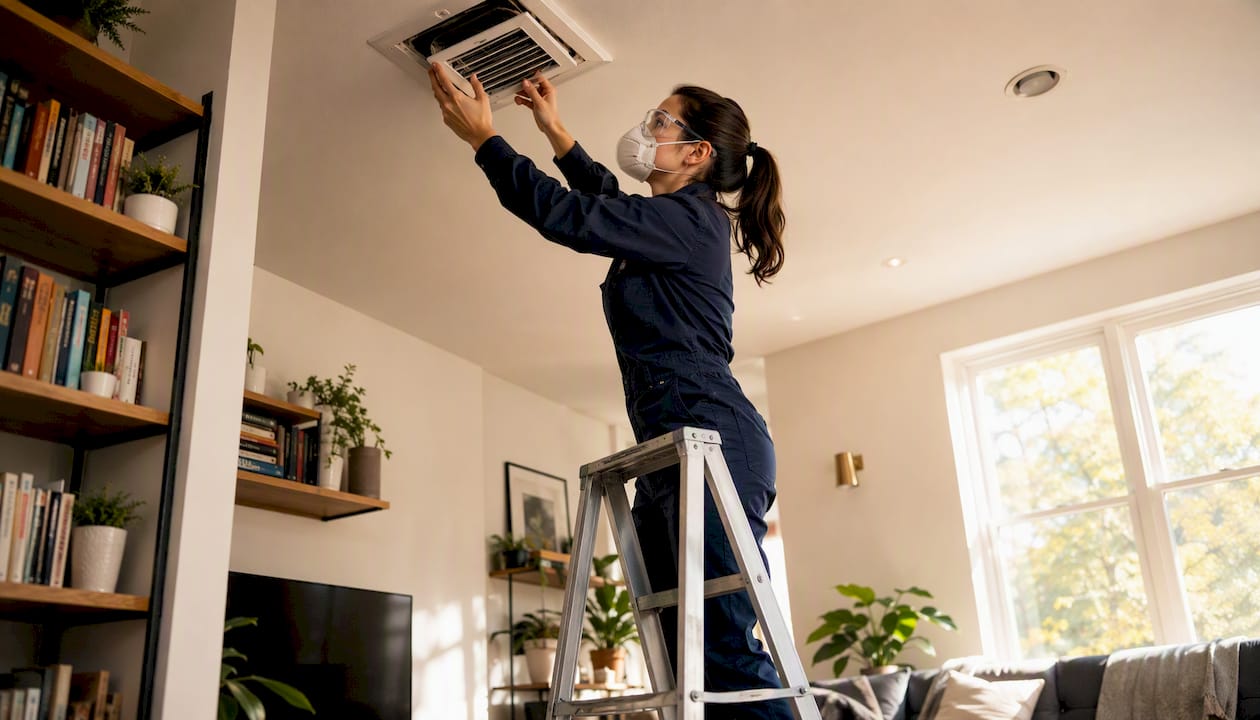
For ceiling vents: wear safety goggles and a dust mask, use a stable ladder rated for your weight, and have a second person steady it. Debris falls directly toward your face when you remove a ceiling register.
Which tools and filters actually make a difference?
The short tool list
- Vacuum with a soft brush attachment: the single most useful tool. The brush loosens dust without scratching metal slats.
- Crevice tool: reaches the narrow gap between the register frame and the wall or ceiling.
- Microfiber cloth (dry): picks up fine particles without pushing them deeper into slats.
- Mild dish soap and a toothbrush: for the twice-yearly soak-and-scrub. The toothbrush gets into corners no cloth reaches.
Avoid wet wipes on dry vent slats. Mixing moisture with dry dust creates a paste that packs into corners and hinges, making the next clean harder than the last one.
Filter choice and timing
A clogged or old filter is the most common reason vents look dusty within days of cleaning. The filter is doing its job, but once it is full, it bypasses air around the edges and sends unfiltered particles straight to the vents.
For most homes, a filter with a MERV 8–11 rating is the right range. MERV 8 catches most household dust, pollen, and pet dander. MERV 11 adds finer particles and is worth it for allergy sufferers. MERV 13 and above can restrict airflow on older systems not designed for that resistance, so check your HVAC manual before going higher.
Replacement cadence:
- Every 1 month if you have pets, allergies, or run the system constantly
- Every 2 months for average households
- Every 3 months maximum for low-use homes or vacation properties
Pro Tip: Write the installation date on the filter frame with a marker the moment you put it in. You will never wonder how old it is again. Also, confirm the filter dimensions before buying — a filter that fits loosely lets air bypass the media entirely.
How do you know when DIY isn't enough?
The white-paper test
Turn the HVAC fan on. Hold a white paper towel over a supply vent for 10 seconds. If the towel stays white, the system is reasonably clean. Gray or dark specks mean the system is still shedding debris. Repeat at a second vent to confirm it is not just one dirty register.
After you complete a full cleaning, run the fan for 30 minutes and test again. If the towel still shows dust or you detect a musty smell, the problem is deeper than surface cleaning can reach.
Red flags that require a professional
- Visible mold on or near any vent or duct component
- A musty or earthy odor that returns after cleaning
- Standing water near condensate pans or cooling coils — the EPA specifically flags moisture as the primary driver of microbial growth in ducts
- Rodent droppings or signs of pest activity inside ducts
- Filters that reload with dust within a day or two of replacement — this points to leaks, a dirty blower, or insulation shedding inside the system
Surface clean vs. deep clean: what each covers
| Task | Who does it | Recommended cadence |
|---|---|---|
| Vacuum vent face | Homeowner | Monthly |
| Remove, wash, and dry register | Homeowner | Twice yearly (spring and fall) |
| Replace air filter | Homeowner | Every 1–3 months |
| Full duct inspection and cleaning | Professional | Every 3–5 years, or after red flags |
| Mold treatment, leak sealing, blower cleaning | Professional | As needed after inspection |
Pro Tip: Schedule a professional inspection after any major renovation. Construction dust is finer than household dust and loads ducts faster than normal use. One post-renovation clean can prevent months of dusty vents.
What daily and seasonal habits keep vents from getting dusty again?
The goal is to reduce the dust supply reaching your vents, not just clean up after it arrives.
Monthly:
- Run a 10-second vacuum pass over every vent face during your regular dusting. This one habit prevents the gray dust halos that form on ceilings near supply vents.
- Glance at your filter. If it looks gray, swap it early rather than waiting for the calendar.
Twice yearly (spring and fall):
- Remove all registers, soak and scrub them, dry completely, and reinstall.
- Do a visual inspection of every accessible duct joint for gaps or disconnected sections.
Household habits that cut the dust supply:
- Place entry mats at every exterior door. A significant share of indoor dust walks in on shoes.
- Groom pets regularly and keep their bedding clean. Pet dander loads filters faster than almost anything else.
- Vacuum floors with a HEPA-filter vacuum. Standard vacuums recirculate fine particles back into the air.
- Keep indoor humidity between 30–50%. Dry air carries more airborne particles; air that is too humid encourages mold in ducts. A basic hygrometer costs under $15 and tells you exactly where you stand.
Pro Tip: An air purifier with a true HEPA filter in the main living area reduces the particle load your HVAC system has to handle. Less dust in the air means less dust reaching your vents.
What safety mistakes do most homeowners make when cleaning vents?
Most DIY vent cleaning problems come from a handful of repeated errors. Knowing them ahead of time takes about 30 seconds; fixing the damage they cause can take much longer.
Never do these:
- Run the HVAC fan while cleaning. Airflow pulls dislodged dust deeper into the system and can coat the air handler with debris.
- Push a vacuum hose more than an inch into a duct opening. Flexible ductwork tears easily, and a tear creates a leak that sends conditioned air into your walls instead of your rooms.
- Reinstall a damp register. Moisture trapped between metal and drywall is exactly the condition mold needs.
- Use wet wipes or damp rags on dry, dusty slats. The moisture binds dust into a paste that packs into hinges and corners.
Moisture is the one risk that turns a dusty vent into a health problem. The EPA's guidance on duct contamination is clear: controlling moisture is the most effective way to prevent biological growth inside your system. If you see standing water near a condensate pan or smell something musty after cleaning, stop and call a professional before the problem spreads.
Ceiling vent checklist:
- Wear safety goggles (debris falls toward your face)
- Wear a dust mask rated N95 or better
- Use a ladder rated for your weight, positioned on level ground
- Have someone steady the ladder while you work
- Set the thermostat to Off before climbing
If you see anything unexpected inside a duct — dark staining, wet insulation, animal activity — close the register and contact a professional. Those are not DIY situations.
Key Takeaways
Replacing a clogged filter and vacuuming vent faces monthly eliminates the most common causes of dusty vents; the white-paper test tells you in 10 seconds whether the system needs a professional.
| Point | Details |
|---|---|
| Replace filters on schedule | Change every 1–3 months; homes with pets or allergies need monthly replacement. |
| Monthly vent vacuum | A 10-second brush-attachment pass per vent prevents dust halos and reduces buildup. |
| White-paper test | Hold a paper towel over a running vent for 10 seconds; gray specks mean call a pro. |
| Never probe ducts deeply | Household vacuums can tear flexible ductwork; keep suction to the first inch of the opening. |
| Airanddryerventcleaningavondale | For Avondale, AZ homeowners whose white-paper test fails or who spot mold or water, Airanddryerventcleaningavondale provides professional duct cleaning, air quality testing, and duct repairs. |
The part most homeowners underestimate about dusty vents
Most articles on this topic treat dusty vents as a cleaning problem. They are often a system problem wearing a cleaning problem's clothes.
A vent that gets dusty again within a week of cleaning is telling you something. Either the filter is wrong for the system, there is a gap somewhere in the ductwork pulling in unfiltered air from a crawl space or attic, or the blower itself is coated and shedding debris every time it runs. Wiping the register face is the right first move, but it is not a diagnosis.
The white-paper test matters precisely because it separates surface dust from system dust. Surface dust accumulates slowly and evenly. System dust shows up fast, often at specific vents, and it comes back the same day you cleaned. That pattern is the signal most homeowners miss because they assume they just did not clean thoroughly enough. They clean again. The dust returns again.
Leaky ducts are also more common than most homeowners expect. A gap at a duct joint in an unconditioned attic does not just waste energy; it pulls in attic insulation fibers, dust, and whatever else is up there, and delivers it directly to your living room. No amount of register cleaning fixes that.
The honest answer is that DIY vent maintenance is genuinely effective for normal dust accumulation. It keeps your system healthier, your filters lasting longer, and your air noticeably cleaner. But it has a ceiling. When you hit that ceiling, the right move is a professional inspection, not a more aggressive DIY approach.
Professional vent cleaning in Avondale, AZ: what to do next
When the white-paper test fails, or when you want the confidence of a thorough clean you did not have to do yourself, Airanddryerventcleaningavondale is the local option for Avondale homeowners. The team handles air vent and duct cleaning, dryer vent cleaning, air quality testing, and duct repairs — the work that goes past what a vacuum and microfiber cloth can reach.
Flexible scheduling, including after-hours appointments, means you are not rearranging your week to get it done. Services come with warranties, so if something is not right, it gets made right. For homeowners dealing with persistent dust, a musty smell, or a positive white-paper test, booking an air quality test is a straightforward next step that tells you exactly what is in your air and what needs attention.
Useful sources
The following sources informed this article and are worth bookmarking for further reading:
- Should You Have the Air Ducts in Your Home Cleaned? | US EPA — Primary guidance on moisture control, mold risk, and when professional duct cleaning is warranted.
- How to Clean Air Vents | Martha Stewart — Step-by-step register cleaning with safety notes on turning off the system first.
- How to Clean Air Ducts | The Spruce — Washing and drying vent covers correctly, including the hair-dryer tip for crevices.
- Air Vent Cleaning, Air Duct Cleaning, Avondale, AZ — Local professional service page for Avondale homeowners seeking a pro clean or inspection.
FAQ
How do you get rid of dust in air vents quickly?
Vacuum the vent face with a soft brush attachment for 10 seconds, wipe with a dry microfiber cloth, and replace the air filter if it looks gray. Turn off the HVAC before you start.
What can you put in air vents to keep dust down?
Nothing goes inside the vent itself, but the right filter does the work: a MERV 8–11 filter traps most household dust before it reaches the vents. Change it every 1–3 months depending on pets and usage.
Why is my house still dusty even after duct cleaning?
Rapid dust return usually points to a leaky duct joint pulling in unfiltered air, a dirty blower shedding debris, or a filter that is the wrong size and letting air bypass the media. Run the white-paper test; if it fails within a day of cleaning, a professional inspection is the right next step.
What is the fastest way to get dust out of the air?
A true HEPA air purifier in your main living area captures airborne particles before they settle on vents and surfaces. Pairing it with a fresh MERV 8–11 HVAC filter and a HEPA vacuum gives you the fastest overall reduction in household dust.