
Leaking or damaged ductwork silently drains energy and compromises indoor air quality in Avondale’s scorching climate. Your HVAC system works overtime to compensate for losses, driving up utility bills while circulating dust, allergens, and outdoor pollutants through your home or business. This guide walks you through inspecting and repairing duct damage using proven methods and proper materials, helping you restore efficiency, lower costs, and breathe cleaner air.
Table of Contents
-
Can I Repair Duct Leaks Myself Or Should I Hire A Professional?
-
How Often Should Ductwork Be Inspected And Maintained In Avondale’s Climate?
Key takeaways
| Point | Details |
| Energy loss from duct leaks | Typical duct systems lose 25 to 40 percent of heating and cooling energy through leaks and gaps. |
| Essential sealing materials | UL 181-rated foil tape and mastic sealant provide durable, heat-resistant seals that standard duct tape cannot match. |
| Annual savings potential | Properly sealed ductwork can save approximately $160 per year on HVAC energy bills for average homes. |
| Air quality impact | Damaged ducts reduce efficiency and allow mold spores, pest debris, and outdoor contaminants into your breathing air. |
| Inspection focus areas | Check seams, joints, connections, and insulation regularly, especially in attics and crawlspaces where damage occurs most. |
What you need: tools and safety tips for duct repair
Before you begin any ductwork repair, gather the right materials and take essential safety precautions. Using substandard products or skipping safety steps can waste your effort and create new problems down the road.
Start by assembling these critical supplies. You’ll need UL 181-rated foil tape for reinforcing seals, mastic sealant for filling gaps and cracks, heavy-duty work gloves to protect your hands from sharp metal edges, a utility knife for trimming tape and insulation, and duct insulation wrap if your ducts lack proper thermal protection. Optional but helpful tools include a flashlight for inspecting dark spaces, a smoke pencil or incense stick for detecting airflow leaks, and a ladder for accessing attic or elevated ductwork.
Always turn off your HVAC system completely before starting any repair work. This prevents air pressure changes that could spread dust or debris while you’re working and eliminates the risk of the system cycling on unexpectedly. Wear protective eyewear and a dust mask, especially when working in dusty attic spaces or near insulation materials.
Pro Tip: Inspect your attic and crawlspaces carefully for signs of rodent or pest damage before starting repairs, as compromised ducts often attract unwanted visitors seeking shelter or nesting materials.
Avoid standard household duct tape despite its name. It degrades rapidly under the temperature extremes common in Avondale’s climate and HVAC systems, losing adhesion within months. Instead, invest in certified materials designed specifically for HVAC applications. Air duct repair replacement professionals use commercial-grade products that withstand heat cycles and maintain their seal for years.
| Material | Pros | Cons |
| UL 181 foil tape | Heat-resistant, long-lasting, strong adhesion | Higher cost than standard tape |
| Mastic sealant | Flexible, fills irregular gaps, paintable | Requires drying time, messy application |
| Standard duct tape | Inexpensive, readily available | Fails quickly in heat, not HVAC-rated |
| Aerosol sealants | Easy spray application, reaches tight spots | Limited to small leaks, requires ventilation |
Keep air filter replacement supplies on hand as well. Fresh filters prevent dust buildup that can stress newly repaired ducts and help you monitor system performance after completing your work.
How to inspect your ductwork for damage and leaks
A thorough inspection reveals exactly where your ducts need attention and prevents wasted effort on areas that don’t require repair. Systematic assessment ensures you catch all problem spots before sealing begins.
Follow this inspection sequence for complete coverage:
-
Start at the air handler unit and work outward along each duct run, checking every accessible section.
-
Examine all joints where duct sections connect, looking for visible gaps, separation, or missing connections.
-
Inspect seams running along duct lengths for splits, holes, or deteriorated sealing tape.
-
Check flex duct for compression, kinks, tears, or areas where inner liner has separated from outer insulation.
-
Look for rust spots, water stains, or discoloration indicating moisture problems that weaken duct integrity.
-
Test suspect areas by holding a lit incense stick or smoke pencil near seams and joints while the system runs, watching for smoke movement that reveals air leaks.
Damaged or leaking ductwork reduces efficiency and increases wear on your entire HVAC system. Beyond visible holes, watch for subtle signs like dusty buildup around certain vents, inconsistent temperatures between rooms, or whistling sounds when the system operates.
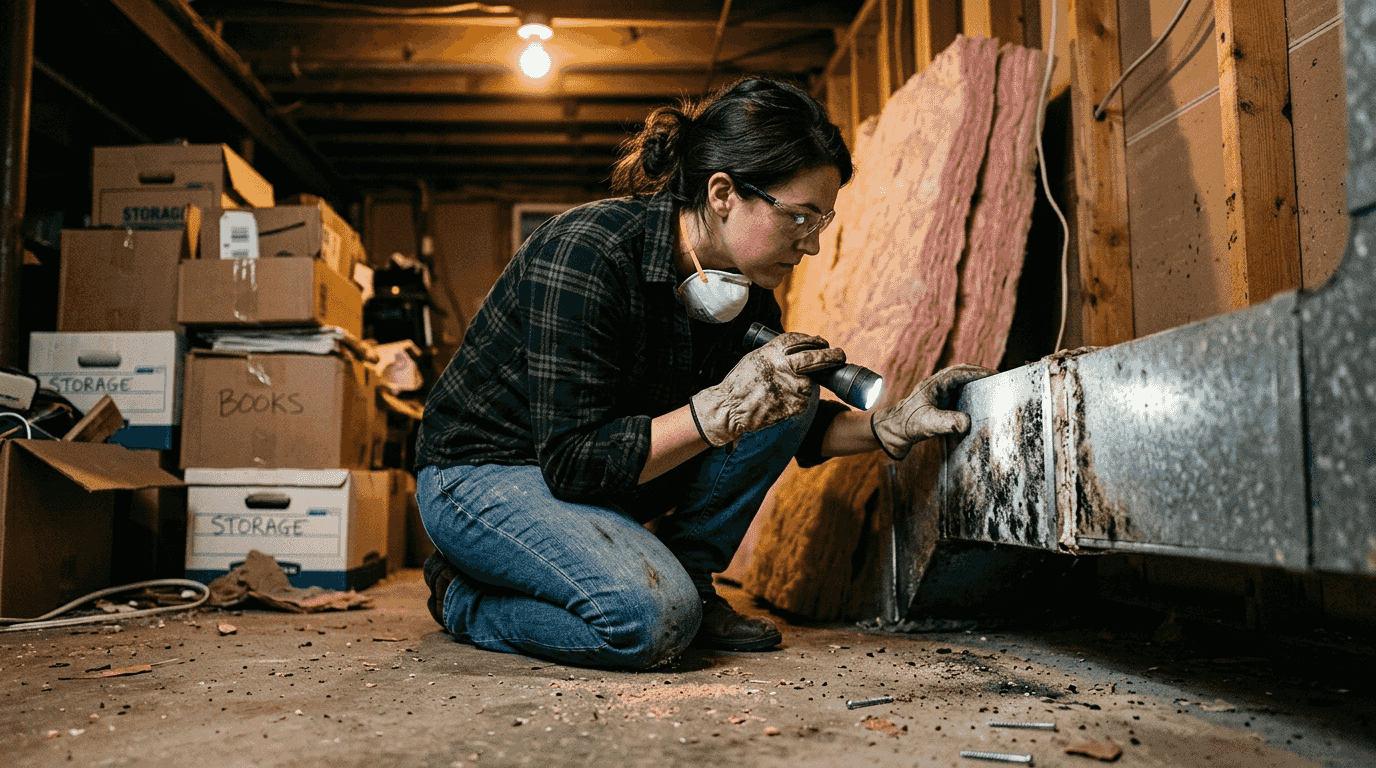
Pay special attention to mold growth inside ducts or on exterior surfaces. Dark spots, musty odors, or visible fuzzy growth indicate moisture intrusion that requires immediate attention. Mold spreads quickly in dark, humid duct environments and compromises indoor air quality severely.
Be alert for pest evidence throughout your inspection. Rodent droppings, chewed insulation, nesting materials, or actual animal presence means your ducts have entry points that need sealing. Attics and crawlspaces provide ideal rodent habitat, and damaged ducts offer convenient highways through your building.
Pro Tip: Take photos of every problem area you find during inspection, noting its location in your duct system. This documentation helps you plan your repair approach, ensures you don’t miss any spots, and provides a before record for comparing post-repair performance.
Schedule indoor air quality testing if you discover extensive mold, pest damage, or suspect contamination beyond simple leaks. Professional testing identifies specific pollutants and helps determine whether duct cleaning should accompany your repairs.
Step-by-step guide to repairing duct leaks and damage
Once you’ve identified all problem areas, methodical repair using proper techniques and materials delivers lasting results. Rushing or cutting corners undermines your effort and leads to recurring issues.
Follow these steps for effective duct sealing:
-
Turn off your HVAC system completely at the thermostat and breaker to ensure zero airflow during repair work.
-
Remove any access panels needed to reach damaged sections, setting screws aside carefully for reinstallation.
-
Clean all surfaces you’ll be sealing using a dry cloth or brush to remove dust, debris, and loose material that prevents proper adhesion.
-
Apply mastic sealant generously over joints, cracks, and holes using a disposable brush or putty knife, working the sealant into gaps completely.
-
While mastic is still wet, press UL 181-rated foil tape firmly over sealed areas to reinforce the bond and add mechanical strength.
-
Smooth tape edges thoroughly, ensuring no bubbles or loose sections that could peel away over time.
-
For larger holes or damaged sections, cut sheet metal patches slightly larger than the opening, seal edges with mastic, and secure with multiple tape strips.
-
Wrap exposed ductwork in insulated sleeves or batting to reduce heat transfer and prevent condensation, especially in unconditioned spaces like attics.
Safety reminder: Never use standard duct tape for HVAC repairs regardless of convenience or cost. It fails rapidly under temperature cycling and creates bigger problems when it peels away. Always work in well-ventilated areas when using mastic sealants, as fumes can be strong in enclosed spaces.
Common mistakes that compromise repair quality include:
-
Leaving gaps between tape strips that allow air to escape
-
Applying tape or sealant over dirty or wet surfaces
-
Using insufficient sealant that doesn’t fully fill cracks
-
Stretching tape too tight, causing it to pull away as it relaxes
-
Forgetting to insulate newly sealed ducts in hot attics where heat gain occurs
-
Skipping small leaks thinking they don’t matter when collectively they waste significant energy
For accessible straight runs, repairs typically take 15 to 30 minutes per problem area. Complex joints or hard-to-reach sections may require more time and creative positioning. Take breaks as needed, especially when working in hot attics, and stay hydrated.
After completing repairs, consider scheduling air duct cleaning to remove accumulated dust and debris that settled during the years your ducts leaked. Clean ducts amplify the air quality benefits of your sealing work. If damage was extensive or you’re replacing entire sections, air vent replacement services can upgrade deteriorated registers and grilles simultaneously.

Verifying your duct repairs and maintaining efficiency
Confirming repair success ensures your effort translated into real improvements and helps you catch any missed spots before they become bigger problems. Ongoing maintenance protects your investment and extends duct lifespan.
Test your repairs using these verification methods. Run your HVAC system and carefully feel around all sealed areas for escaping air, which indicates incomplete seals needing additional attention. Listen for whistling or rushing air sounds that weren’t present before, suggesting new leaks or inadequately sealed sections. Monitor room-to-room temperature consistency over the next few days, as properly sealed ducts distribute conditioned air more evenly. Track your energy bills over the following months, watching for the decreased usage that reflects improved efficiency.
For comprehensive verification, consider a blower door test conducted by an energy auditor. This diagnostic pressurizes your home while measuring air leakage, quantifying exactly how much your duct repairs reduced total building air loss. The data provides concrete evidence of improvement and identifies any remaining problem areas worth addressing.
| Metric | Before Repair | After Repair | Improvement |
| Monthly cooling cost | $240 | $215 | $25 saved |
| Duct leakage rate | 35% | 12% | 23% reduction |
| Temperature variance | 6°F between rooms | 2°F between rooms | 4°F improvement |
| Annual energy waste | $300 | $140 | $160 saved |
Establish a maintenance routine to preserve your duct system’s integrity. Replace air filters on schedule, typically every one to three months depending on usage and air quality, as clogged filters stress ductwork and reduce system lifespan. Inspect accessible duct sections quarterly for new damage, especially after severe weather or if you notice performance changes. Keep attic vents clear and maintain proper attic ventilation to reduce extreme temperature swings that stress duct materials.
Pro Tip: In Avondale’s extreme heat environment, schedule annual professional duct inspections during spring before cooling season peaks. Early detection of developing problems prevents mid-summer failures when HVAC demand is highest and repair costs premium.
Create a simple maintenance checklist:
-
Check visible duct sections monthly for new damage or separation
-
Replace HVAC filters according to manufacturer specifications
-
Clear debris from outdoor HVAC unit and ensure proper clearance
-
Monitor energy bills for unexpected increases suggesting new leaks
-
Schedule annual professional system inspection and tune-up
-
Test smoke detectors and carbon monoxide alarms monthly
Regular professional air duct cleaning every three to five years removes accumulated dust, allergens, and debris that DIY repairs don’t address. For business owners managing larger facilities, commercial air duct cleaning maintains healthy indoor environments for employees and customers while protecting HVAC equipment investments.
Professional duct repair and cleaning services in Avondale
While DIY repairs handle many common duct issues effectively, some situations benefit from professional expertise and specialized equipment. Extensive damage, hard-to-reach ductwork, or systems requiring replacement rather than repair often exceed homeowner capabilities.
Professional inspections use thermal imaging cameras and airflow measurement tools to detect hidden leaks invisible to visual inspection. Technicians access confined spaces safely with proper equipment and training, sealing ducts in attics, crawlspaces, and wall cavities where DIY work becomes impractical or hazardous. Licensed contractors ensure repairs meet local building codes and manufacturer specifications, protecting your warranty coverage and investment value.
Comprehensive services extend beyond basic sealing. Expert air duct repair replacement addresses structural damage requiring new duct sections or complete system redesign for optimal performance. Combining repairs with professional air duct cleaning and air vent cleaning services delivers complete system restoration that maximizes air quality and efficiency gains simultaneously.
How do I know if my ductwork needs repair?
Several clear indicators signal duct damage requiring attention. Uneven heating or cooling between rooms suggests leaks diverting conditioned air into unconditioned spaces instead of living areas. Unexpectedly high energy bills often reflect HVAC systems working harder to compensate for lost air through damaged ducts. Visible signs include dust accumulation around vents, whistling sounds during system operation, or actually seeing holes, gaps, or separated joints in accessible ductwork sections. Conducting airflow tests with smoke pencils near suspected problem areas reveals invisible leaks through smoke movement patterns.
Can I repair duct leaks myself or should I hire a professional?
Simple duct repairs involving accessible straight runs and minor leaks suit DIY approaches using proper materials like UL-rated tape and mastic sealant. Homeowners comfortable working in attics or crawlspaces can handle these projects effectively with basic tools and safety precautions. However, extensive damage, hard-to-reach locations, structural duct problems, or situations requiring permits and code compliance warrant professional help. Complex repairs done incorrectly can worsen efficiency and create safety hazards. When in doubt, professional air duct repair replacement services provide expertise, proper equipment, and warranty protection that justify the investment for major projects.
How often should ductwork be inspected and maintained in Avondale’s climate?
Avondale’s extreme heat and dust levels accelerate duct wear compared to milder climates, making annual professional inspections essential for optimal performance. Schedule these checks in spring before peak cooling season to catch developing problems early. Between professional visits, homeowners should conduct quarterly visual inspections of accessible ductwork, checking for new damage or deterioration. Replace air filters every one to three months depending on usage and dust exposure, as Avondale’s dry, dusty conditions clog filters faster than humid climates. Following a consistent air filter replacement schedule protects both duct integrity and indoor air quality year-round.
Is it safe to use standard duct tape for repairs?
Standard duct tape is completely inappropriate for HVAC ductwork despite its misleading name. Duct tape degrades quickly when exposed to the temperature extremes typical in HVAC systems and Avondale attics, losing adhesion within months and leaving sticky residue on duct surfaces. HVAC temperature cycling between extreme heat and cooling causes standard tape to crack, peel, and fail catastrophically. Only UL 181-rated foil tape and mastic sealants provide the heat resistance, flexibility, and longevity required for safe, effective duct sealing. These certified products cost slightly more but deliver reliable performance for years, making them the only acceptable choice for permanent repairs.