TL;DR:
- Regular HVAC cleaning reduces energy bills and improves indoor air quality.
- DIY methods are suitable for surface cleaning but professional help is needed for coils and mold.
- Scheduling system inspections every 2-3 years ensures optimal performance in Avondale’s dusty climate.
Your energy bill keeps climbing, your family sneezes more than usual, and the air inside feels stale no matter how often you open a window. Sound familiar? A dirty HVAC system is usually the culprit. Dirty systems waste 25-40% energy and push allergens back into your living space every time the fan kicks on. For Avondale homeowners and small business owners, where dust and heat are a year-round reality, knowing exactly how to clean your HVAC system is not just helpful, it is essential. This guide walks you through every step, from prep to post-cleaning checks.
Table of Contents
- Why HVAC cleaning matters in Avondale
- What you need before cleaning: Tools, safety, and prep
- Step-by-step HVAC cleaning instructions
- How to check your results and maintain clean HVAC systems
- The truth: When DIY works and when to call a professional in Avondale
- Want spotless air? Let Avondale's HVAC pros help
- Frequently asked questions
Key Takeaways
| Point | Details |
|---|---|
| Clean system saves energy | Removing HVAC dust can cut power bills by up to 21% and improve airflow. |
| DIY has limits | Homeowners can clean vents and replace filters, but deep cleaning and mold require pros. |
| Prep is critical | Proper tools, safety gear, and turning off power keep your cleaning safe and effective. |
| Maintain between cleanings | Change filters regularly and check airflow to prevent dust buildup in Avondale’s climate. |
Why HVAC cleaning matters in Avondale
Avondale sits in the heart of the Sonoran Desert, where dust storms roll through regularly and summer temperatures routinely top 110°F. That combination pushes your HVAC system harder than systems in most other parts of the country. Dust, pollen, and debris get pulled into your ductwork constantly, and when those particles build up, your system has to work harder to push air through.
The results are not just uncomfortable. They are expensive. Cleaning coils saves up to 21% in energy costs alone, and it directly reduces the allergens and dust circulating through your home or office. When you factor in Avondale's long cooling season, that savings adds up fast.
Here is what a neglected HVAC system actually does to your space:
- Reduced airflow: Clogged ducts force your blower to strain, shortening its lifespan.
- Higher utility bills: Dirty coils and filters mean more energy to reach the same temperature.
- Worse air quality: Dust, mold spores, and pet dander recirculate through every room.
- Unexpected breakdowns: Systems under stress are more likely to fail during peak summer heat.
- Shortened system life: Neglected units often need replacement years ahead of schedule.
The EPA links indoor air quality directly to respiratory health, and studies consistently show that improving ventilation reduces exposure to dust and allergens. For Avondale families dealing with seasonal allergies or asthma, that connection is personal.
Reading about better air with HVAC cleaning can help you understand what a professionally cleaned system actually delivers versus what a dusty one is costing you right now. If you are curious about doing some of this work yourself, understanding DIY duct cleaning benefits is a smart starting point before picking up a single tool.
The bottom line: regular cleaning is not optional in Avondale. It is maintenance your system genuinely needs to survive the climate here.
What you need before cleaning: Tools, safety, and prep
Now that you know why cleaning helps, here is how to get ready for a safe and effective HVAC cleaning session. Rushing into this without the right supplies or safety steps is where most DIYers go wrong.
Essential tools and supplies:
- Flathead and Phillips screwdrivers
- Soft-bristle brush and stiff duct brush
- HEPA-filter vacuum with hose attachments
- Coil cleaner spray (non-acid formula for residential use)
- Replacement air filters (correct size for your unit)
- Microfiber cloths
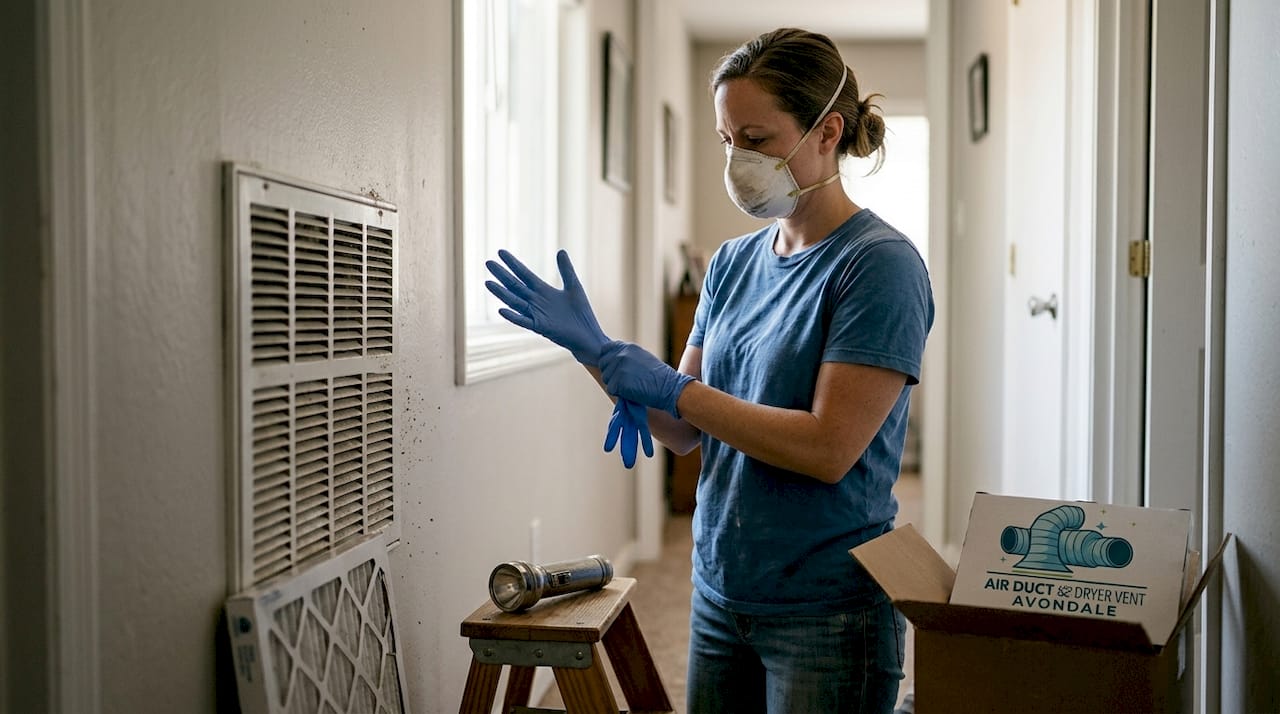
- Disposable gloves and N95 mask
- Safety glasses
- Flashlight or headlamp
| Task | DIY-friendly | Requires a pro |
|---|---|---|
| Filter replacement | Yes | No |
| Vent and grille cleaning | Yes | No |
| Surface duct vacuuming | Yes | No |
| Coil cleaning | With caution | Recommended |
| Mold removal | No | Yes |
| Duct sealing or repair | No | Yes |
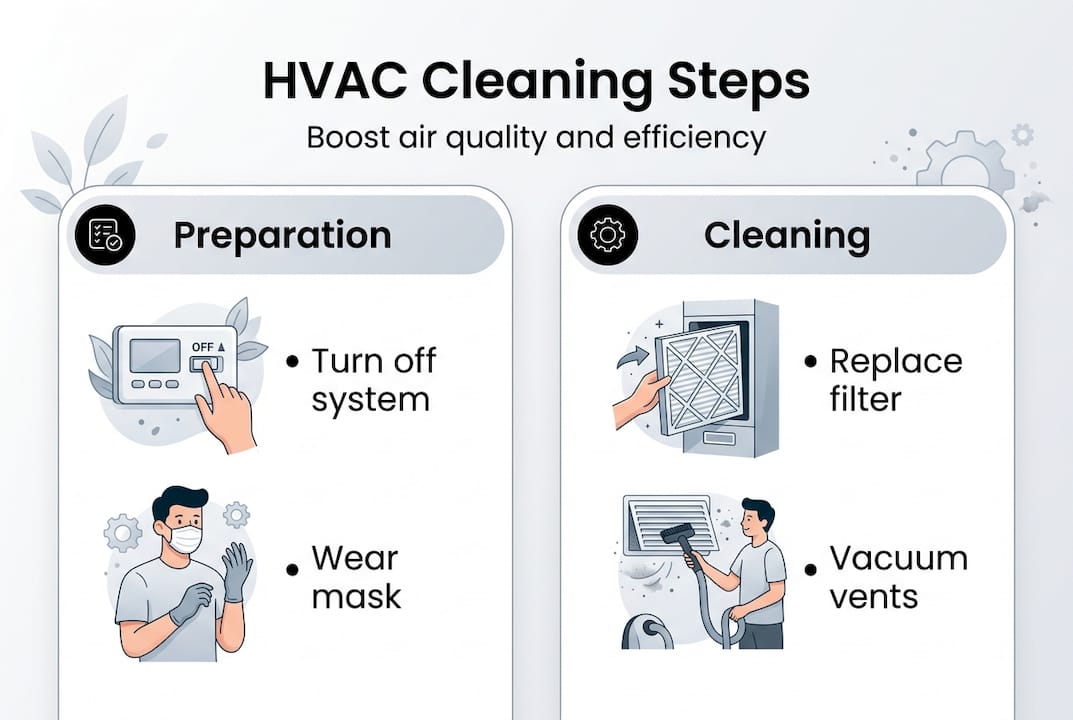
Before you touch anything, turn off your HVAC system at the thermostat and at the breaker. This is not optional. Moving parts and live electrical components inside air handlers can cause serious injury. Always check your system's manual for manufacturer-specific guidance before opening any panels.
Wear your gloves and mask from the start. Duct interiors collect years of debris, and disturbing that material releases particles into the air. Watch for sharp metal edges inside duct openings, especially in older homes.
Pro Tip: Take a photo of your current filter before removing it. The photo shows you the correct orientation for the replacement and gives you a visual record of how dirty things were.
The EPA and NADCA recommend source control, meaning filter replacement and ventilation improvements, as the first line of defense before any duct cleaning begins. If you want a full breakdown of what to expect when cleaning your air handler specifically, the air handler cleaning guide covers that process in detail.
Know when to stop: If you open an access panel and see visible mold, standing moisture, or insulation that looks compressed or damaged, close it back up and call a professional. These are not DIY situations.
Step-by-step HVAC cleaning instructions
With your tools and prep complete, you are ready for the most important part: the cleaning process itself.
- Shut down the system completely. Turn off the thermostat and flip the breaker. Confirm the unit is not running before opening any panels.
- Remove and inspect vent covers. Unscrew return and supply vent grilles. Wash them in warm soapy water and let them dry fully before reinstalling.
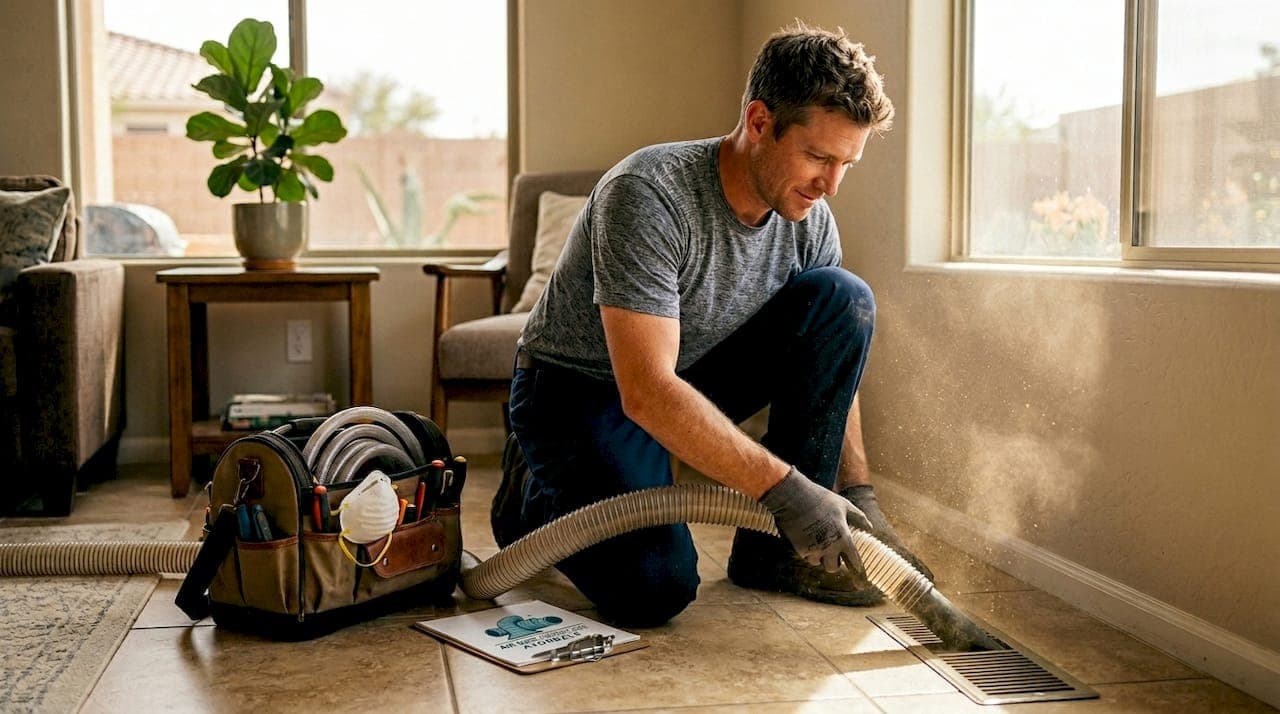
- Vacuum duct openings. Use your HEPA vacuum with a long hose attachment to pull dust and debris from the first 12 to 18 inches of each duct opening. Work slowly.
- Clean the blower compartment. Open the air handler access panel. Use a soft brush and vacuum to remove dust from the blower fan blades and housing. Be gentle.
- Clean the evaporator coils. Spray coil cleaner evenly across the coil surface and let it foam and drip into the drain pan. Do not scrub. Rinse lightly if the product requires it.
- Clear the condensate drain line. Pour a small amount of diluted bleach or white vinegar into the drain line to prevent algae buildup, which is a common issue in Avondale's humid summer months.
- Replace the air filter. Install a new filter with the correct MERV rating for your system. A MERV 8 to 11 filter balances air quality with airflow for most residential systems.
- Seal and close all panels. Check for gaps around access panels. Even a small air leak reduces efficiency significantly.
- Restore power and test. Turn the system back on and stand near each vent to feel for consistent airflow.
Pro Tip: Never use a wire brush on evaporator coils. The fins are extremely thin aluminum and bend easily. Bent fins block airflow and reduce cooling efficiency fast.
DIY duct cleaning steps can guide you further on technique, and if you want to understand what a professional vent cleaning service covers beyond what DIY reaches, that comparison is worth reviewing before you decide how far to take this yourself.
Keep in mind that DIY cleaning handles surface dust well, but coil damage is a real risk if you rush or use the wrong products.
How to check your results and maintain clean HVAC systems
After a thorough cleaning, the final step is making sure you have actually improved your air and efficiency, and staying on track with easy upkeep.
Start by standing near each supply vent with the system running. You should feel steady, consistent airflow from every register. Weak flow from one vent and strong flow from another suggests a blockage or a duct leak that needs attention.
Listen carefully for the first 10 minutes after startup. Rattling, whistling, or grinding sounds were not there before? They may indicate a loose panel, a debris piece caught in the blower, or a bent fin vibrating. Catch these early before they become expensive repairs.
Check for dust settling around vent covers within 24 to 48 hours. Some dust is normal right after cleaning, but heavy new buildup within a day suggests your filter is not capturing particles effectively.
Ongoing maintenance habits that actually work:
- Replace filters every 30 to 60 days during heavy-use months in Avondale.
- Keep at least 18 inches of clearance around your outdoor condenser unit.
- Never block return air vents with furniture or curtains.
- Monitor indoor humidity. Avondale's monsoon season can spike humidity fast, which encourages mold growth inside ducts.
- Schedule a professional inspection every 2 to 3 years, or after any major renovation.
Pro Tip: Set a recurring phone reminder on the first of each month to check your filter. A quick visual check takes 30 seconds and can prevent a $300 repair.
The EPA notes that routine duct cleaning is not always necessary, but consistent source control through filter changes is the single most effective thing you can do between full cleanings. Knowing how often to schedule cleaning for Avondale's specific conditions helps you build a realistic maintenance calendar. For deeper guidance on what professional air duct cleaning involves, it is worth understanding what goes beyond what a homeowner can safely reach.
The truth: When DIY works and when to call a professional in Avondale
Most online guides make HVAC cleaning sound like a Saturday afternoon project. Grab a vacuum, swap the filter, and you are done. We have seen what actually happens when that mindset meets Avondale's real conditions, and the picture is more complicated.
Dust storms here do not just leave a film on your car. They push fine particulate deep into ductwork, sometimes past the first bend where no consumer vacuum can reach. Heat stress over years can cause duct insulation to crack or separate, creating hidden gaps that no amount of surface cleaning will fix.
DIY cleaning absolutely works for basic maintenance: vent covers, accessible duct openings, filter swaps, and light coil cleaning if you follow instructions carefully. But DIY coil cleaning risks damage that can cost more to repair than a professional cleaning would have cost in the first place.
Persistent musty odors after cleaning, visible mold on any surface inside the system, or allergy symptoms that do not improve after a full cleaning session are all signs that you need professional equipment and expertise. Knowing when to hire professionals is not a failure. It is smart homeownership.
Want spotless air? Let Avondale's HVAC pros help
For those who want total confidence in their air quality, or just do not have the time, Avondale has expert help ready.
At Air Duct and Dryer Vent Cleaning Avondale, we use professional-grade equipment that reaches deep into your ductwork, well beyond what any consumer vacuum can access. Our team handles everything from routine air duct and vent cleaning to full air quality testing so you know exactly what is circulating through your home or business. Heading into Avondale's hottest months with a clean, verified system is not a luxury. It is peace of mind. Visit our HVAC cleaning services page to schedule your appointment, including after-hours options that work around your schedule.
Frequently asked questions
How often should HVAC systems be cleaned in Avondale?
Inspect your filter monthly and replace it every 30 to 60 days during peak season. For full system cleaning, every 2 to 3 years is a reasonable baseline, though source control like filter changes is your most consistent defense between deep cleanings.
Is DIY cleaning safe for all parts of my HVAC?
Vents, grilles, and accessible duct openings are safe for DIY cleaning. Coil cleaning and mold removal carry real risk, since DIY coil cleaning risks damage to delicate fins and should be handled by a professional whenever possible.
What are signs my HVAC needs cleaning?
Watch for excess dust settling near vents, uneven airflow between rooms, new allergy symptoms indoors, musty or stale odors, or any visible discoloration around vent covers. Any one of these is a clear signal to inspect and clean your system.
What is the biggest mistake DIYers make with HVAC cleaning?
Bending or scrubbing evaporator coil fins is the most common and costly error. DIY cleaning risks coil damage that reduces efficiency and can lead to refrigerant leaks, so always use the correct coil cleaner and never apply mechanical pressure to the fins.