
TL;DR:
- Replacing accordion-style dryer vent hoses with smooth rigid metal ducting reduces fire risk and improves airflow. Regular inspections and annual cleaning help prevent lint buildup, which can cause fires and increase dryer energy use. Professional replacement is recommended for concealed or long duct runs, ensuring code compliance and safety.
Yes, replace your accordion-style dryer vent hose. That ridged plastic, vinyl, or thin foil tube behind your dryer is a lint trap by design, and lint inside a hot exhaust duct is a fire waiting to happen; the fix is straightforward: swap it for smooth rigid metal ducting, or call a pro if the run is concealed or long.
What to do right now:
- Pull the dryer away from the wall and look at the hose connecting it to the wall duct.
- If it's plastic, vinyl, or thin foil accordion, plan to replace it.
- If it's crushed, kinked, or runs inside a wall, stop using the dryer until it's replaced.
- If you have a gas dryer, shut off the gas before touching any connections and check for exhaust leaks before restarting.
Table of Contents
- What accordion-style dryer vent hoses actually are
- 1. The fire risk is the main reason to replace it
- 2. Restricted airflow makes your dryer work harder
- 3. Accordion hoses violate building codes when concealed
- 4. How to inspect your current hose
- 5. What to replace it with (and what to avoid)
- 6. How to replace the hose yourself
- 7. How often should you inspect and clean your dryer vent?
- 8. DIY or hire a pro?
- 9. What local pros in Avondale see on the job
- Key Takeaways
- The accordion hose problem is more common than most people realize
- Dryer vent replacement and cleaning in Avondale, AZ
- Useful sources
- FAQ
What accordion-style dryer vent hoses actually are
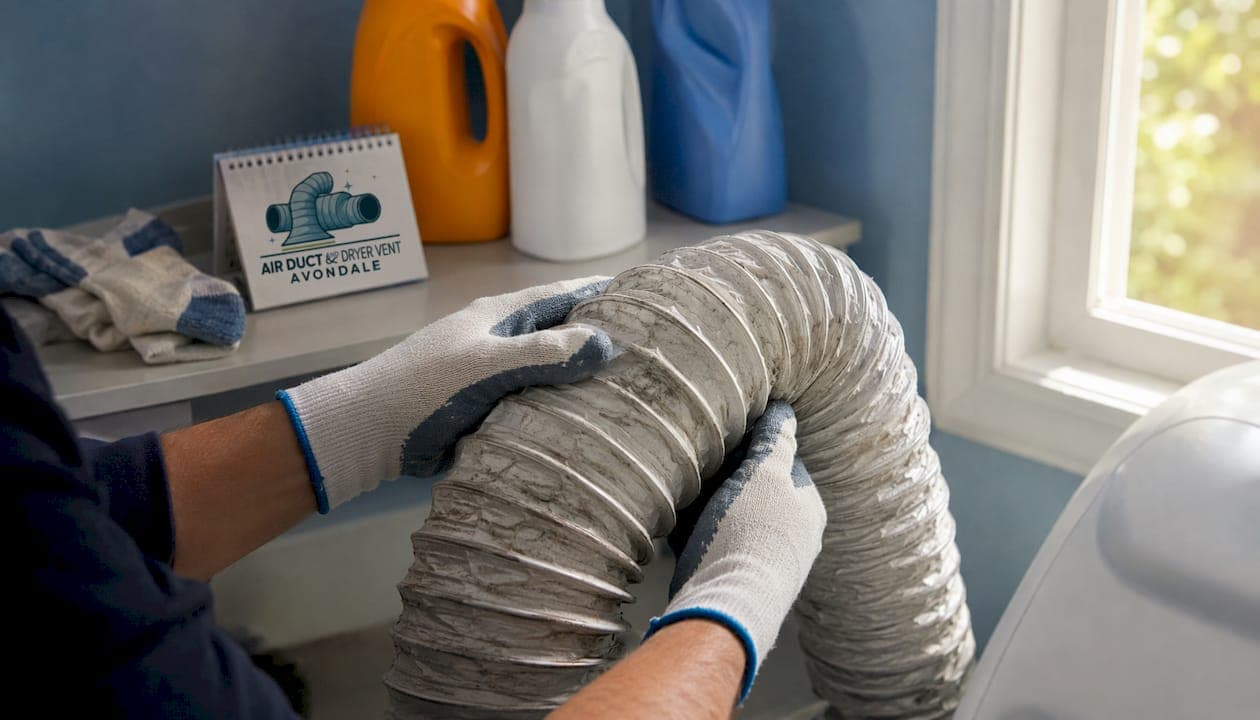
The accordion hose behind most dryers is a flexible, spiral-wound tube with a ridged interior. It comes in plastic, vinyl, thin foil, or corrugated metal versions, and it was designed as a short transition piece to connect the dryer's exhaust port to the wall duct. The flexibility makes installation fast, especially in tight laundry closets where a rigid elbow won't fit.
That convenience is the whole problem. The ridges that make the hose flexible also catch lint on every load. Accordion-style flexible ducts are intended as temporary transition pieces only, not as permanent or full-length duct runs. Plastic and vinyl versions are combustible. Even the metallic-looking thin foil versions have corrugated interiors that trap lint and can't be cleaned effectively once installed inside a wall.
Common accordion hose materials:
- Plastic or vinyl: cheapest, most flammable, prohibited by most codes
- Thin foil (spiral-wound): looks metallic but has the same ridged lint-trapping interior
- Semi-rigid aluminum: corrugated but more durable; acceptable only as a short transition piece
1. The fire risk is the main reason to replace it
Lint is combustible. Every load pushes fine fibers through the duct, and the ridges in an accordion hose grab them. Over months, that buildup becomes a thick, dry layer coating the interior. The National Fire Protection Association and the U.S. Fire Administration consistently identify lint-clogged dryer ducts as a leading cause of residential dryer fires, and improper venting materials are a key contributing factor.
Plastic and vinyl hoses make this worse because the material itself is flammable. A thin foil accordion hose may not burn as readily, but its corrugated interior still accumulates lint faster than any smooth duct. IRC guidance explicitly classifies thin foil and flexible plastic ducts as inappropriate for concealed runs because they can't be safely inspected or cleaned once they're inside a wall or ceiling.
2. Restricted airflow makes your dryer work harder
A clogged or kinked accordion hose doesn't just raise fire risk. It forces your dryer to run longer to dry the same load, which drives up your energy bill and puts extra wear on the heating element and motor. One documented case shows a homeowner who was running three cycles per load because a compressed vinyl hose had collapsed to less than half its original diameter. After replacing it with rigid metal and reducing the number of bends, dry time dropped dramatically.

The ridges in an accordion hose increase airflow resistance even when the hose isn't visibly clogged. Smooth rigid metal ducting moves the same volume of air with far less resistance, which means shorter cycles, lower energy use, and a cooler-running appliance.
3. Accordion hoses violate building codes when concealed
If your accordion hose runs inside a wall, ceiling, or floor cavity, it's almost certainly a code violation. The International Residential Code (IRC) prohibits flexible plastic and thin foil ducts for concealed dryer exhaust runs. The reason is practical: you can't inspect or clean a flexible duct once it's sealed inside a wall, and a lint fire inside a wall cavity spreads fast.
Code and manufacturer requirements increasingly mandate smooth metal ducts for permanent runs. This matters at resale too. Home inspectors flag improper dryer venting, and buyers or their lenders sometimes require correction before closing.
4. How to inspect your current hose
You don't need tools for a basic inspection. Pull the dryer out, look at the hose, and run through this checklist.
Visual checks:
- Cracks, splits, or holes anywhere along the hose
- Kinks or crushed sections that reduce the diameter
- Sagging loops that collect lint and moisture
- Any section that disappears into a wall or ceiling (a red flag for concealed flexible runs)
- Missing or stuck exterior vent cap (flap should open freely when the dryer runs)
Performance signs:
- Clothes taking noticeably longer to dry than they used to
- The top of the dryer hot to the touch after a normal cycle
- Lint accumulating around the dryer or on nearby surfaces
- A burning or musty smell during operation
Quick test: Time a standard load from wet to dry. If it takes more than one cycle, check the exterior vent flap while the dryer is running. It should open visibly and you should feel warm air. If the flap barely moves, airflow is restricted. Cleaning alone won't fix the problem if the hose material is plastic, vinyl, or thin foil, or if the run is too long.
5. What to replace it with (and what to avoid)
The right replacement material depends on your setup, but the hierarchy is clear.
| Duct Type | Code-Compliant | Fire Safe | Best Use |
|---|---|---|---|
| Rigid aluminum | Yes | Yes | Full duct run inside wall |
| Rigid galvanized steel | Yes | Yes | Full duct run inside wall |
| Semi-rigid aluminum | Yes (transition only) | Yes | Short connector behind dryer, max 8 ft |
| Foil accordion flex | No | No | Not recommended; prohibited by IRC for concealed runs |
| Flexible vinyl or plastic | No | No | Not permitted; fire and code violation |
What to buy:
- Smooth rigid metal (galvanized steel or aluminum): the best option for any run that goes inside a wall or ceiling; 4" diameter matches most dryer outlets
- Semi-rigid aluminized metal: acceptable for the short transition section directly behind the dryer, where a rigid elbow won't fit; keep it under 8 feet and as straight as possible
- UL-listed all-metal flex connectors: only for the immediate transition, never for the main run
What to avoid:
- Plastic or vinyl hose of any kind
- Thin foil accordion duct for anything other than a very short, visible, accessible transition
- Internal screws to fasten joints (screw tips protrude into the airflow path and snag lint)
- Plastic tape or duct tape to seal joints (use foil tape rated for dryer exhaust)
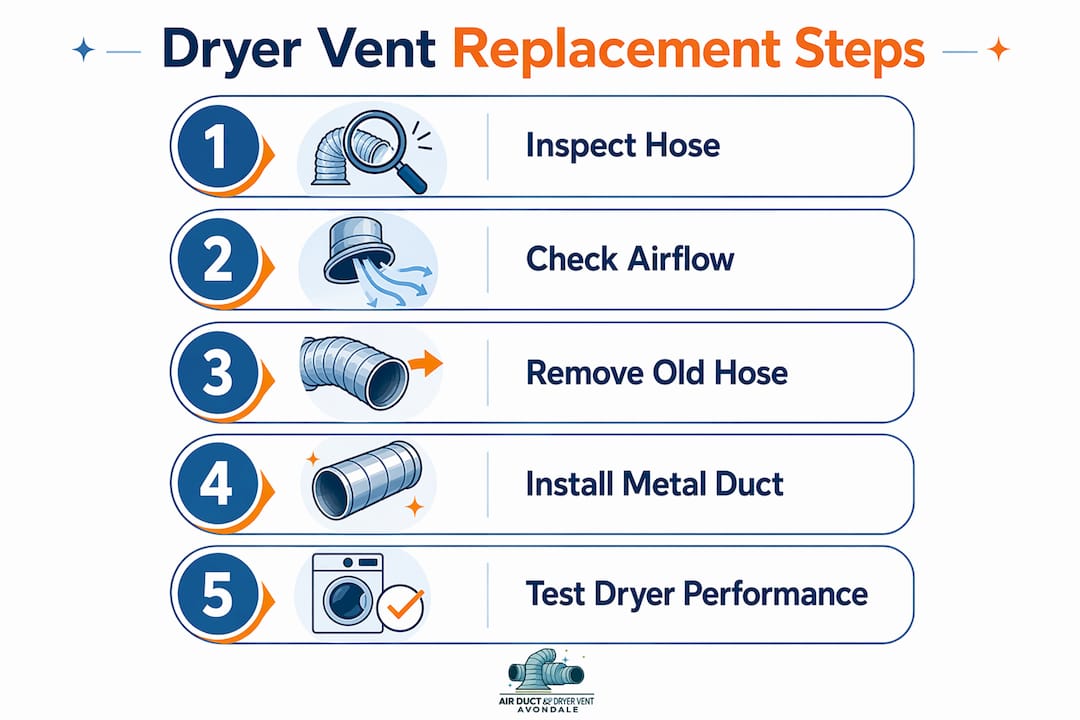
6. How to replace the hose yourself
This is a manageable DIY job when the run is short and fully accessible. Budget two to three hours.
- Unplug the dryer. For a gas dryer, shut off the gas supply valve before touching any connections.
- Detach the old hose from both the dryer exhaust port and the wall duct collar. Note how it's routed.
- Inspect the wall duct. Look inside with a flashlight. If you see heavy lint buildup, clean it before installing new material.
- Measure the route and cut rigid duct sections to fit. Keep the run as short and straight as possible. Every 90-degree elbow reduces effective length by 5 feet, so minimize turns.
- Install rigid sections with the seams pointing in the direction of airflow. Connect sections with foil tape rated for dryer exhaust, not plastic tape or duct tape.
- Secure joints externally with clamps. Never use sheet-metal screws that penetrate into the airflow path.
- Check the exterior cap. The louvered flap should open freely. Replace it if it's stuck, damaged, or missing a screen (screens trap lint and should be removed on dryer vents).
- Plug in and test. Run a short cycle and confirm the exterior flap opens and you feel warm airflow.
Common mistakes:
- Using plastic or vinyl because it was easier to find at the hardware store
- Adding extra elbows to work around obstacles instead of rerouting
- Leaving a concealed flexible section in place and only replacing the visible part
- Sealing joints with regular duct tape, which fails under heat
Pro Tip: Keep the transition section as short as physically possible. If the dryer sits close to the wall and there's no room for a straight connection, a low-profile periscope-style duct or a recessed dryer vent box solves the clearance problem without forcing a kink into the hose.
7. How often should you inspect and clean your dryer vent?
Annual cleaning is the standard recommendation for most households. Family Handyman puts it plainly: clean dryer vents every 12 months, or more often if the dryer runs frequently. Heavy-use homes, large families, or anyone with a long or complex duct run should consider cleaning every six months.
Maintenance schedule:
- Every load: clean the lint trap
- Monthly: check the exterior vent flap for obstructions (bird nests, debris)
- Annually: full duct cleaning, inspect the transition hose for damage, and confirm joints are sealed
| Task | Frequency | Who Does It |
|---|---|---|
| Clean lint trap | Every load | Homeowner |
| Check exterior flap | Monthly | Homeowner |
| Inspect transition hose | Every 6 months | Homeowner |
| Full duct cleaning | Annually (or more for heavy use) | Pro or homeowner |
| Full duct inspection | Annually | Pro recommended |
Professional cleaning typically involves a cost that varies by location and duct complexity. Replacement of a short transition section with semi-rigid aluminum may be included or priced separately for parts and labor. Improving indoor humidity control in your laundry area also reduces moisture buildup in the duct, which slows lint adhesion.
8. DIY or hire a pro?
DIY is reasonable when:
- The transition hose is the only section being replaced
- The entire duct run is visible and accessible
- There are no concealed sections inside walls or ceilings
- You're comfortable with basic hand tools and measuring
- It's an electric dryer
Hire a pro when:
- Any part of the duct runs inside a wall, ceiling, or floor
- The run is long or has multiple elbows
- It's a gas dryer and you're unsure about the connections
- Performance problems persist after you've already replaced the hose
- You want documented code compliance for a home sale or rental inspection
For renters, check with your landlord or property manager before replacing ductwork. Apartment dryer vent safety often involves building-wide duct systems that require a licensed technician. When getting quotes, ask the pro to measure the effective duct length and confirm the materials used, not just the visible transition piece.
9. What local pros in Avondale see on the job
Professionals who inspect dryer vents regularly see the same pattern: an accordion hose that was installed quickly during a move-in and never touched again. After years of use, the hose is partially crushed, coated in lint, and sometimes tucked partially into the wall where it can't be cleaned at all.
What a professional inspection and replacement includes:
- Measuring the full effective duct length, including elbow deductions
- Removing inaccessible or damaged flexible sections
- Installing rigid or semi-rigid metal ducting with properly sealed joints
- Checking and repairing the exterior cap
- Testing airflow before and after to confirm the improvement
Airanddryerventcleaningavondale regularly handles jobs in Avondale where the original accordion hose was the root cause of poor dryer performance. In one recent job, a homeowner had been running multiple cycles per load for over a year. The dryer vent cleaning revealed a thin foil accordion hose that had partially collapsed inside the wall cavity. After replacing it with rigid aluminum and straightening the route, the dryer returned to single-cycle drying.
Key Takeaways
Accordion dryer vent hoses should be replaced with smooth rigid metal ducting because their ridged interiors trap lint, restrict airflow, and pose a real fire risk under both NFPA guidance and IRC code.
| Point | Details |
|---|---|
| Replace accordion hoses | Plastic, vinyl, and thin foil accordion hoses trap lint and are prohibited for concealed runs under IRC. |
| Use smooth rigid metal | Rigid galvanized steel or aluminum is the code-compliant, fire-safe choice for permanent duct runs. |
| Inspect annually | Clean the lint trap every load and schedule a full duct inspection and cleaning once a year. |
| Know your DIY limits | Concealed runs, gas dryers, and long routes require a licensed professional, not a DIY fix. |
| Airanddryerventcleaningavondale | Provides professional dryer vent inspection, cleaning, and rigid-duct replacement for Avondale homeowners. |
The accordion hose problem is more common than most people realize
Most homeowners never look at the hose behind their dryer. It was there when they moved in, the dryer works (mostly), and out of sight means out of mind. That's exactly how a minor installation shortcut turns into a years-long fire risk.
What I find worth saying plainly: the accordion hose isn't a gray area. It's a known problem with a known fix. The NFPA and the IRC don't hedge on this. Smooth metal ducting is the standard, and flexible plastic or foil is the exception that should have been corrected at installation. The fact that hardware stores still sell foil accordion hoses doesn't mean they're safe for permanent use. It means they're cheap and easy to stock.
The efficiency argument often lands harder than the safety argument for homeowners who haven't had a scare. Running two or three cycles to dry one load isn't just annoying. It's a measurable cost, and it's entirely preventable. A $40 semi-rigid aluminum transition piece and an hour of work often solves it completely for a simple setup.
Where I'd push back on the conventional DIY framing: the transition hose is the easy part. The harder question is what's happening inside the wall. Many homes have a short visible section of semi-rigid aluminum and then a long concealed run of old foil or plastic that no one has touched in a decade. Replacing only what you can see and calling it done misses the actual risk. If you don't know what's inside your wall, a professional inspection is worth the cost.
Dryer vent replacement and cleaning in Avondale, AZ
If your dryer is running long cycles, the hose looks questionable, or you simply don't know what's inside the wall, Airanddryerventcleaningavondale offers a faster path to a straight answer than a DIY inspection.
The service covers the full scope: inspection of the transition hose and full duct run, professional cleaning, rigid or semi-rigid metal replacement where needed, joint sealing with foil tape, and exterior cap check and repair. Appointments are flexible, including after-hours scheduling, and the work comes with a service warranty. Most residential jobs are completed in a single visit.
For Avondale homeowners who want the job done right without guessing at what's inside the wall, book a dryer vent inspection with Airanddryerventcleaningavondale. If you also need air vent replacement or duct repairs beyond the dryer, the team handles those in the same visit.
Useful sources
- NFPA Dryer Safety Tips (DryerSafety.org): Primary source for dryer fire statistics and the case for annual duct cleaning and proper venting materials.
- IRC Dryer Exhaust Duct Material Commentary (JASpector): Code-level explanation of why flexible plastic and foil ducts are prohibited for concealed dryer exhaust runs.
- Clothes Dryer Vent Installation (InspectAPedia): Detailed installation guidance covering material selection, joint sealing, and why accordion hoses are temporary transition pieces only.
- Dryer Vent Installation Requirements (BestDryNDryers): Practical overview of code compliance, material specifications, and manufacturer requirements for permanent dryer duct runs.
- Is It Time to Replace a Dryer Vent? (HomeSafe Vent Cleaning): Service-provider perspective on when cleaning is enough and when replacement is the right call, including a real case example.
- How to Clean a Dryer Vent (Family Handyman): Step-by-step homeowner cleaning guide with frequency recommendations and component replacement advice.
- Dryer Vent Installation Guide (Pro Install Guy): Installer-focused guidance on effective length calculations, elbow deductions, and routing best practices.
FAQ
Should you replace a dryer vent hose?
Yes, especially if it's plastic, vinyl, or accordion-style foil. These materials trap lint, restrict airflow, and are prohibited for concealed runs under IRC code. Replace with smooth rigid or semi-rigid metal ducting.
Can I run my dryer without the vent hose attached?
No. Running a dryer without a connected vent hose pushes hot, moist, lint-laden air directly into your living space, which raises fire risk, promotes mold growth, and can damage walls and flooring.
Does it matter what dryer vent hose I use?
It matters significantly. Rigid smooth-walled metal (galvanized steel or aluminum) is the code-compliant, fire-safe choice. Plastic, vinyl, and thin foil accordion hoses trap lint and are either prohibited or strongly discouraged by the IRC and NFPA.
Is vinyl or aluminum dryer vent hose better?
Aluminum is far safer. Vinyl hoses are flammable, become brittle over time, and are not permitted under current building codes. Even a corrugated aluminum hose is only acceptable as a short transition piece; smooth rigid aluminum is the preferred permanent solution.
How often should a dryer vent be professionally cleaned?
Annual professional cleaning is the standard recommendation for most households. Homes with heavy dryer use or long, complex duct runs should consider cleaning every six months.