
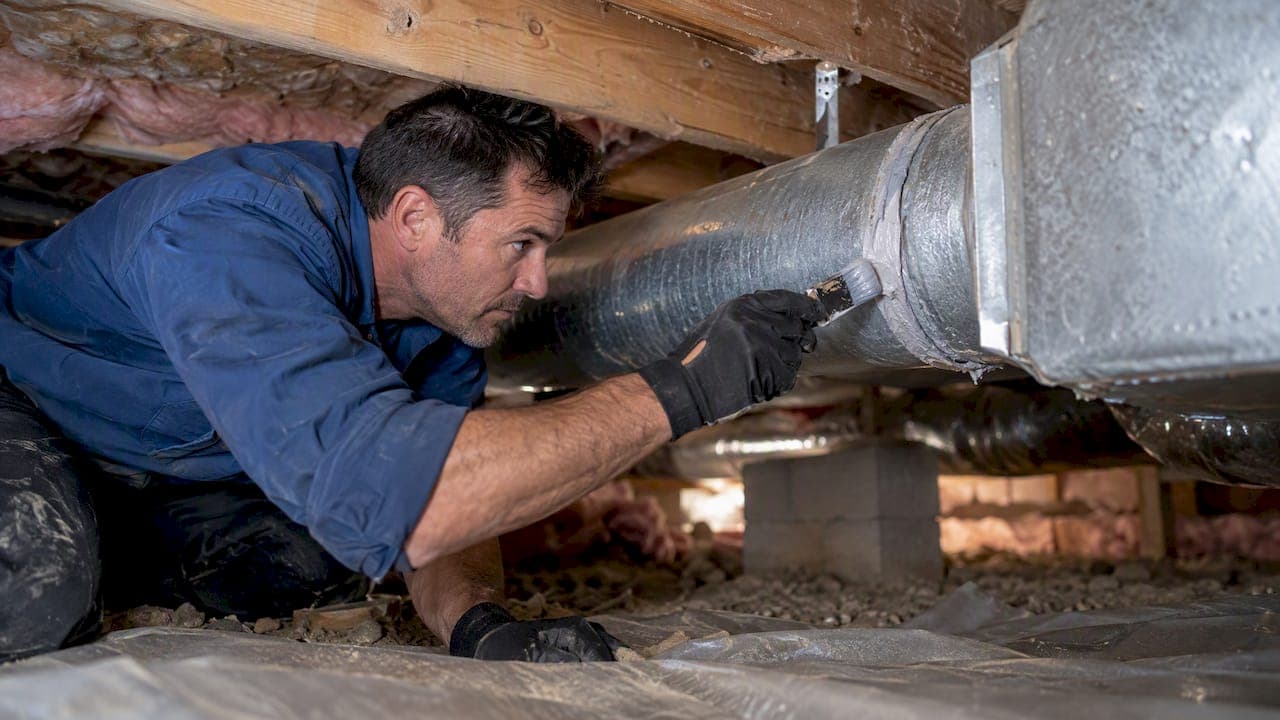
The repair methods that work are hand-applied UL-181 mastic with mesh for small gaps, foil-faced UL-181 tape for reinforcing joints, mechanical sheet-metal patches for large holes, and aerosol-injected sealant for leaks you cannot reach by hand. As a rule of thumb, tackle visible gaps under an inch yourself with the right materials, but call a professional for pressure testing, aerosol sealing, or anything near a gas appliance.
TL;DR:
- Use fiber mesh and UL 181 mastic for gaps under a quarter inch; medium gaps need foil faced tape, mesh, and a mastic finish.
- Patch openings larger than three quarters of an inch with screwed sheet metal, then seal the patch seams with mesh and mastic.
- Aerosol sealant reaches inaccessible leaks smaller than a quarter inch, but it cannot reconnect separated ducts or repair large openings and requires a technician.
- Leaking ducts can lose 20% to 40% of conditioned air; after sealing, insulate exposed runs to an R value of about six in unconditioned spaces.
- Test combustion safety after sealing whenever gas or oil appliances share the space, and stop for suspected asbestos, heavy rust, or structural corrosion.
Table of Contents
- At-a-glance duct repair methods and when to use them
- How to find and confirm duct leaks before you repair them
- Materials and repair steps for small, medium, and large gaps
- Step-by-step sealing workflow for an accessible duct run
- Aerosol-injected sealant: how it works and when it earns its cost
- Safety checks and verification tests after sealing
- What years of duct work have taught us about DIY limits
- How our team handles duct repair and sealing in Avondale
- FAQ
- Sources
At-a-glance duct repair methods and when to use them
Matching the method to the defect saves time and keeps the repair from failing early. Here is how the main techniques line up against common scenarios:
- Mastic and mesh: best for seams, small gaps, and joints under a quarter inch wide.
- Foil-faced UL-181 tape: ideal for reinforcing flex-to-metal connections alongside a mastic coat.
- Mechanical sheet-metal patches: needed for holes larger than three-quarters of an inch or torn sections.
- Aerosol-injected sealant: suited to leaks buried in walls, ceilings, or crawl spaces that hand tools cannot reach.
Whichever method you use, insulate any exposed ductwork in an attic, crawl space, or garage afterward. Energy Star recommends insulating unconditioned-space ducts to around R-6 once seams are sealed, since a sealed but bare duct still loses heat through the metal itself.
How to find and confirm duct leaks before you repair them
Before buying materials, confirm where air is actually escaping. A few checks will tell you most of what you need to know:
- Look for visual clues like peeling tape, dark dust streaks near seams, disconnected takeoffs, or kinked flex duct that restricts airflow.
- Run a register-by-register feel test, holding your hand near each supply and return while the system runs to spot weak or uneven airflow.
- Use a smoke pencil or theatrical fog inside a pressurized duct run to make small leaks visible at joints and seams, a method described in This Old House's duct repair guide.
- Rent a duct blaster for a rough reading, or hire a professional for a full CFM leakage test if you want precise numbers.
Return-side leaks deserve extra attention because they pull in dusty attic or crawl space air directly into your air handler, which can affect indoor air quality even when the supply side seems fine. For a deeper walkthrough of detection steps, our homeowner's guide to detecting duct leaks covers the process in more detail.
Materials and repair steps for small, medium, and large gaps
The right material depends almost entirely on the size of the gap, not personal preference. Building America's Solution Center outlines three tiers worth following:
- Small gaps under a quarter inch: clean the surface, add a fiber-mesh backer if the gap is irregular, then brush on UL-181 fiber-reinforced mastic to at least nickel thickness.
- Medium gaps between a quarter and three-quarters of an inch: lay mesh across the opening, cover with foil-faced UL-181 tape, then finish with a mastic coat; secure loose flex duct connections with tie bands and a tensioning tool.
- Large gaps over three-quarters of an inch: cut a sheet-metal patch sized to overlap the damage, fasten it with self-drilling screws, then seal the new seams with mesh and mastic so the patch does not rely on adhesive alone.
Skip cloth-backed duct tape entirely. It dries out and peels within months, and neither Energy Star nor Building America guidance lists it as an acceptable permanent seal. Stick to UL-181-rated materials and manufacturer instructions for your specific duct type.
Pro Tip: Keep a damp rag nearby while brushing on mastic. It wipes clean edges before the material sets, which keeps the finished seam neater and easier to inspect later.

Step-by-step sealing workflow for an accessible duct run
Working through a duct run in order prevents missed spots and keeps the repair durable. The sequence that holds up best:
- Shut off the HVAC system and remove the registers or access panels you need to reach the run.
- Clean the metal and strip failed tape, then reconnect any loose takeoffs or collars before sealing anything else.
- Patch large holes first, fastening mechanically so the repair does not sag once mastic is applied over it.
- Seal all seams with mastic, reinforce flex connections with foil tape, and give the mastic time to cure fully before running the system.
- Verify the repair with a smoke pencil or a simple airflow check at the registers, then insulate any exposed sections and reinstall the covers.
The payoff is real: leaking duct systems typically lose 20% to 40% of conditioned air before repair, which forces the system to work up to 50% harder and can cut overall heating and cooling efficiency by as much as 20%. Sealing even one accessible run can noticeably ease that load.
Aerosol-injected sealant: how it works and when it earns its cost
For leaks buried inside walls, chases, or finished ceilings, aerosol-injected sealant reaches what hand tools cannot. The system pressurizes the ductwork and injects a fine aerosol that accumulates at leak sites, closing gaps typically under a quarter inch, according to Lawrence Berkeley National Laboratory's research on aerosol duct sealing.
- Works best on small, scattered leaks across a duct system rather than one large opening.
- Does not reconnect major gaps or replace a disconnected duct section, so larger damage still needs manual sealing first.
- Pairs with manual repair, since professionals typically patch big leaks by hand before running the aerosol process to catch what is left.
- Worth considering when ducts run through finished walls or ceilings where cutting access points would cause unnecessary damage.
Because the equipment pressurizes the entire system and monitors sealing in real time, this method is performed by trained technicians rather than as a weekend project.
Safety checks and verification tests after sealing
Sealing a duct system changes its pressure balance, and that shift can matter more than it sounds. Tightening up leaks without checking the rest of the system can occasionally contribute to backdrafting, where combustion gases get pulled back into the living space instead of venting outside.
- Test combustion safety whenever gas or oil appliances share space with the ductwork you are sealing.
- Verify results with a duct blaster or pressure-pan check, the same tools professionals use to confirm leakage dropped after repair.
- Rebalance airflow at the registers once sealing is complete, since a previously leaky run may now deliver noticeably more air.
- Stop and call a licensed contractor if you find suspected asbestos insulation, heavy rust, or structural corrosion. These are not DIY-safe repairs.
Pro Tip: If your home has a gas furnace or water heater near the ductwork, schedule a combustion-safety test right after sealing, not months later, so any pressure imbalance gets caught early.
What years of duct work have taught us about DIY limits
Most homeowners can handle small and medium seam repairs with the right mastic and tape. Where things go wrong is scope: people seal half a system, skip the return side, or use the wrong tape, and the leak reappears within a season. Diagnostic testing, aerosol sealing, and major mechanical repairs are where a qualified technician earns their keep, because the equipment and the pressure math behind it are not guesswork.
— Shaun
How our team handles duct repair and sealing in Avondale
We bring the same approach outlined above to every job: inspecting duct runs for leaks, sealing accessible seams with proper materials, patching or replacing damaged sections, and checking that insulation and airflow are right once the work is done.
- Diagnose leaks and recommend the right fix, from mastic touch-ups to full section replacement.
- Handle mechanical patching and reconnections that need more than tape and sealant.
- Check insulation levels on exposed ductwork in attics, garages, and crawl spaces.
| Service | What it covers |
|---|---|
| Air Duct Cleaning | Inspection and cleaning before sealing or repair work |
| Air Duct Replacement | Repair or replacement of damaged and heavily leaking sections |
| Services overview | Ductwork repairs, installation, and related HVAC work |
Pro Tip: If you are not sure whether a leak needs mastic or a full section replacement, an inspection settles it faster than guessing with tape and a flashlight.
If your ducts are losing air and you would rather have a technician confirm the fix than redo it twice, reach out for an inspection and we will walk you through what the job actually needs.
FAQ
What could be causing a water leak from my air duct?
Water near ductwork is usually condensation from a poorly insulated duct in a humid space, or a nearby AC drain line that has backed up. It is rarely the duct material itself failing, so check the insulation wrap and the condensate line before assuming the ductwork is at fault.
Can I repair ductwork myself?
You can handle small and medium seam repairs yourself using UL-181 mastic, mesh, and foil tape, as outlined by Building America's guidance. Larger structural damage, aerosol sealing, and anything near gas appliances are better left to a professional with pressure-testing equipment.
How do I install HVAC ductwork in a crawl space?
Crawl space duct installation involves supporting the ductwork off the ground, sealing every joint with mastic, and wrapping exposed sections with insulation rated for unconditioned spaces. Given the tight access and moisture concerns common in crawl spaces, many homeowners have a licensed technician handle the installation.
Can a leaking HVAC system be fixed?
Yes, most duct leaks can be sealed using mastic, UL-181 tape, mechanical patches, or aerosol-injected sealant depending on the size and location of the gap. Leaking ducts can lose 20% to 40% of conditioned air, so sealing them typically restores a noticeable amount of lost efficiency.
When does a small gap in weatherization work need professional attention beyond duct sealing?
If sealing ducts does not resolve drafts or energy loss, the issue may extend to other air leaks around doors and windows rather than the ductwork itself. Pairing duct sealing with broader air-sealing steps, like the low-dust door replacement process that avoids tearing into walls, can close gaps a duct repair alone will not fix.
Sources
- FCS3263/FY1024: Energy Efficient Homes: The Duct System
- Air Seal and Repair Ducts | Building America Solution Center
- Aerosol injection (LBL) — injected sealant overview
- Duct sealing | ENERGY STAR