
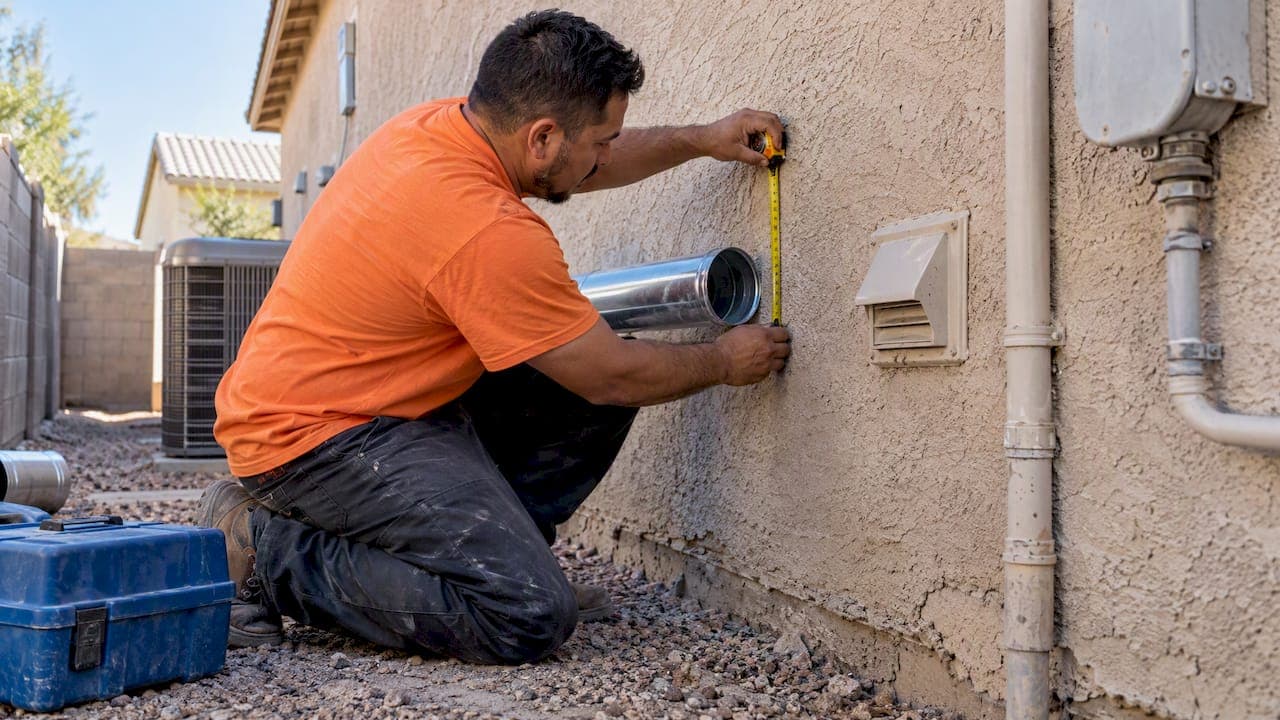
The single most important rule when relocating a dryer vent is this: use rigid or semi-rigid metal duct, keep the run as short and straight as possible, and terminate outside through a backdraft damper, never plastic, foil, or a screen. Codes typically cap total equivalent length around 35 feet, and cost depends heavily on run length and access. When you are unsure about the path, drill a pilot hole before cutting and get a written quote.
TL;DR:
- Using rigid or semi-rigid metal duct and keeping the run under 35 feet with minimal elbows ensure optimal airflow and reduce fire risk.
- Measure the entire route accurately, including elbows and transition ducts, and ensure the exterior termination is at least 3 feet from openings, with a proper damper.
- Avoid flexible foil, plastic, or screen caps; support long ducts every 12 feet and confirm all joints are secured with clamps or UL-approved tape.
- Insulate and slope ducts passing through unconditioned spaces to prevent condensation and mold formation.
- Hire a professional if the route involves roof penetrations, extended length, or if local codes and permits require expert installation verification.
Table of Contents
- Pre-Project Checklist: Measurements, Obstacles, Permits, and Materials
- Acceptable Materials and Code Basics Homeowners Must Follow
- How to Plan the Route: Equivalent Length, Elbows, and Booster Fans
- Preventing Condensation and Mold in Attics, Basements, and Crawl Spaces
- Where and How to Terminate the Duct Outside
- Reroute Pricing Bands, Line-Item Estimates, and Permit Triggers
- Deciding Whether to DIY or Hire a Pro
- High-Level Step-by-Step Sequence to Relocate a Dryer Vent
- Field-Proven Inspection and Cleaning Priorities
- Common Mistakes and Practical Priorities
- How We Can Help With Inspection, Relocation, and Cleaning
- FAQ
- Sources
Pre-Project Checklist: Measurements, Obstacles, Permits, and Materials
Before anyone cuts into a wall, a few measurements and decisions will save money and rework later. Start by mapping the full route from the dryer to the planned exterior point, then count every elbow along that path since each one adds resistance equivalent to several feet of straight duct.
- Measure the planned total run and count elbows to estimate equivalent length.
- Locate a compliant exterior termination point, keeping it at least 3 feet from windows, doors, or other openings and away from HVAC intakes, per Building America guidance.
- Confirm your duct material will be rigid or smooth semi-rigid metal, and check that any transition piece is UL 2158A listed.
- Drill a small pilot hole to check for wiring, plumbing, or fire blocking before committing to a full opening.
- Decide whether you will handle the work yourself or hire out, and collect at least three quotes if hiring.
Permits vary by jurisdiction, but any project that involves new wall or roof penetrations commonly triggers an inspection requirement. Confirm this with your local building department before scheduling work, since skipping a required permit can complicate a future home sale or insurance claim.
Pro Tip: Photograph the existing vent path and any obstacles you find before closing up walls, so future repairs or inspections do not start from scratch.

Acceptable Materials and Code Basics Homeowners Must Follow
Dryer venting codes exist because lint is flammable and airflow resistance directly affects how hard a dryer has to work. Industry guidance calls for rigid or smooth-walled semi-rigid metal duct for the entire run, never vinyl, foil, or plastic accordion hose, which trap lint and pose a fire hazard.
- Use rigid or semi-rigid smooth metal duct for the full run; avoid foil, plastic, or vinyl flexible hose.
- Keep any transition duct (the short flexible piece connecting the dryer to the wall) to a maximum of 8 feet and confirm it carries a UL 2158A listing.
- Stay within the maximum equivalent length your manufacturer specifies or the commonly cited 35-foot limit, adjusting for every elbow in the run.
- Fasten joints with clamps or UL-approved foil tape, never screws that protrude into the duct interior, since protruding screws snag lint and start blockages.
A transition duct limited to 8 feet and listed to UL 2158A is the baseline professionals use when connecting a dryer to a wall or floor outlet. That limit exists because flexible sections are the most common place lint accumulates and ignites.
Local code excerpts, including those referencing the International Residential Code, spell out termination and length rules in more detail, and our guide to the 4-inch duct rule covers the sizing side of these requirements.

How to Plan the Route: Equivalent Length, Elbows, and Booster Fans
Equivalent length is the number that actually matters for dryer performance, not just the physical distance the duct travels. Every elbow adds resistance as if the duct were several feet longer than it is, so a short run with four tight bends can perform worse than a long straight one.
- Measure the straight-line footage of your planned route from dryer to exterior termination.
- Add the equivalent length value for each elbow: roughly 2.5 feet for a 45-degree bend and 5 feet for a 90-degree bend, figures commonly used by manufacturers and installers.
- Add your transition duct length, remembering it can contribute 3 to 8 feet of equivalent length on its own, a detail often overlooked after relocation.
- Compare the total against your manufacturer's limit or the 35-foot code guideline.
- If the total exceeds that limit, consider rerouting to a shorter wall or adding an inline booster fan rated for dryer exhaust.
A booster fan becomes worth considering once your equivalent length approaches or exceeds that 35-foot range, since beyond that point airflow drops enough to extend drying times and raise fire risk. Our booster fan guide walks through when that hardware makes sense versus rerouting instead. On any run longer than a short attic hop, build in an access panel or inspection port so future cleaning does not require tearing into finished walls.
Preventing Condensation and Mold in Attics, Basements, and Crawl Spaces
Routing a dryer duct through an unconditioned attic or crawl space introduces a moisture problem many homeowners do not anticipate. A typical dryer load releases a substantial amount of water vapor, and if warm, moist exhaust air hits cold duct walls in an unheated space, that moisture condenses inside the duct and soaks into lint, creating ideal conditions for mold growth.
- Insulate duct sections that pass through unconditioned attics, basements, or crawl spaces to limit interior condensation.
- Slope the duct slightly downward toward the exterior, roughly a quarter inch per foot where the route allows, so any condensate drains out rather than pooling.
- If a vertical rise is unavoidable, schedule more frequent inspections and cleanings for that section since moisture and lint settle at low points.
- Choose insulation wraps and supports that do not pinch or flatten the duct's cross section, since compression reduces airflow just like an extra elbow would.
Our cleaning frequency guide outlines how often to inspect runs that pass through these higher-risk spaces.
Where and How to Terminate the Duct Outside
The exterior termination point is where many relocations go wrong. Codes and manufacturer guidance consistently call for a louvered or gravity-operated backdraft damper rather than a screen, because screens trap lint and clog within a few dryer cycles, eventually restricting airflow enough to extend drying times and raise interior heat buildup.
- Place the termination at least 3 feet from windows, doors, or other building openings, and keep it well away from HVAC intake vents.
- Use a louvered or gravity-operated backdraft damper instead of a screen, which lets exhaust escape freely while keeping pests out.
- Seal and flash the wall or roof penetration properly, orient the hood to discharge downward, and mount it high enough above grade to avoid snow or debris blockage.
- Favor a wall termination over a roof termination when the layout allows it, since roof penetrations carry a higher risk of leaks, condensate drip-back, and winter snow blockage.
Pro Tip: Never vent a dryer into an attic, crawl space, or garage interior. It is not just inefficient. It pushes moisture and lint into an enclosed space with no path out, which is a recognized cause of hidden mold damage.
Reroute Pricing Bands, Line-Item Estimates, and Permit Triggers
Cost for a dryer vent relocation swings widely depending on how far the duct has to travel and how much access the installer has to walls, attics, or the roof. Industry pricing guides place a typical reroute at around $300 on the low end, $650 on average, and up to $1,400 for more involved jobs requiring multiple penetrations.
- Run length is the biggest cost driver: a simple attic reroute close to the existing path costs far less than a full relocation to a new exterior wall.
- Access matters almost as much as distance; cutting through finished drywall, brick, or a roof adds labor hours that a straightforward attic or basement run avoids.
- Material choice shifts cost too, since stainless steel duct runs 20 to 40 percent more than standard aluminum but holds up better in corrosive or high-heat settings.
- To control cost, choose the shortest practical route and bundle the relocation with other duct or vent work happening at the same time.
When comparing quotes, ask each contractor for an itemized breakdown covering labor hours, exact materials, warranty terms, and cleanup, not just a flat number. Our replacement cost breakdown covers budgeting for related duct work in more detail.
Deciding Whether to DIY or Hire a Pro
A short, straight run with easy exterior wall access is reasonable for a confident DIYer to tackle. Once the project involves a roof penetration, a long vertical rise, or any uncertainty about local code compliance, bringing in a licensed professional protects you from both fire risk and a failed inspection.
- Hire a pro when the equivalent length is long, the route requires cutting roof or structural framing, or the duct runs near a gas appliance.
- Hire a pro when you are unsure whether your plan meets local permit or code requirements.
- Vet any contractor by asking specifically about dryer vent installation experience, not just general HVAC work.
- Request proof of insurance, at least one reference, a written estimate, and a stated warranty before signing anything.
A professional installer also carries liability if something goes wrong, which matters since a code violation on a dryer vent is a documented fire and carbon monoxide risk, not a cosmetic issue.
High-Level Step-by-Step Sequence to Relocate a Dryer Vent
Once you have chosen a route and confirmed materials, the actual relocation follows a predictable sequence from measurement to first test run.
- Measure and map the full proposed route, noting every elbow and the equivalent length total.
- Drill a pilot hole at the planned exterior point to check for hidden wiring, plumbing, or framing before cutting a full opening.
- Install rigid or semi-rigid metal duct, supporting it roughly every 12 feet, maintaining a slight downward slope, and sealing every joint with clamps or UL-approved tape.
- Fit the exterior termination with a backdraft damper, run a full dryer cycle to confirm airflow and drying time feel normal, and schedule a first professional cleaning within the following year.
Field-Proven Inspection and Cleaning Priorities
We provide dryer vent cleaning, vent replacement, and installation services, and that focus shapes what we check on every relocation inspection. We back our work with warranties and offer flexible scheduling, including after-hours appointments, for homeowners and business owners alike.
- Transition duct length and listing, confirming it stays within the 8-foot limit and carries proper certification.
- Total equivalent length, documented in writing rather than estimated by eye.
- Fasteners used at every joint, checking specifically for screws that protrude into the airflow path.
- Termination clearance from windows, doors, and HVAC intakes.
- A test drying cycle to confirm airflow and cycle time match expectations after any relocation work.
Common Mistakes and Practical Priorities
After seeing enough relocated vents, the pattern is consistent: the installs that fail are the ones where someone skipped the shortest route, used flexible foil instead of rigid metal, or capped the termination with a screen instead of a proper damper. Those three choices account for most of the airflow and fire-risk problems homeowners call about later.
Undercounting equivalent length is the next most frequent mistake, usually because nobody added the transition duct or the extra elbow into the total. Insist that whoever does the work hands you a written record of the equivalent length and the exact materials used. That document protects you if drying performance drops later or a future inspector asks questions.
— Shaun
How We Can Help With Inspection, Relocation, and Cleaning
If a relocation is already planned or you suspect an existing vent run no longer meets code, we handle dryer vent cleaning, inspection, relocation support, and duct replacement for homes and businesses.
A typical visit includes an on-site assessment of your current vent path, an equivalent-length check against code limits, a written estimate before any work starts, and professional installation with full cleanup afterward. We back our work with warranties and offer scheduling that fits your availability, including after-hours slots.
- On-site inspection covering transition duct, fasteners, and termination type.
- Equivalent-length calculation so you know exactly where your run stands against code.
- Written estimate with itemized materials and labor before any cutting begins.
If you want a professional set of eyes on a relocation before or after the work happens, schedule a dryer vent cleaning and inspection and we will walk the route with you.
FAQ
Where should my dryer vent terminate on the outside of the house?
Terminate the duct through an exterior wall whenever possible, at least 3 feet from any window, door, or other building opening, and away from HVAC intake vents, per Building America guidance. Use a louvered or gravity-operated backdraft damper rather than a screen, since screens trap lint and clog quickly.
How much does it cost to relocate a dryer vent?
A typical reroute runs around $300 on the low end, roughly $650 on average, and up to $1,400 for more complex jobs. Run length and access, such as whether the installer needs to cut through finished walls or a roof, drive most of that variation.
Can a dryer vent duct run through a stud wall?
A dryer duct can pass through a framed wall cavity as long as it uses rigid or smooth semi-rigid metal duct sized to fit the cavity without crushing, not flexible foil or plastic. The duct still needs to meet equivalent length limits and terminate properly outside, so confirm the planned run fits those requirements before cutting into the wall.
What holds a dryer vent duct in place?
Rigid and semi-rigid metal duct sections are joined with clamps or UL-approved foil tape, never screws that poke into the interior, since protruding screws catch lint and start blockages. Longer horizontal runs typically need support roughly every 12 feet to keep the duct from sagging or separating at the joints.
Sources
- Dryer vent installation pro guide | Ferguson
- Proper clothes dryer venting | Building America Solution Center (PNNL)
- Rerouting a Dryer Vent Cost and Pricing Guide 2026 | CurrentCost
- Clothes dryer vent installation | InspectApedia